1965-1968 Ford Heater Control Vavle and System with Factory Air Conditioning
2023, November 14
Hello all,
Seemed like a good time of the year to share what I did to overhaul the heater portion of the Ford HVAC system. Maybe it can help someone else out with little or no heat.
So no doubt, those with factory air con systems have come across a problem with the HVAC system as a whole, either little to no heat or no air con.
The system on these is a little odd in that it was overly complicated for what it did and still doesn't allow for dehumidified warm air to the windscreen (defrost).
These systems unlike the heat only option do not have a mechanical blend door, instead the temperature of the heater core and evaporator itself is modulated to your hot-cold setting.
To start, you have to have a good source of vacuum. The engine needs to at least have 15" of vacuum to fully open the heater coolant valve. Stock engines should have no problem with this.
Given the small diameter of the hoses it only takes a small leak and the whole system can be affected.
I found vacuum leaks on my reservoir can itself, especially at the top.
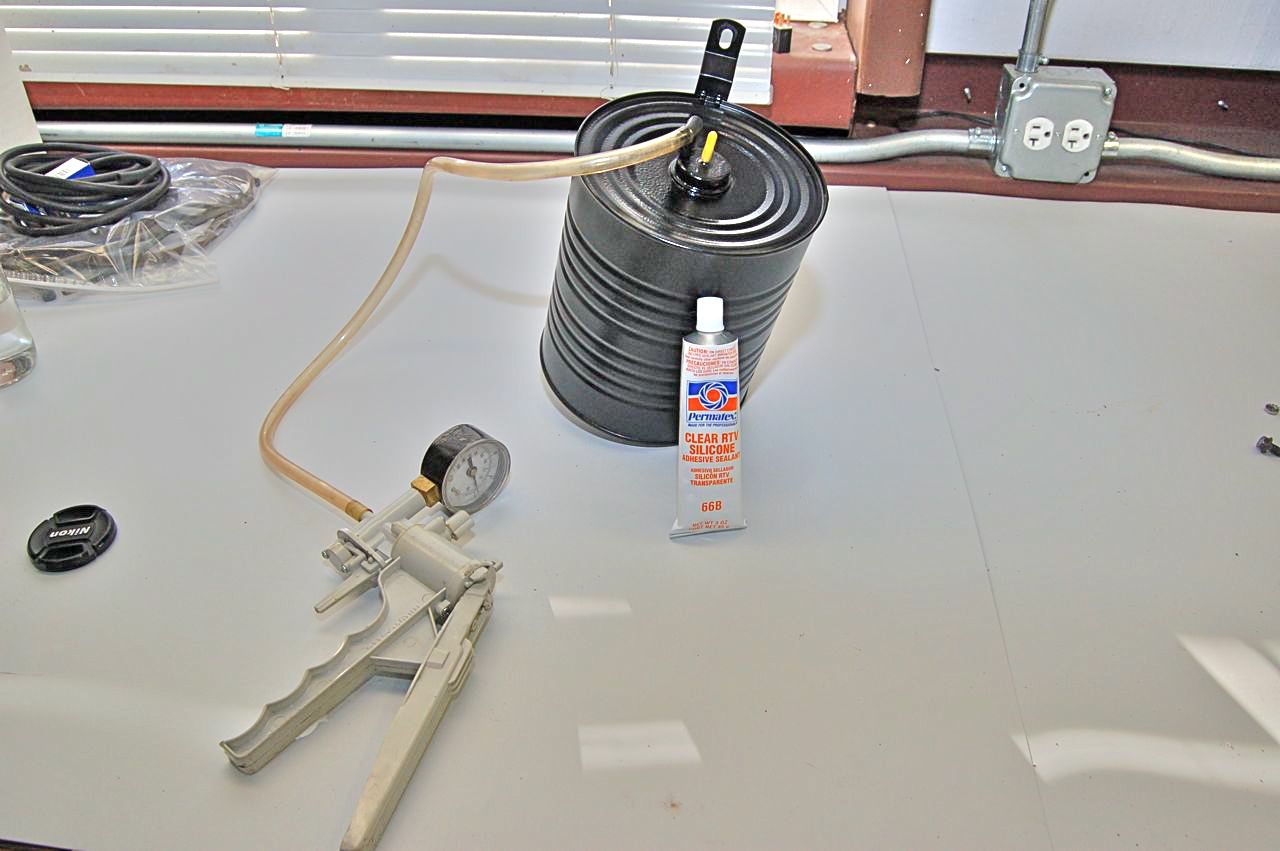
The best way I found was to thoroughly clean it (carb spray works just fine too) to wash grease and muck off it. Then using a small vacuum hand pump apply a small vacuum and allow the leak to gently pull in the sealant (RTV) but no to hard to where the leak reappears.
The next thing to check for is a check valve in the supply. Some say it's in the top part of the vacuum reservoir while some literature shows a separate valve inline to the reservoir. I probed around on this one and there was no evidence of anything in the top port, no spring or disc. Either it was never there or it disintegrated.

If your tank doesn't have a check valve in it or it doesn't seal well. I found this one at Napa.
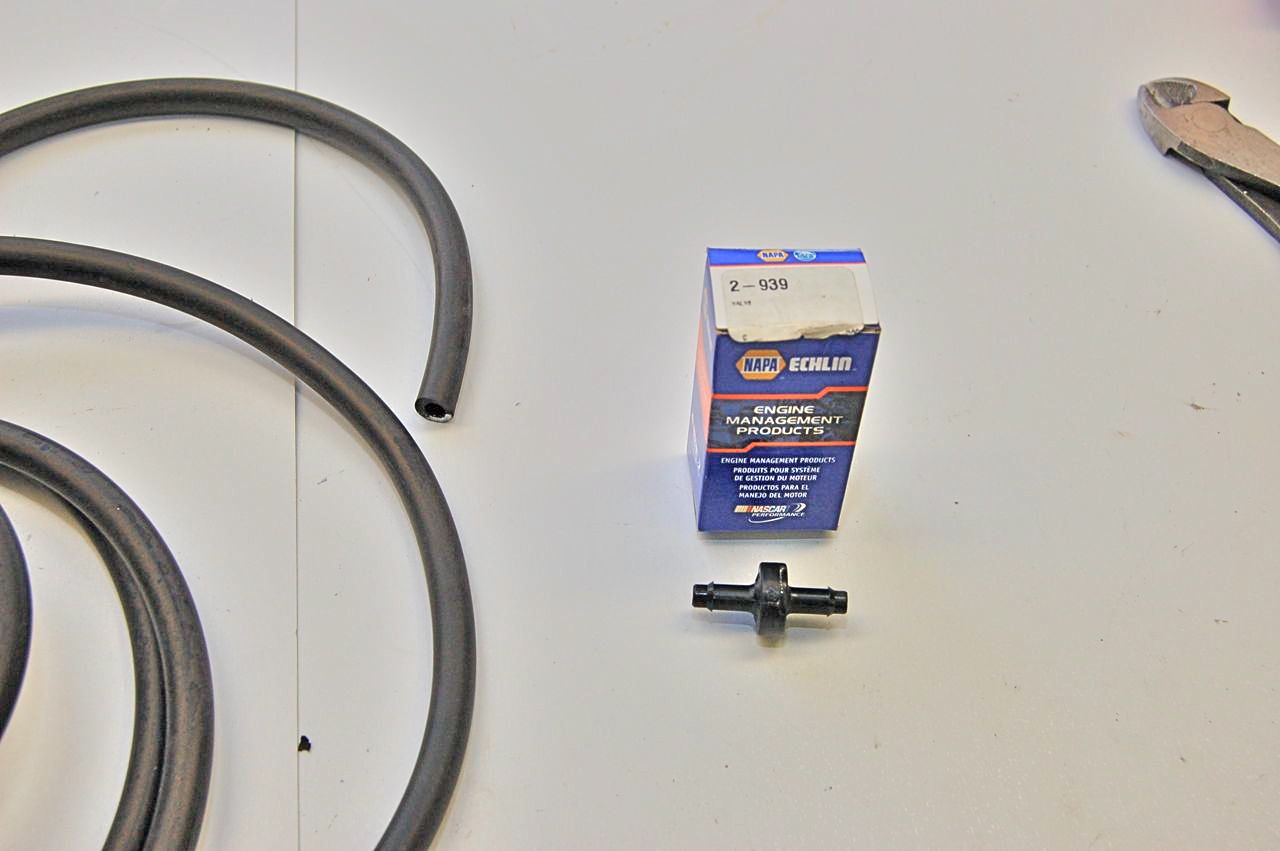
Once that the vacuum reservoir and supply are checked out and working properly, next to check the remainder of the system.
Old hoses turn hard and leak and if yours are questionable I'd replace them. I know there's a lot under the dash and in the engine bay.
The next place to check is the heater coolant/control valve itself. Usually the ancient seal will start to leak or it will corrode to the point it will no longer move, or the diaphragm will rupture/tear/crack/leak.
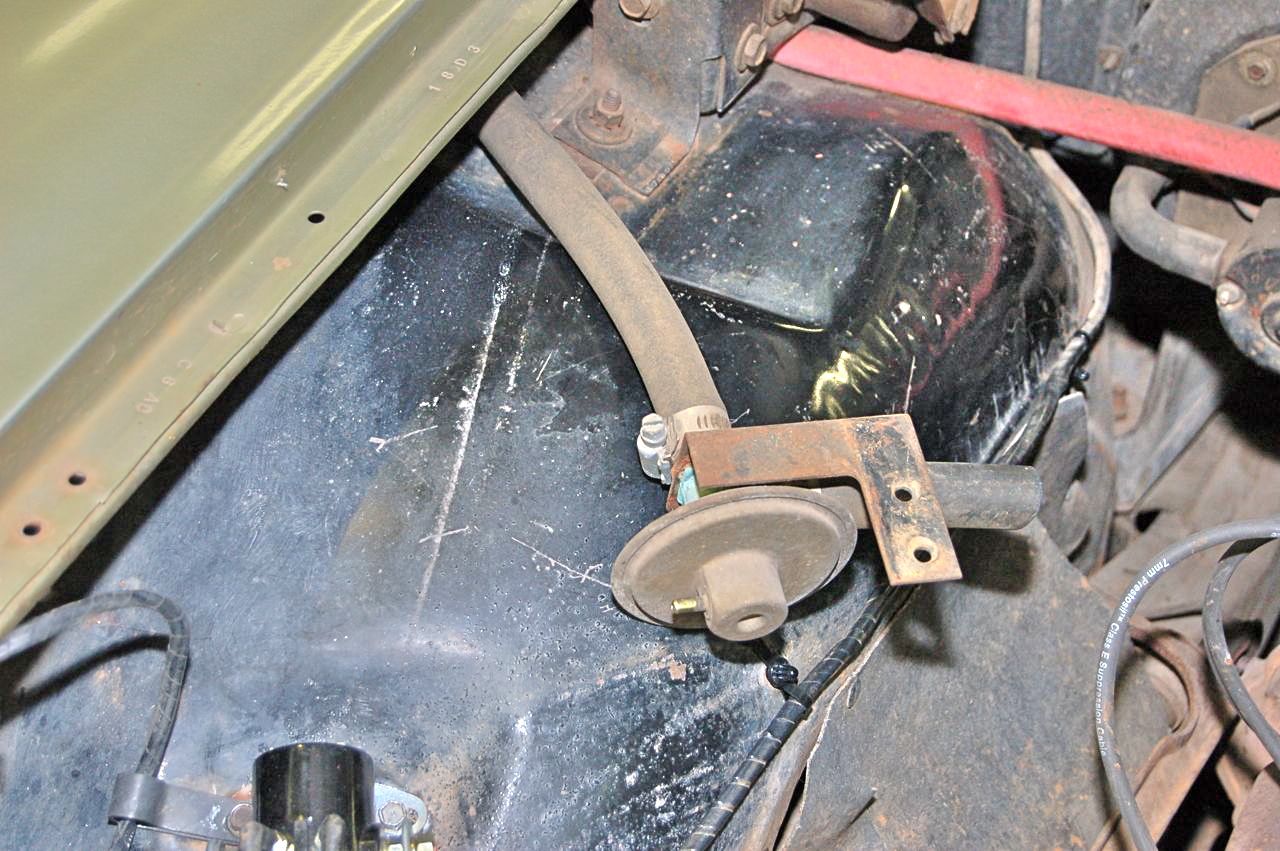
This one wouldn't budge. Problem is these are not reproduced exactly to fit. There are generic ones that will work.
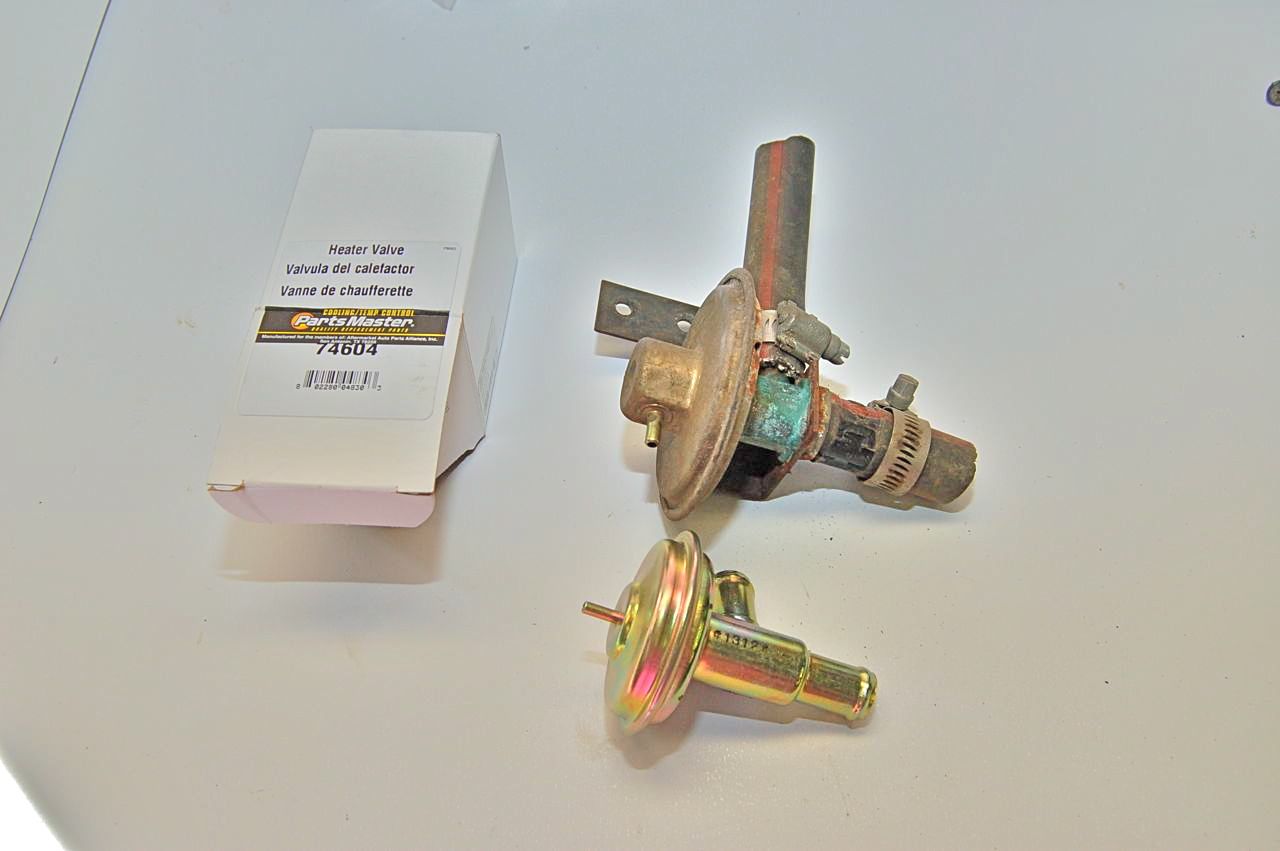
But the original mounting bracket take a little modification to hold the new part. I need to mention there are two flavors of heater valves. One that is normally open and one that is normally closed. Our gals need the one that's normally closed, which is the uncommon one.
Here's the modification I did to the bracket to hold the newer valve.

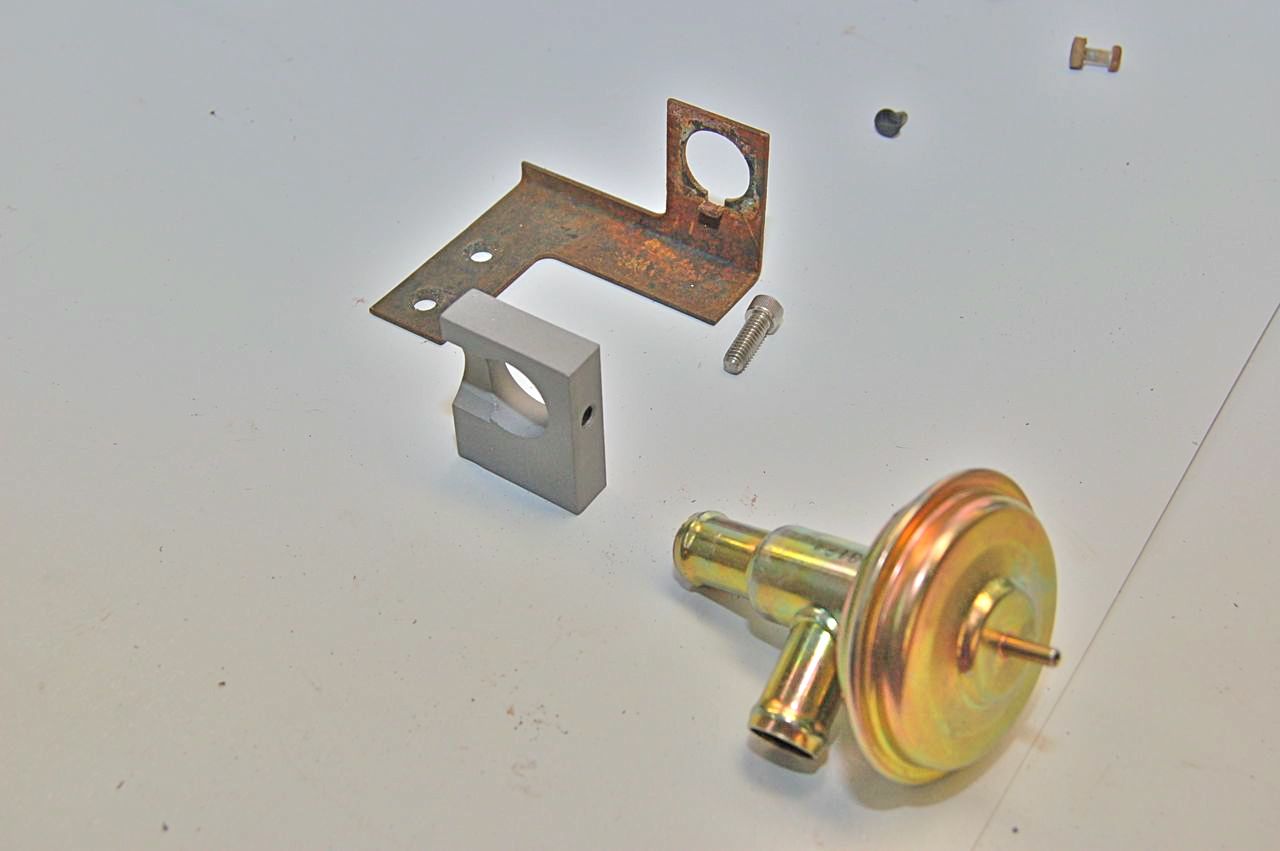
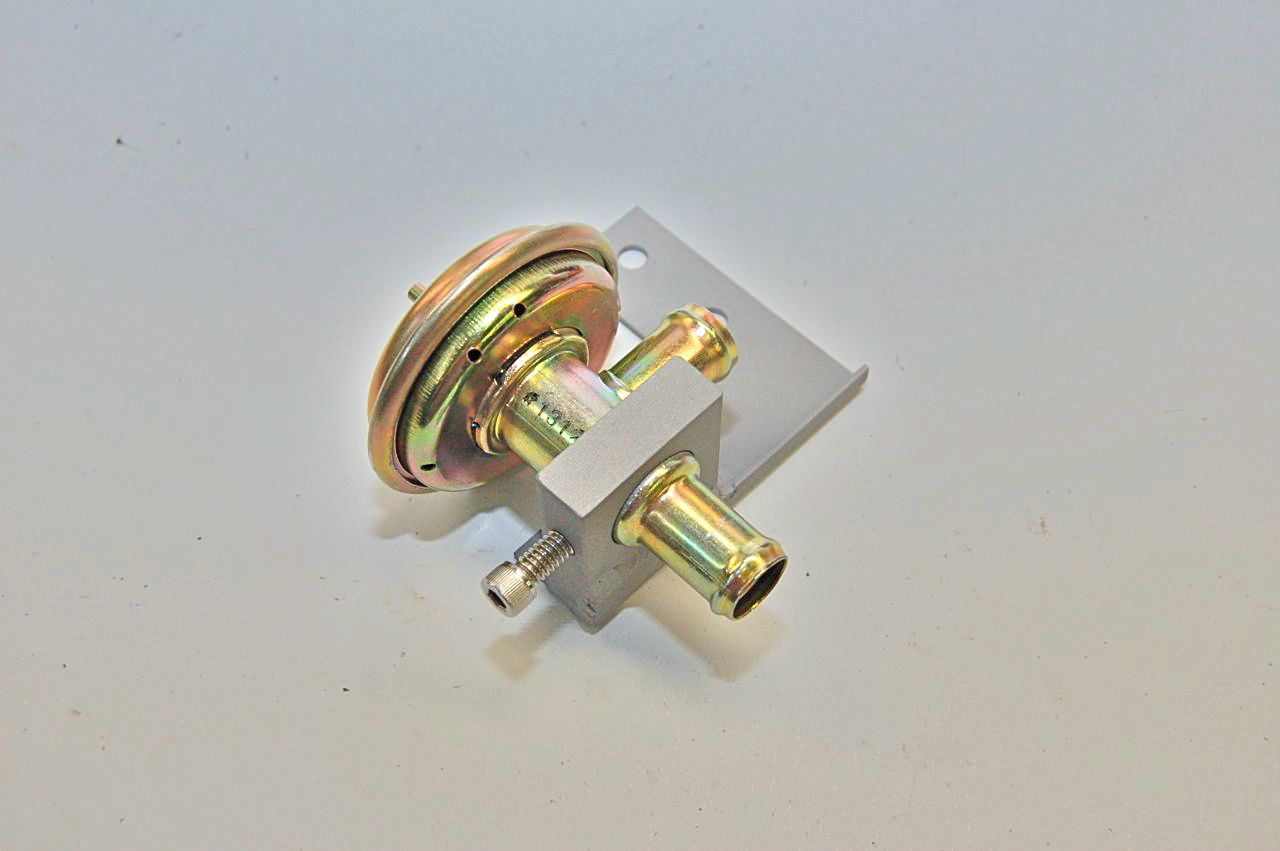
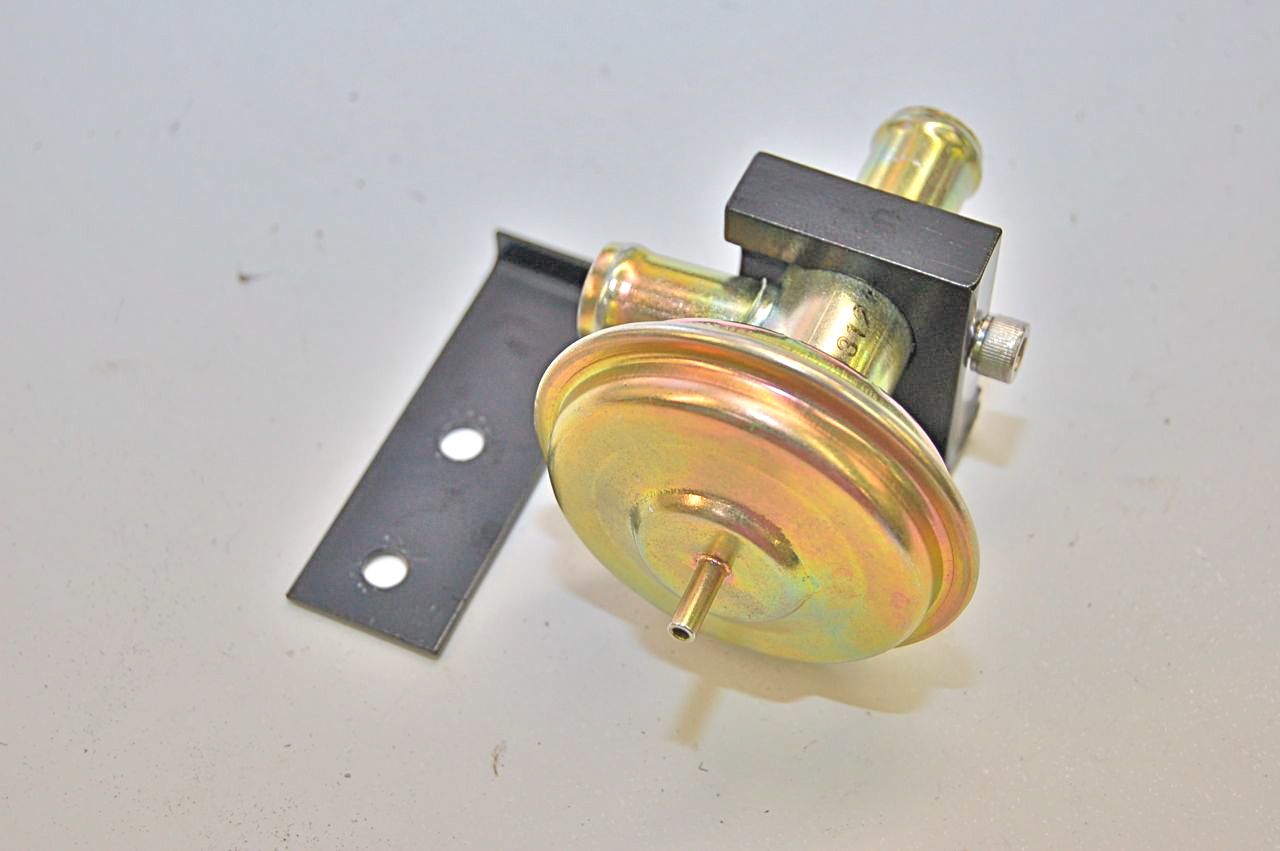
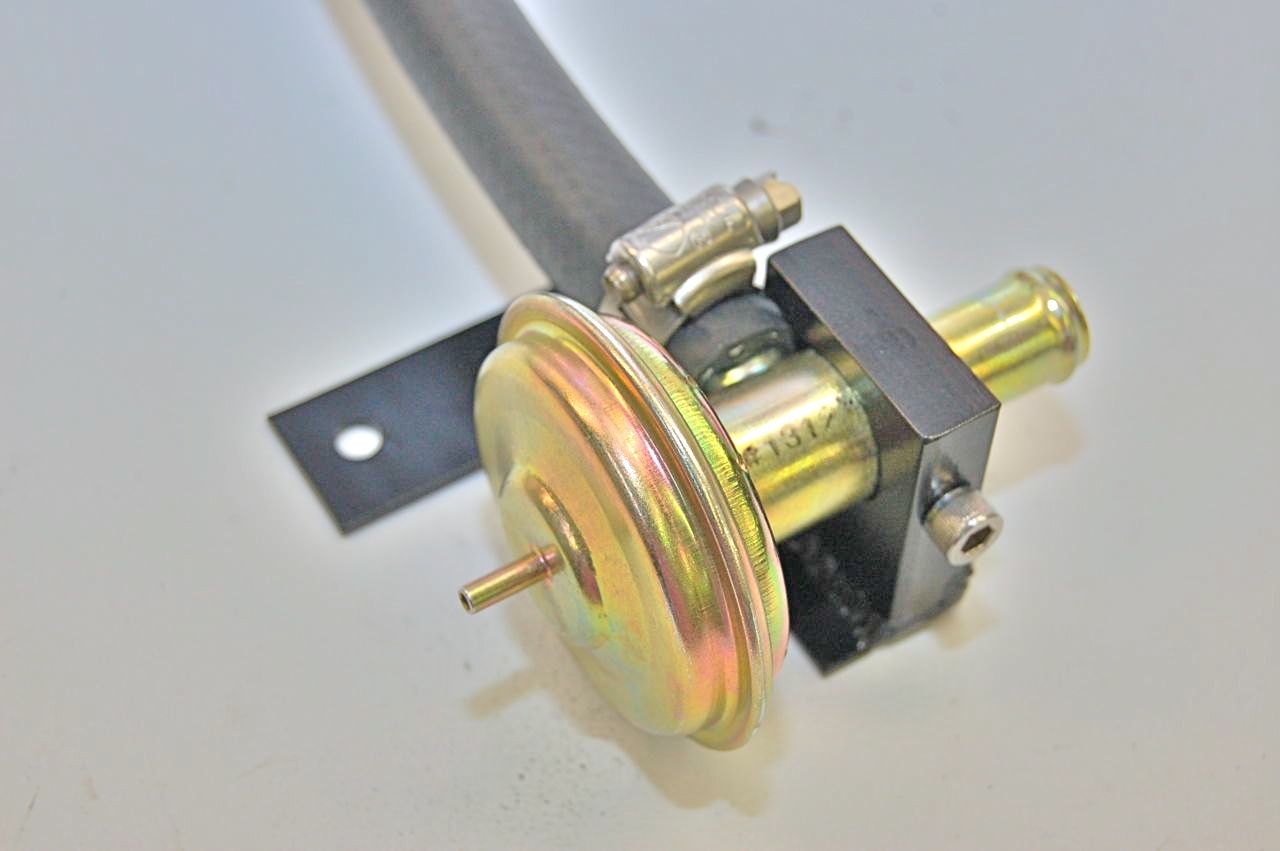
For the retaining screw, I ground it to a dull point at the end which dimples the valve behind the plunger, but since the plunger has a small travel this does not interfere with it and so it seals tight with no vacuum and it's very open when vacuum is applied.
Next is checking the heater vacuum thermostat.
With the thermostat set to the cold position there should be a vacuum leak (vacuum bleed off) if checking from the heater valve control port. If checking from the vacuum supply side it should hold vacuum when set to full cold.
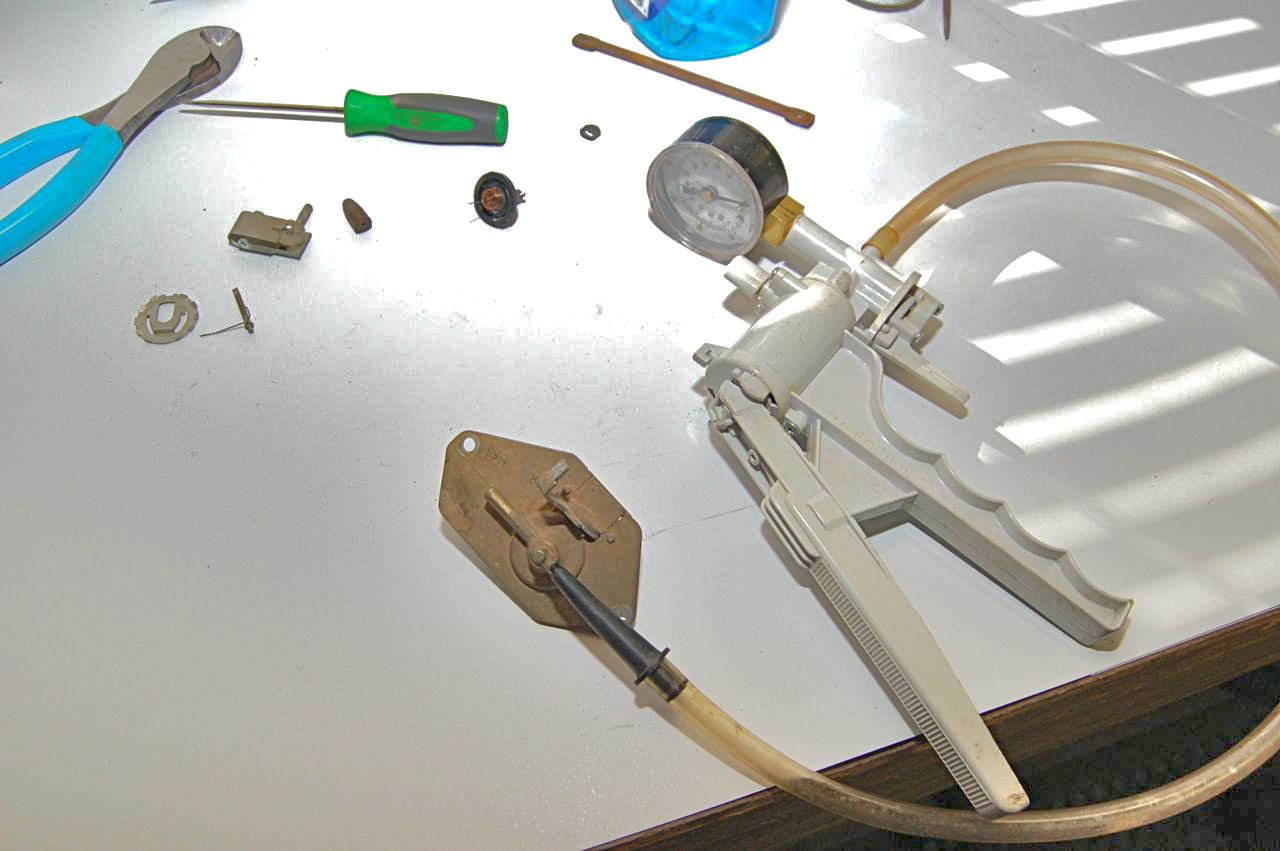
Next set the thermostat to full heat and plug the port to the heater control valve and pull vacuum on the supply port. It should hold vacuum.

If it doesn't hold vacuum especially in the last test, the thermostat is dirty or has a ruptured diaphragm. It can be taken apart, but there are two small needle and seats (valves) in there. The needle is the size of a hemming needle. It's almost analogous to working on a wrist watch as far as delicacy is concerned.
I had pictures of taking this apart, cleaning and inspecting and reassembling. I lost those pics. But I still have 3 more of these Ford HVAC systems to R&R so hopefully in the future I can cover this better.
If you're confident in taking it apart go for it, if not, occasionally I see these NOS on EBay for 100-250 dollars. Something to keep in mind.
Lastly you want to make sure the Bowden cable that connects from the dash 'hot-cold' selector is adjusted properly to the cooling and heating thermostats under that plastic cover in the engine bay.
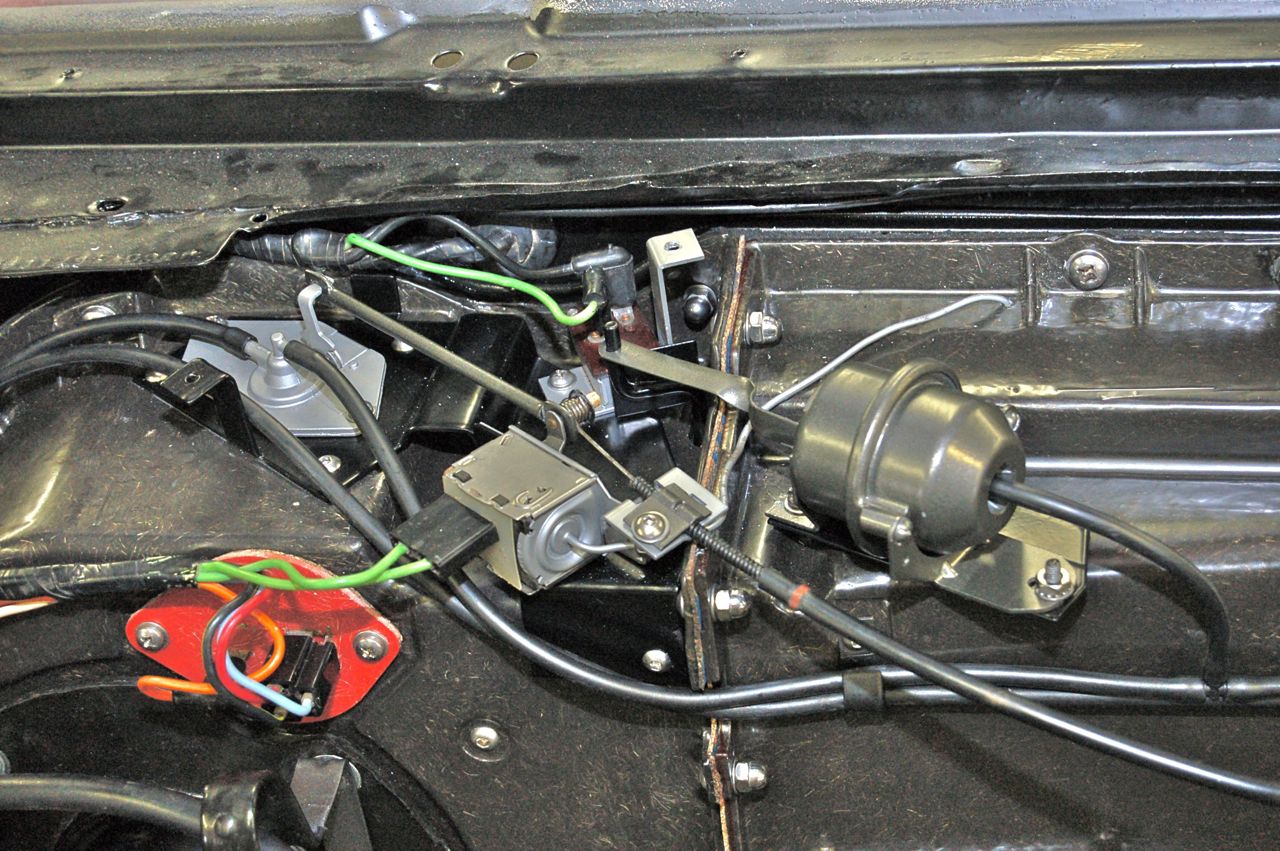
Another quick check to make sure you have enough vacuum at the heating thermostat is to check the vacuum servo motor here in the picture on the right. With the engine running in the heat or defrost positions it should have pulled in its arm hard. If it's not pulled in or not pulled in all the way and fully seated then you need to recheck the vacuum lines and the HVAC selector on the dash for vacuum leaks.
And please it kind of goes without saying to check that the heater core itself isn't full of scale or plugged or the 90' heater hose elbow on top of the engine isn't plugged as well.
Hope that helps solve heat problems.
Rant 1
The reason especially why the heater related vacuum hoses are connected to the dash control unit is that in cooling mode the vacuum is shut off to the heater mode door vacuum servo, heater thermostat, and subsequently coolant control valve.
Rant 2
I have enough parts for 4 additional systems plus the one I finished on the LTD. Every single vacuum reservior I checked either had a disintegrated check valve or there simply is no check valve in it to begin with and you need the external.
If someone has positive proof of a check valve in a 3rd gen full size factory original vacuum can I'd love to hear about it.
Rant 3
The circuit breaker for the heater blower and compressor clutch is located on the back of the ignition switch for factory air conditioning. It's just an add on to the centre screw stud on the back of the switch.
Rant 4
There is no blend door on these systems and yes the vacuum lines and components need to be mended for heat to work. The heat only cars are very simple and have a mechanical blend door and require no vacuum.
On the Heat-A/C door vacuum servo (the one in the engine compartment atop the plenum) the closest reproduction I could find online is this one Vacuum Actuator, 1961-1966 Thunderbird Air Conditioning Vacuum Actuator Motor
It looks close, but will most likely require modification to work properly in the 3rd generation full size Ford ('65-'68). These usually fail because of the engine heat and exposure to hydrocarbons that deteriorates the rubber diaphragm inside.
Rant 5
The only way to get air through the dash vents is in one of the A/C modes (recirc or fresh), heated air is only allowed through the heat or defrost on 3rd generation with factory air. You can manually reroute the vacuum to the heating thermostat and coolant valve and put the A/C on fresh air and you will have heat to the dash vents, but that's a manual work around.
Rant 6
That vacuum servo on the engine bay side dictates whether air will flow to the dash vents or to another passage that will either go to defrost or floor vents.
Rant 7
The heater hose comes from the top of the manifold 90˚ outlet to the carb base heater, then out the back of the carb base heater along the HVAC case through the loop bracket (screwed on with blower motor mounting screws) then into the area between the wing/fender and in the inner apron to the heater core. From the other nipple of the heater it goes straight under the wing/fender to the wing/fender mounted coolant valve near the starter relay on the apron. Then from the coolant valve straight across to the coolant pump nipple.
Rant 8
There should be no flow through the heater control valve with no vacuum (ie, normally closed). The heater control valve should open with vacuum applied.
Cheers.
‹ the end ›