1968 Ford XL Repairing Whilst Keeping It Roadworthy : 22 A/C York Compressor Pulley
2023, November 14
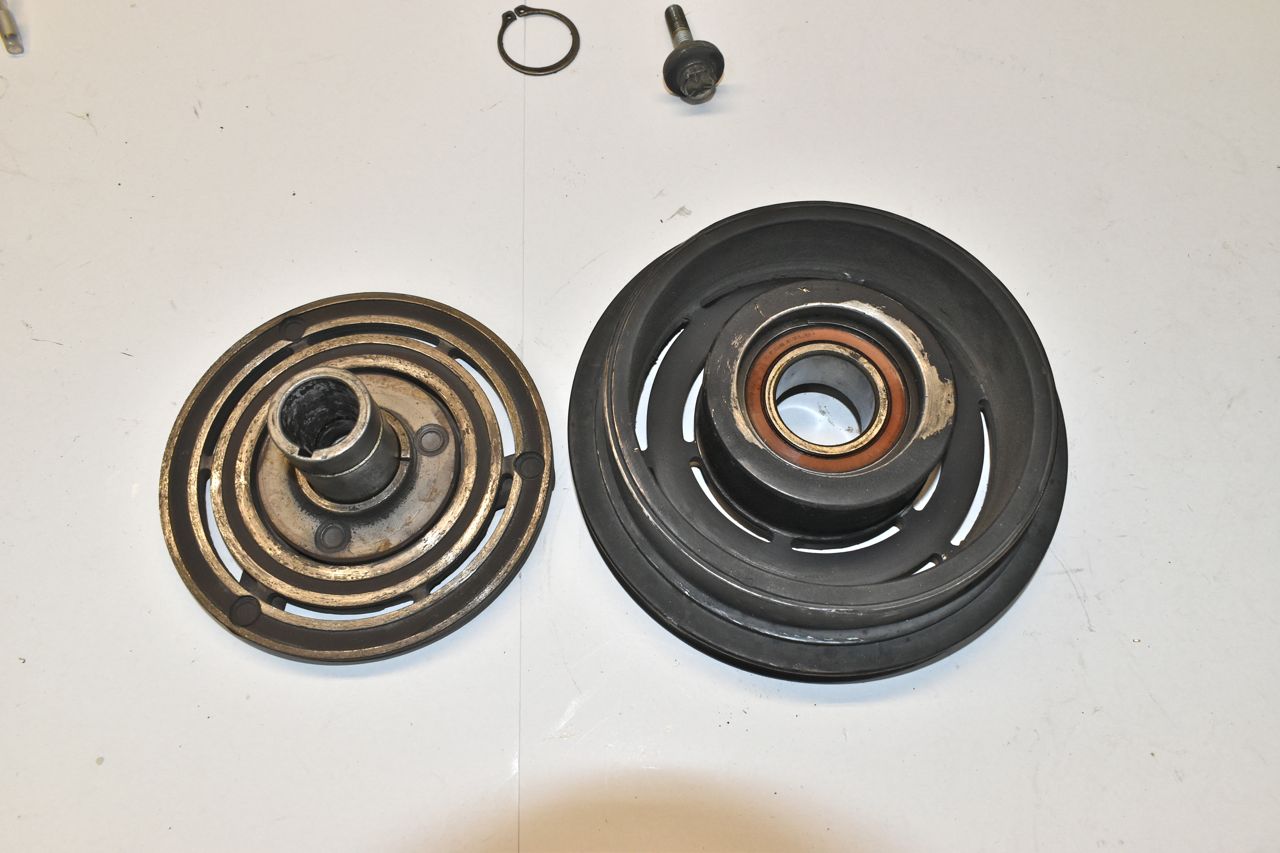
1 - 2 - 3 - 4 - 5 - 6 - 7 - 8 - 9 - 10 - 11 - 12 - 13 - 14 - 15 - 16 - 17 - 18 - 19 - 20 - 21 - 22 - 23 - 24 - 25 - 26 - 27 - 28 - 29 - 30 - 31 - 32 - 33 - 34 - 35 - 36 - 37 - 38 - 39 - 40 - 41 - 42 - 43 - 44 - 45 - 46 - 47 - 48 - 49 - 50 - 51 - 52 - 53 - 54 - 55 - 56 - 57 - 58 - 59 - 60 - 61 - 62 - 63 - 64 - 65 - 66 - 67 - 68 - 69 - 70 - 71 - 72 - 73 - 74To segue onto the next item, one of these pulleys is not like the other..... The A/C pulley needs to have its bearing changed as even though it feels smooth I can hear the ball bearings moving around. That can't be good.

To remove the centre bolt holding the clutch assembly onto the shaft of the York 210 you can apply the tool into the three holes in the clutch shoe. But if you don't have the tool, you can apply 12 volts to the clutch (assuming it works) and hold the outer pulley.
Or you can just wrap the belt around the pulley if the bolt is stubborn for more holding power.

Once the centre bolt is out you can use a 5/8" coarse thread bolt to screw in and this will pop the clutch assembly off the shaft of the York.

I'm pretty sure that oil seal was originally a bright reddish orange. But I digress. To remove first the clutch shoe has to be pressed out. With that remove the outside snap ring first then carefully press out.

Next there is an inside spiral snap ring surrounding the bearing, remove that and press the bearing out, be careful as there is metal shield in front of the bearing so don't press on it, press on the inner race.

Easy peasy.

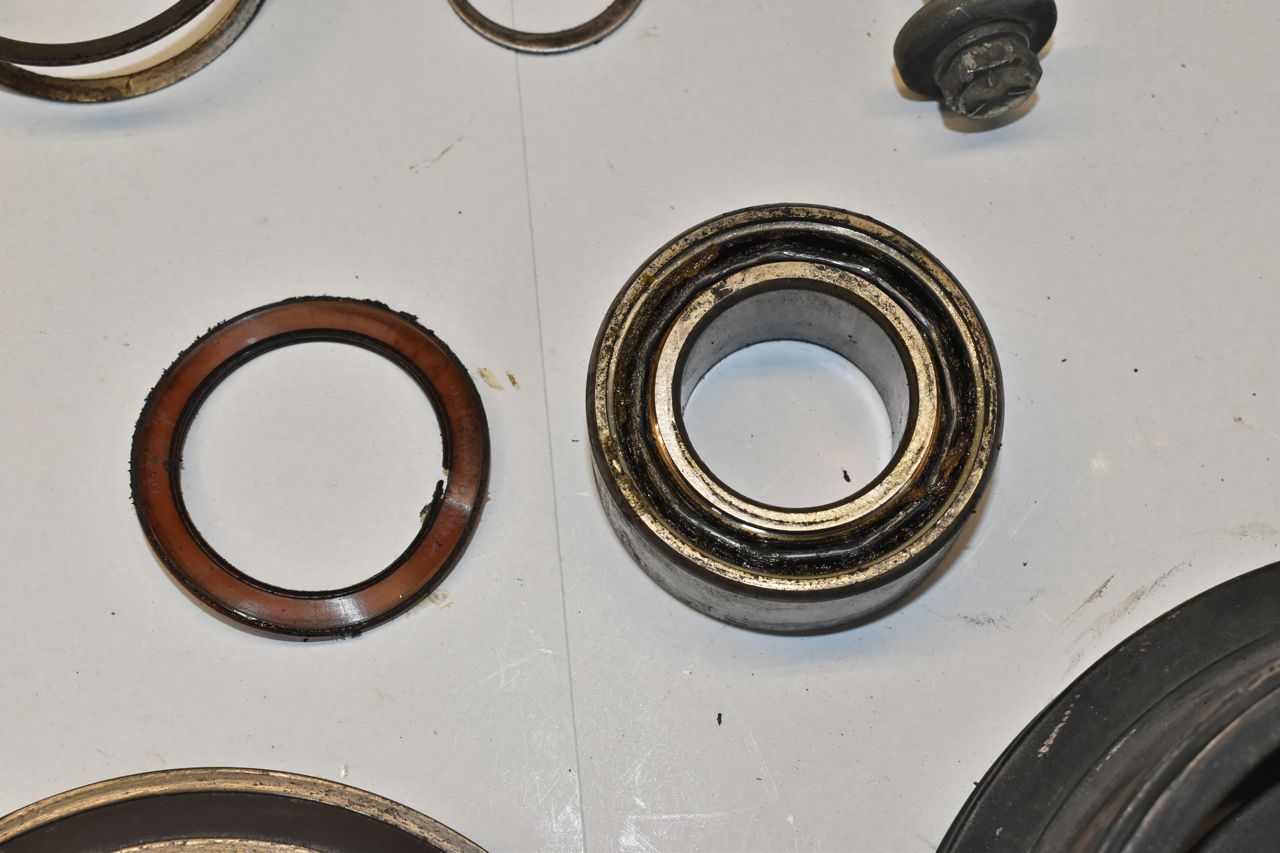
Yup, the grease is hard as a rock and that seal is cooked.

New bearing part number.

Whilst I was waiting for paint to dry I fixed this. This was hanging like this between the condenser and radiator and it's partially blocking air flow. The lack of detail and attention from the previous people working on this car is just appalling.

The order to assemble is really simple. Only thing this time you can press on the outer race to install the bearing in the clutch hub and not the inner race. Don't forget to install the bearing shield first.

Once pressed in, install the spiral snap ring, then on the clutch shoe slide the spacer down the snout and press that in and you want to support the inner race only on the bearing when pressing that in, let the hub float.

Install the snap ring and spin the clutch shoe, there should be no binding or rubbing and the bearing should be quiet and smooth.

The clutch coil. This is the one with the jenky wire on it. I cut it close to the coil assembly and crimped, as well as soldered, a new piece of 14 gauge GXL to it, then heat shrink with inner melt polyolefin with inner melt and then a PVC heat shrink jacket over that for durability.

The epoxy top seal was all cracked, so I applied a layer of RTV to keep moisture and oil out of the windings.

I ran the wire out the side rather than the top as it looks neater.

Again you can apply the clutch electrically and use the V-Belt to hold the pulley whilst tightening. I had to resort to holding the pulley with the V-Belt in my hand as I originally just put the belt on and tightened it and in trying to tighten the small bolt I was turning the engine over pretty easily, that engine is so worn out.

At least the belts were newer and in good shape. This is the quick test, flex them in the other direction like so, if they split or show signs of cracks toss em. These are good.

I cleaned all the sludge off with Pinesol. They almost look brand new.
