1968 Ford XL Repairing Whilst Keeping It Roadworthy : 55 Tires and Alignment
2023, November 14
1 - 2 - 3 - 4 - 5 - 6 - 7 - 8 - 9 - 10 - 11 - 12 - 13 - 14 - 15 - 16 - 17 - 18 - 19 - 20 - 21 - 22 - 23 - 24 - 25 - 26 - 27 - 28 - 29 - 30 - 31 - 32 - 33 - 34 - 35 - 36 - 37 - 38 - 39 - 40 - 41 - 42 - 43 - 44 - 45 - 46 - 47 - 48 - 49 - 50 - 51 - 52 - 53 - 54 - 55 - 56 - 57 - 58 - 59 - 60 - 61 - 62 - 63 - 64 - 65 - 66 - 67 - 68 - 69 - 70 - 71 - 72 - 73 - 74The Most Stubborn Car I've Had.
I swear this XL is like a child in the "terrible twos". It just fights me every chance it gets.
To start off the original tyres on the car granted were in no great shape and several years old, but I ended up with a flat trying to drive into town. Being New Mexico, where the proudest things about this state are broken windscreens and flat tyres in abundance, I'm used to small nails and screws in tyres. However this takes the cake.

The mechanics of how the geometry lined up in order for that to go in still baffles me. But as you can see the funky wear patterns, combined with old age and its time for new tyres.

And what kind of bargain basement Singapore tyre is Primewell?!
Good grief.
I bought some Cooper Cobras. Since I was changing the tyre size a bit I changed all 5 tyres (spare as well). At least the previous owner made the spare a Magnum 500 rim as well. Credit where credit is due.

I think that was the most tyres I've lugged to the store to have changed. The astute will notice we have a truck and yet the Mercury is doing the work. The more astute will notice the reason for this: truck is a Dodge.

Well that sorted out the tyre problems. I did dynamic balance these tyres at home and on the car so I just had them mounted and sadly they couldn't do that very well either. Not only did they mount the new tyres with the raised white letters facing inwards, but then when they remounted them again to flip them around they didn't line up the mark for the valve stem (lightest part of the tyre). This is why I balance my own tyres and never let anyone touch our vehicles directly. I mean this is what it has come to when so called trained technicians can not even mount a tyre correctly.
Next problem. Awhile back I had mended the vacuum leaks in the HVAC system. Well a few weeks ago I noticed when driving with the A/C in normal (outside air) position every time I needed more throttle the recirc door would start to open under engine loading. Great, it's leaking again. I tested the HVAC system at the firewall fitting and that's leaking down some, then for giggle-snorts I tested the vacuum check valve and reservoir can. The check valve was fine, but the can wasn't. It cracked again.
you can see the cracks forming and working their way out from the solder.

So this is a new one to me, I never considered the vacuum can would be metal fatigued from breathing from high mileage and repeated use.
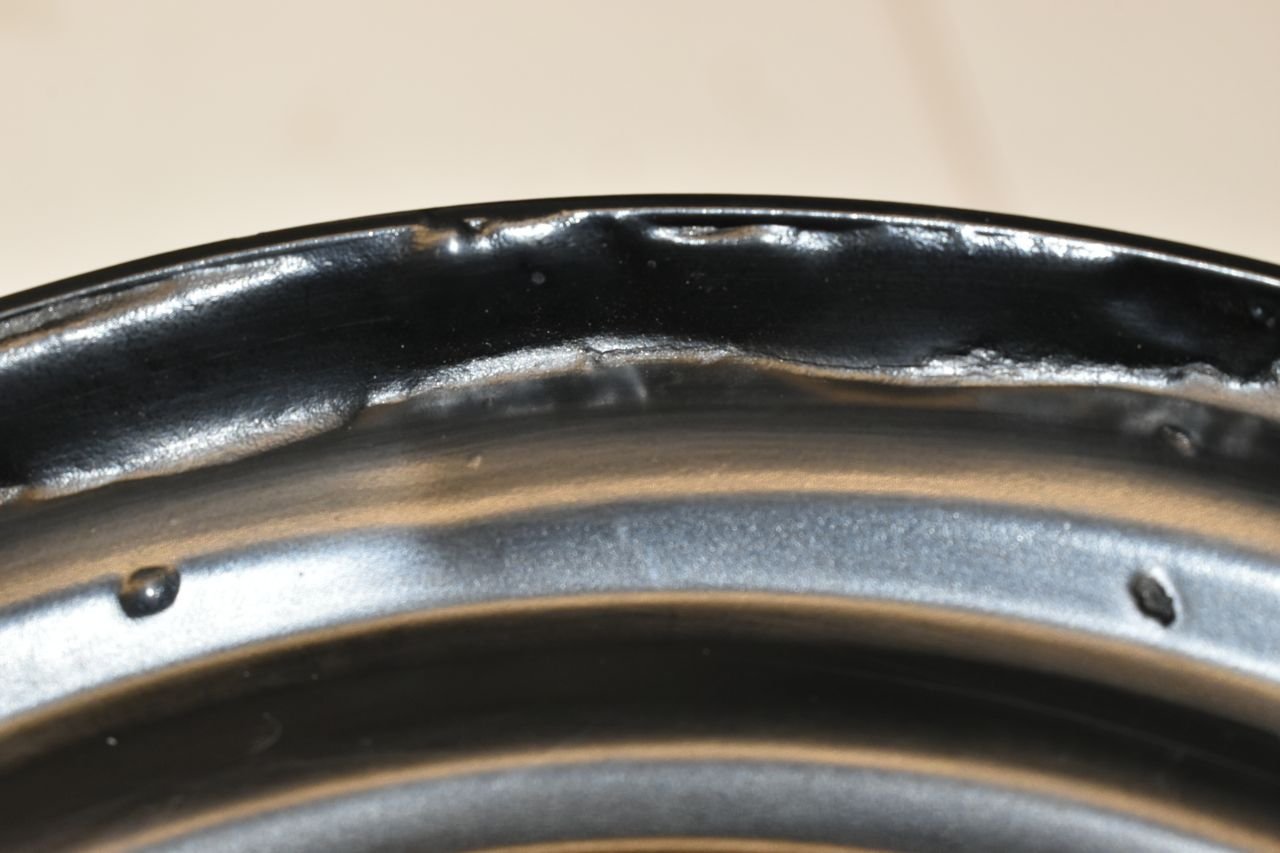
The only way to really fix this would be to strip the paint and lead solder from the can, then effectively anneal the can, but the vacuum port on the end is made from pot metal which would probably melt. So really the best you could do would be strip the can and TIG the edges completely and letting it slowly cool in small welding steps around. It would be tedious.
Or, plan B.
Just prep the spare from the other '68 XL..... done. The '66 uses a similar can but the mounting is different.
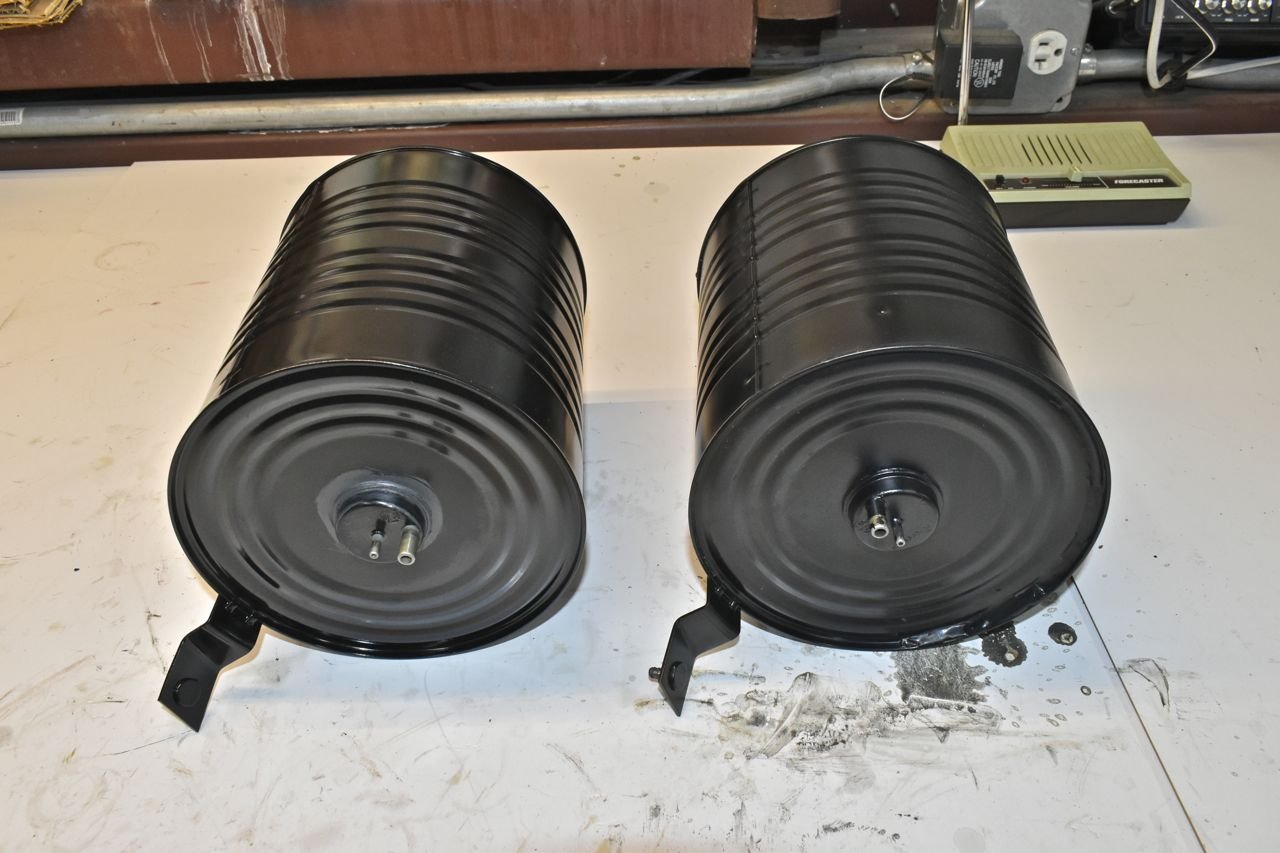
As for the rest of the HVAC system the problem is under the dash, either another old original hose has split and or another vacuum servo is leaking. Either way the dash needs to come apart to a great degree to replace all the hoses. Fixing the leaking can stopped the recirc door from opening for now. When I replace the radio, clock, seat belt reminder and driver side dash vents I'll replace the rest of the vacuum hoses as well.
On a plus side, the engine made it to its 500 mile break in oil change and I'm happy to report it's doing really well.
I have one of those oil filter can openers and checked the filter element. The worse I found was some little bits of black RTV.
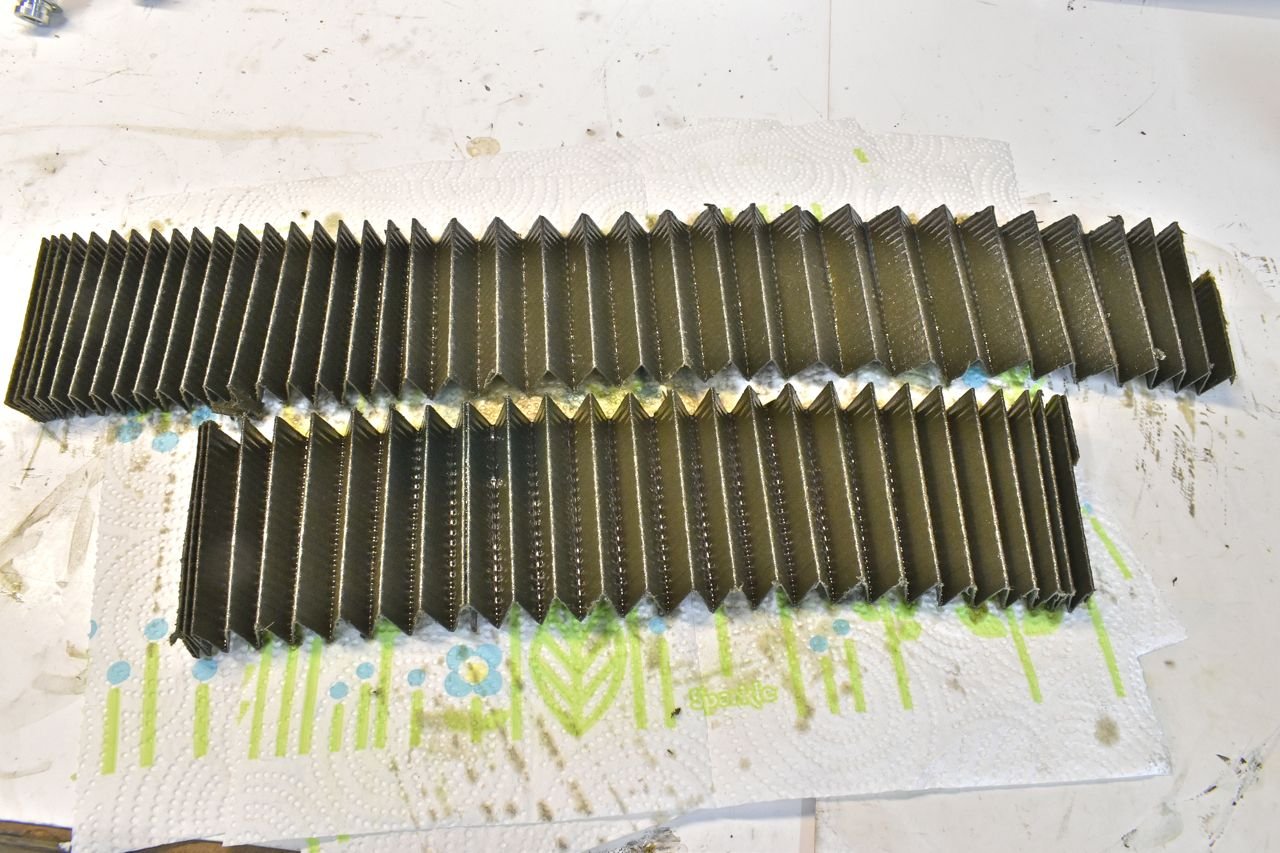
I can live with that. Now I do have a magnetic drain plug and there was a small wad about 1/2 the volume of a Q-tip worth of fine metal powder on it. It didn't even cover the entire magnet. Looked more like an electron cloud around a nucleus. I figured this was the rings breaking in and now it is done.

This Z-390 isn't powerful but it's happy. When I say it isn't powerful, it is a relative statement as I compare it to todays standards. Back then in the 70's it was probably worth some bragging rights when other more modern (70's) engines were really neutered by emissions of the time. But today sadly tis a joke.
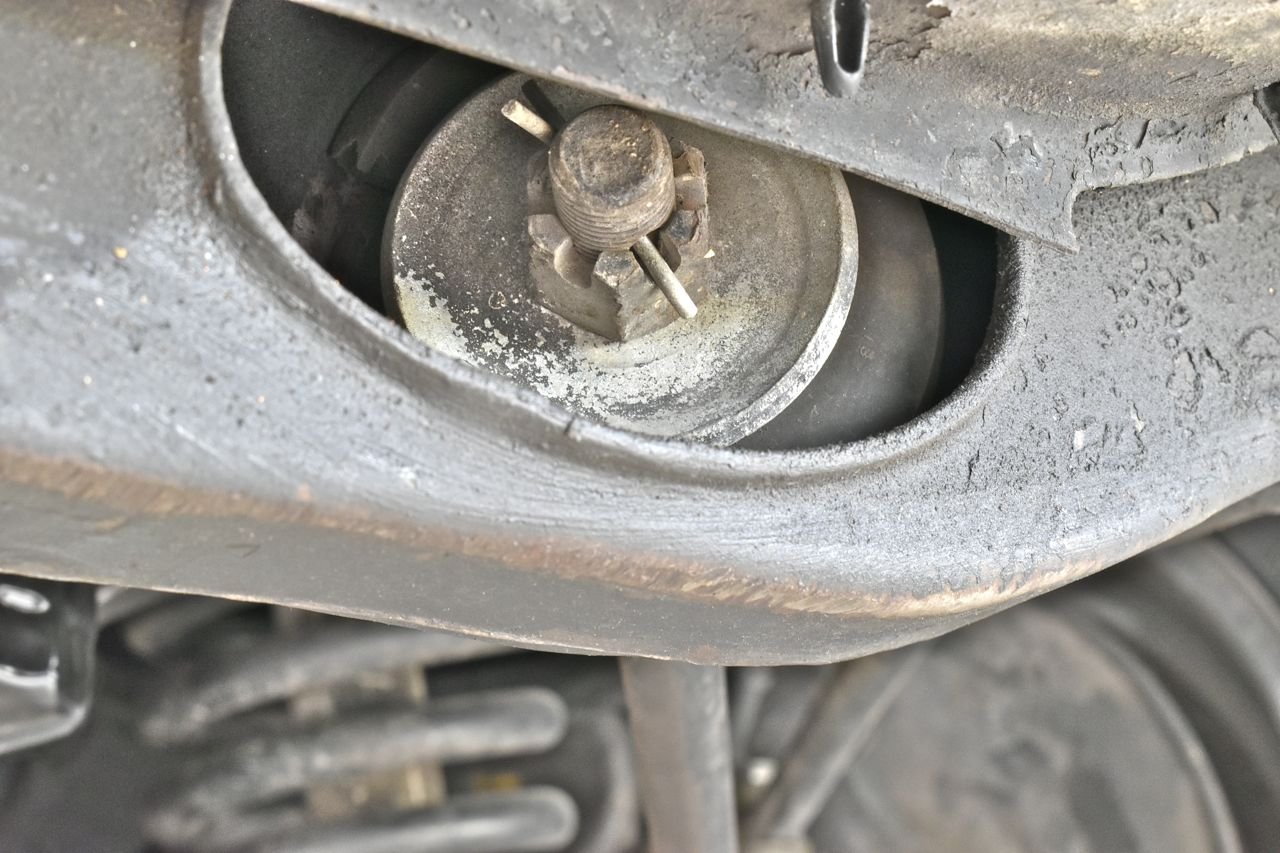
Moving on to another calamity. The strut rod bushing failed completely, fortunately I wasn't too far from home.
You can see the strut rod is just floating around. This makes for a not so fun ride home with the lower control arm moving about seemingly on its own.

The rubber bushing had enough. The previous owner said he had the front suspension replaced not to long ago. Now he said he used Moog parts, but I know for a fact Moog discontinued these strut rod bushings so what brand of excellence did he use. Oh and by excellence I mean .
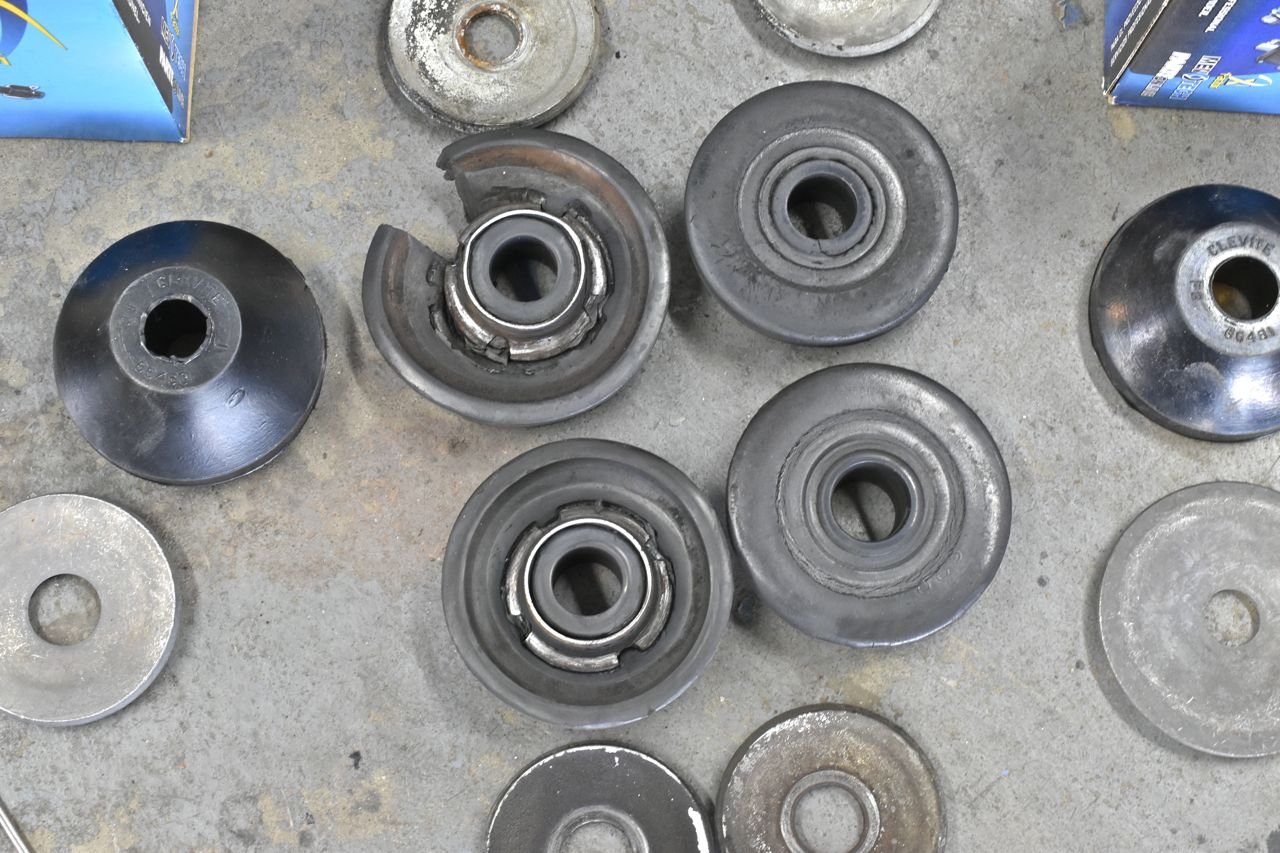
So the middle bunch is what came off the car and I am having trouble wrapping my head around these parts as the outer bushing needs to have a recess to accommodate the frame bump out and these do not.
You can see the replacement set does in fact have this and so do old Moog bushings. I was able to buy 2 NOS Moog sets, but I used them on the '66's. These Clevite made bushings will do.
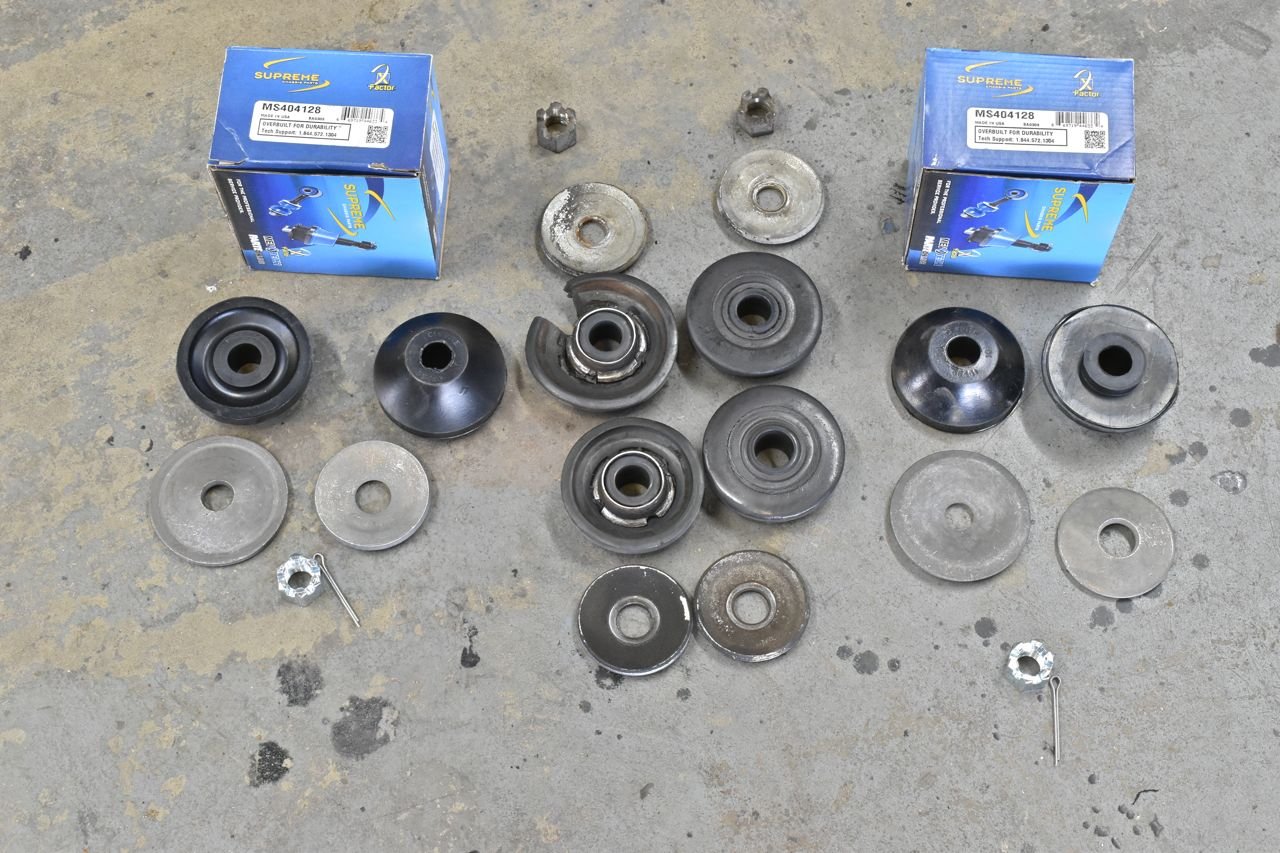
Then I find things like this. I mean what sort of hack does this to the threads? This a Phoenix car and has very little corrosion yet they somehow mangle the threads. Some people really shouldn't be working on cars. I chased these and the other end as well.

These are supposed to be held in place by the splines, well 3 of them do, someone obliterated the 4th.

The old strut rods just came right out once the nuts were off. The new bushings required pulling back the lower control arms a bit to get the holes to line up. If the alignment was off before, it's really off now.
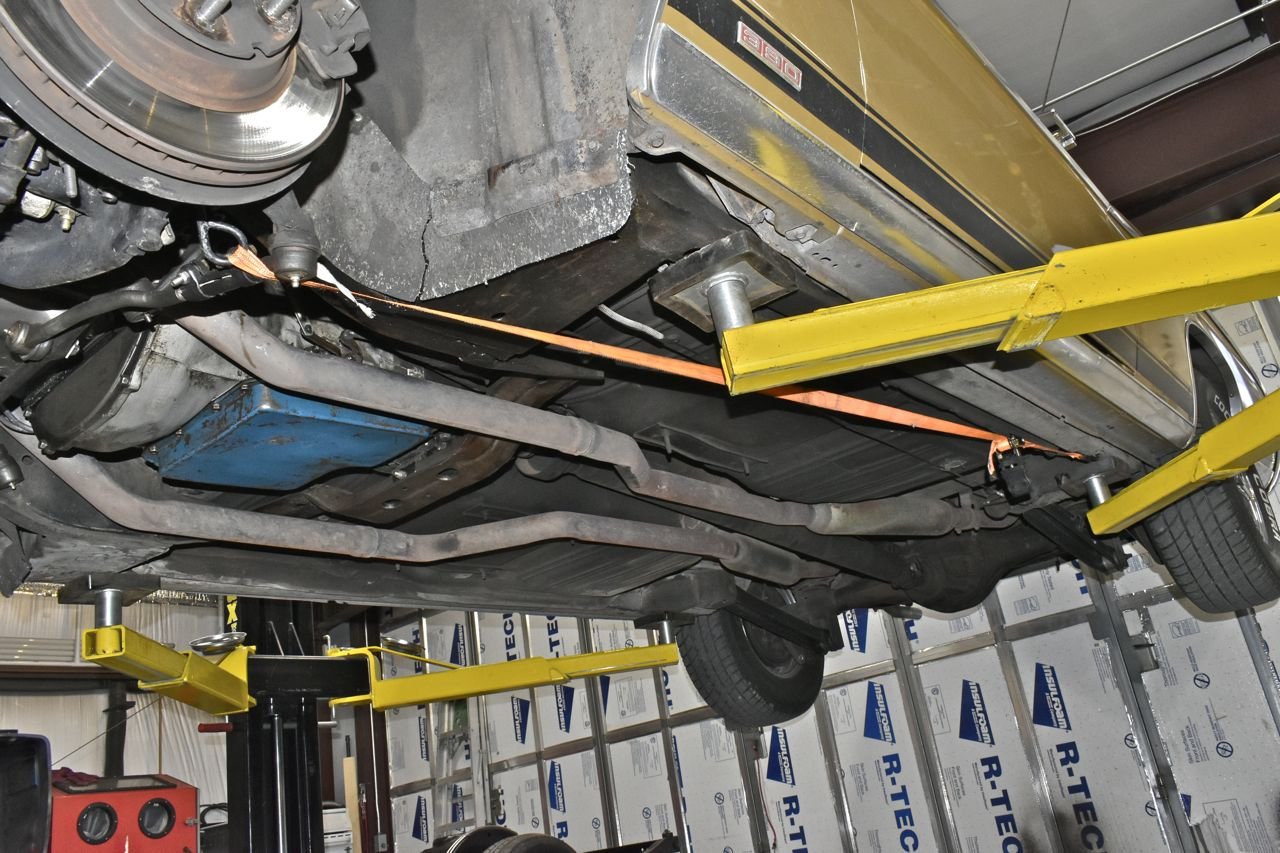
Happy strut rods.

To do the alignment, this is what I use on all our cars. Like my primitive dynamic wheel balancer that spins wheels up to 140 MPH on the car and strobes the heavy spots, these also require more work and expertise to use properly, but also yield good results.
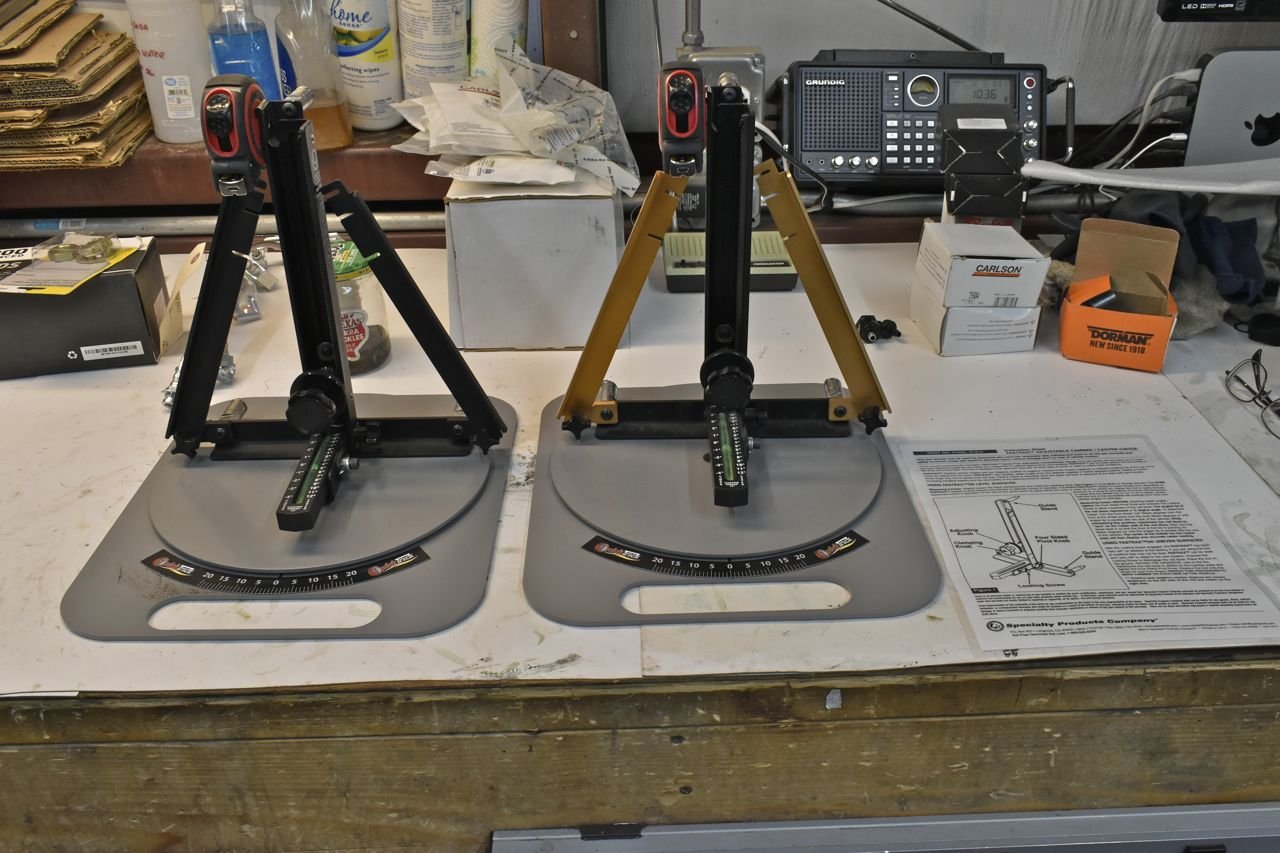
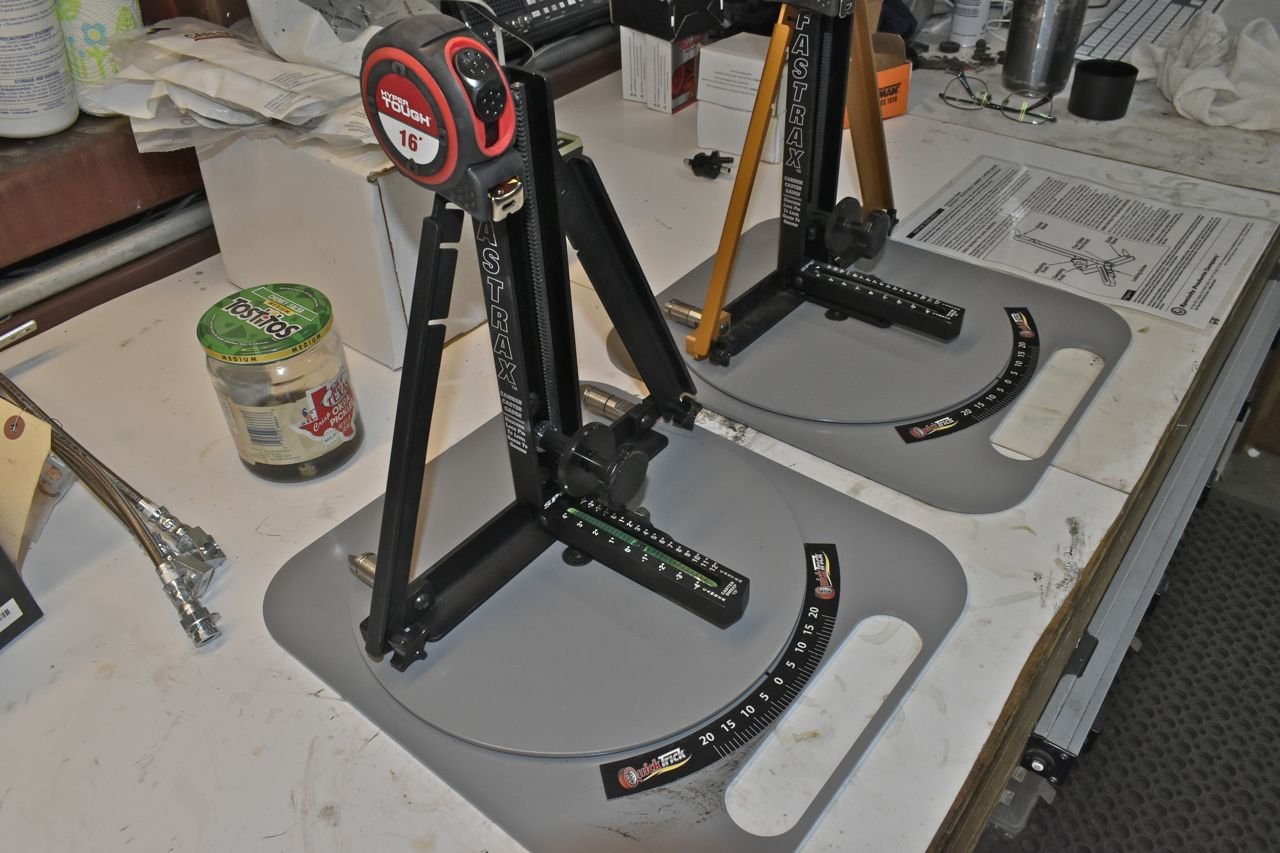
Pretty simple setup. Of course you need to know the slope, if any, in your garage floor to calibrate the gauges before using them.

This is one of the tools specifically for 3 and 4th gen full size Fords to adjust the upper control arm. These cars do not use shims, you just loosen the bolts and move the arm. I bought this several years ago when people were dumping their old alignment stuff for cheap. I think this was ~25 bucks shipped. Now you can't find this stuff and when you do, you need the jaws of life on the wallet.

The only thing that was really out of whack was the toe. It was toed out 5/8" differential. I used the limits on our 1996 Impala SS (they were handy) as targets as the 1968 specifications are for bias ply tyres and obviously it's foolish to use those specs on radials.
Ford wants 1˚ of camber, um no it's 0˚ for modern tyres. So I put the camber to 0˚ on both sides. On caster Ford wanted 0-1˚. Yikes really 0˚ is acceptable!? Um no I'll try to get as much as I can out of the adjustments. Plus the '68 Ford manual made no mention of cross caster. I added that. In the end I was only able to get 1˚ of caster on the drivers side max and then set the passenger side for 1.25˚ of caster. Then set the toe IN to 1/8-1/4" differential. That's measurement is kind of hokey as it really depends on how far out you measure the differential from the hub of the wheel. Fortunately the alignment attachments have slots close to the tyre size. They should be using degrees instead to be perfectly accurate.
I did take it for a test drive and you're not going to believe this, but the steering is finally stable and accurate in this pile of XL. It steers like my 1994 Grand Marquis LS. Finally....... (sigh) . On a crowned road take your hands off the wheel and it stays straight (thanks to even a bit of cross caster). Holy crap no more dodgy steering in this thing. I have no idea how the previous owners were driving this death trap.
Speaking of death trap, the brakes are the next item that takes precedence.
Oh good grief are those glazed and worn out. Then again the backs aren't doing much or really anything anyways.
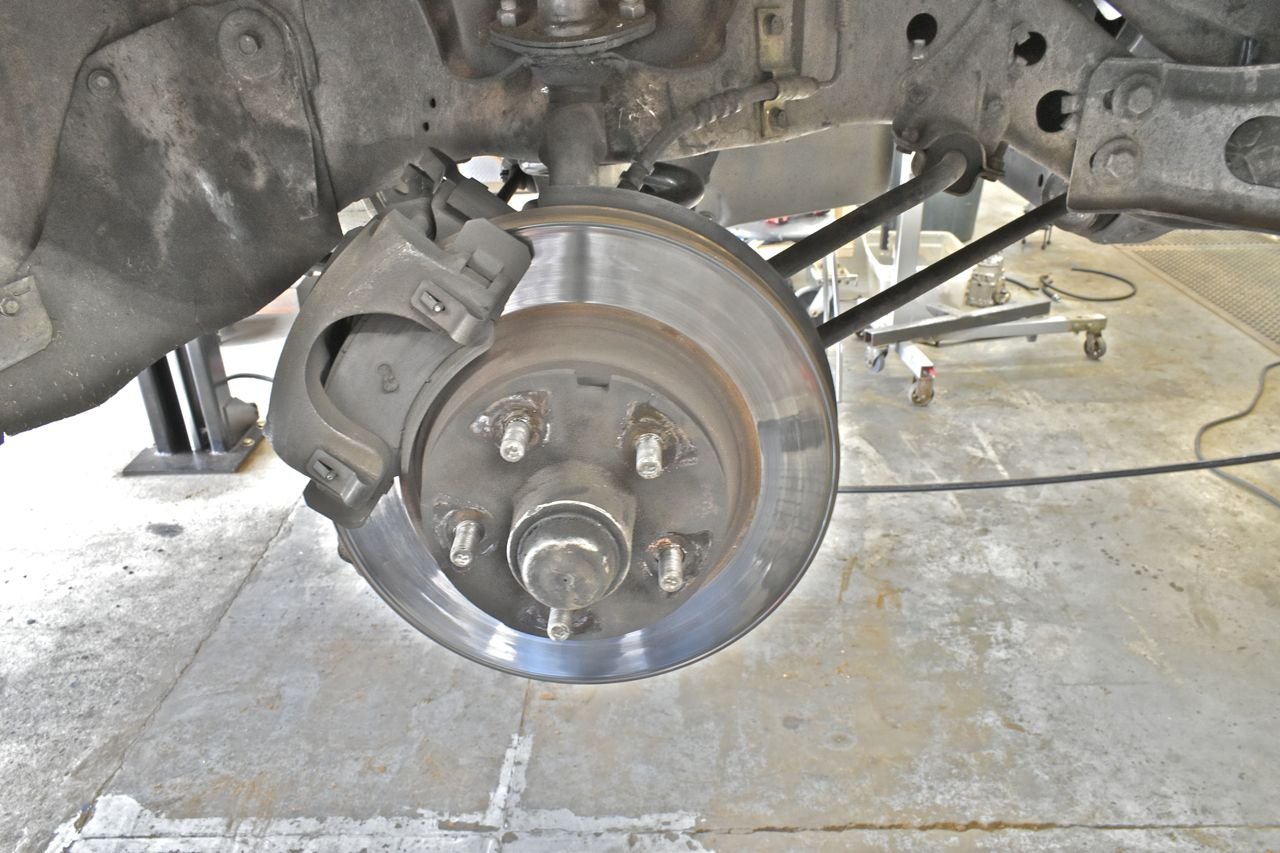
Well at least they're equally bad on either side, I guess that's something.

The outer pads on both sides have uneven wear. And when I say uneven wear I don't mean with respect to the inboard pad, I mean with respect to itself.
I'm taking no prisoners.
On the plus side for a 1960's disc brake it's fairly well sized.
Click here to continue to part 56