1968 Ford XL Repairing Whilst Keeping It Roadworthy : 25 Hoses & Wiring Tidy-ing
2023, November 14
1 - 2 - 3 - 4 - 5 - 6 - 7 - 8 - 9 - 10 - 11 - 12 - 13 - 14 - 15 - 16 - 17 - 18 - 19 - 20 - 21 - 22 - 23 - 24 - 25 - 26 - 27 - 28 - 29 - 30 - 31 - 32 - 33 - 34 - 35 - 36 - 37 - 38 - 39 - 40 - 41 - 42 - 43 - 44 - 45 - 46 - 47 - 48 - 49 - 50 - 51 - 52 - 53 - 54 - 55 - 56 - 57 - 58 - 59 - 60 - 61 - 62 - 63 - 64 - 65 - 66 - 67 - 68 - 69 - 70 - 71 - 72 - 73 - 74Yup, that starter lead is just floating around between a moving control arm and a hot manifold. More crappy bodge jobs to come.
Fortunately I have spares but this is what the clamp should look like to secure the starter main feed wire. It attaches to the top engine mount bolt.

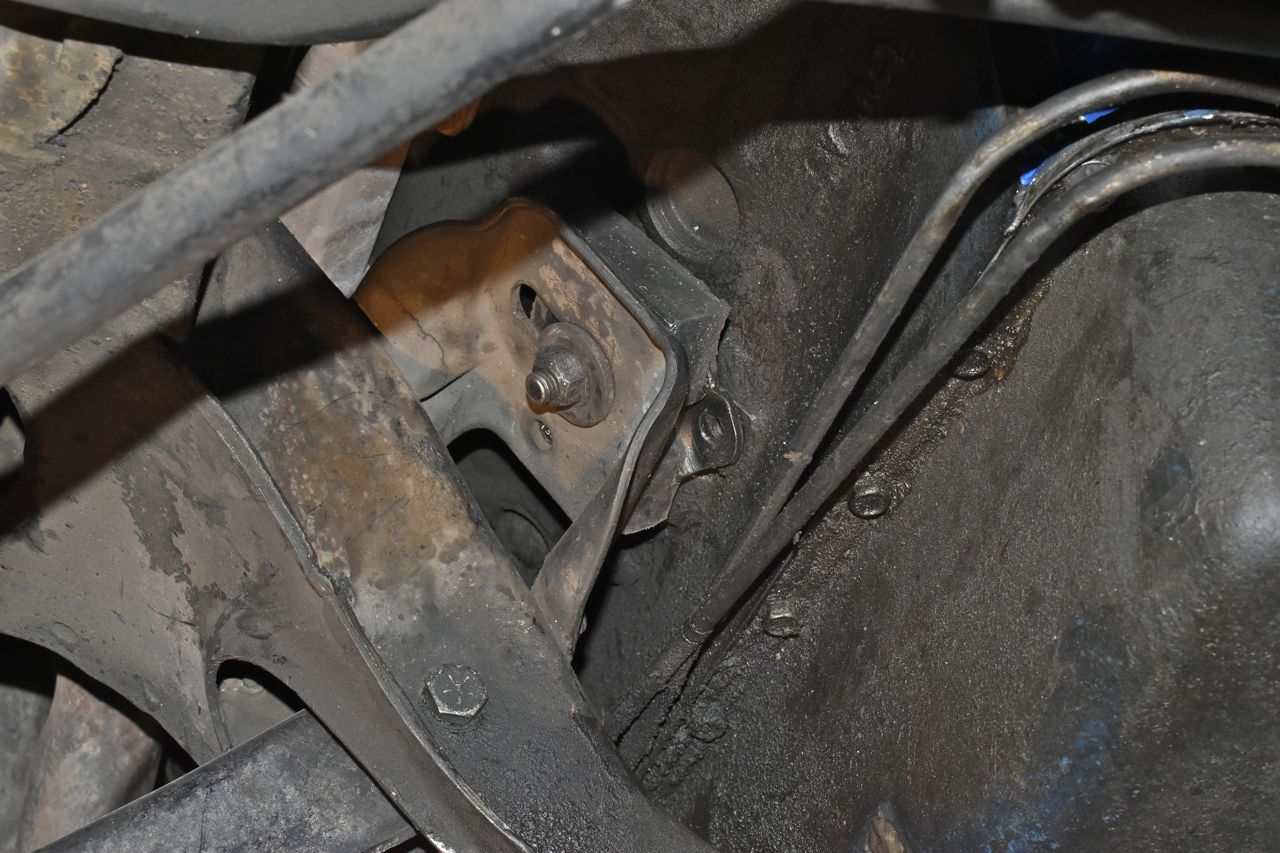
Well crap it's not there but what's more disturbing is the lower bolt is MIA. To make matters worse the hole isn't lined up with the block on the lower hole. Just super....

I just refinished one of the above clamps.

I did eventually get the bracket installed and the lower bolt. I had to jack up the entire engine (loosening the fan shroud first) with a trans-jack and soft would under the oil pan. However once all three bolts were in the engine the mount stud was off on the perch slot. With that I had to loosen the transmission mount and cross member and then grab the tail shaft and pull it to the passenger side, then the engine mount lined up with the perch and simply tightened the transmission back down as there was room in the bolts holes back there to make that happen.
I can surmise when the previous owner took it in to have the transmission replaced with a slam gears-o-matic rebuild unit they replaced the engine mounts and then were too lazy and or incompetent to do the job right. This is exactly why I will not let anyone touch one of our vehicles.
Needless to say this was another 2 hours to sort out.

Once the starter lead was routed correctly I started wiring this corner. Here I have the voltage regulator socket done and just need to add a connector for the RFI capacitor.

Standard makes a bunch of different RFI caps. For a brief look, go to Rock Auto under the part number search tab, then type in " RC* " and select Standard as the manufacturer. You'll get a nice list of all the RFI caps Rock Auto sells.

Here this corner is all wired up. Even though the voltage regulator is electronic and has the field flyback diode, it still switches the field on and off many times a second and that RFI cap is still needed to help reduce noise. It was missing on the original cluster of two voltage regulators.

Installed the fuses. Since there was already a hole drilled for that idiotic second vacuum can I decided to capitalize on it and use an Adel clamp to hold the fuses. I tucked them under the wing as they are a bit out of place. But still easy enough to access should it be warranted.

I can now leave a battery connected without too much fear of angry electron reprisal.
