1968 Ford XL Repairing Whilst Keeping It Roadworthy : 60 Custom Building A Power Window Regulator
2023, November 14
1 - 2 - 3 - 4 - 5 - 6 - 7 - 8 - 9 - 10 - 11 - 12 - 13 - 14 - 15 - 16 - 17 - 18 - 19 - 20 - 21 - 22 - 23 - 24 - 25 - 26 - 27 - 28 - 29 - 30 - 31 - 32 - 33 - 34 - 35 - 36 - 37 - 38 - 39 - 40 - 41 - 42 - 43 - 44 - 45 - 46 - 47 - 48 - 49 - 50 - 51 - 52 - 53 - 54 - 55 - 56 - 57 - 58 - 59 - 60 - 61 - 62 - 63 - 64 - 65 - 66 - 67 - 68 - 69 - 70 - 71 - 72 - 73 - 74Right, onto deck lid torsion springs. So the golden XL had some hacked up torsion springs that wouldn't hold the deck lid up. The previous owner had a cut down hockey stick as a deck lid prop and it was irritating and extremely tacky. I had a bunch of these torsion rods off 66's and off the '68 LTD 4 door hardtop, but I quickly learned they are all different than on the '68 fastback. I forgot to take a picture of the hacked up rods as installed in the golden XL, but since I put them in the parts XL I took a picture you can see someone cut and then tried to weld them. And failed miserably.

Torsion rods are spring temper and alloy steel rods. Heating them up, even welding and letting them cool in air will start to anneal that area and they will loose their spring temper as these did. So what happens is they will twist in the heat affected zone and no longer be springy like the rest of the rod. If you're going to heat a torsion rod for whatever reason the whole thing really needs to be heat treated again, otherwise you end up with a hockey stick holding your stuff up

Now I do not know why the '68 fastback is different than the '66's or even the '68 4 door hardtop. But the following are the more typical rods and slot arrangement.
This is the '66 LTD and the '66 gal 500 (XL) is similar, so was the '68 LTD.
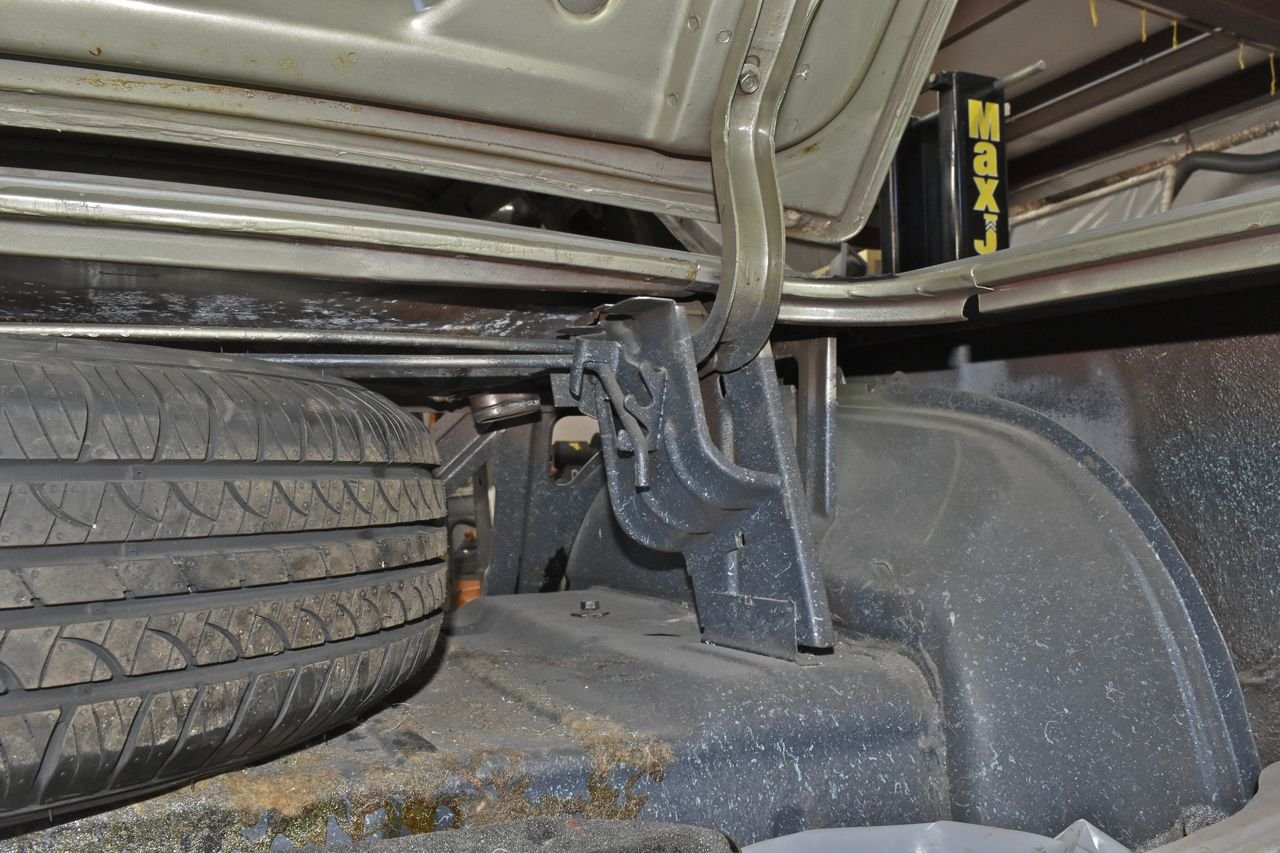


All I can is thankfully I have a parts car '68 XL for stuff like this. Trying to find these rods, then shipping would be pretty expensive.
On other fronts I set the mechanical timing map of the distributor to let full mechanical timing (based on RPM) advance to occur at a lower RPM. I used the weakest springs in the recurve kit. At first when I assembled this engine I was conservative as it is a high compression Z code 390 and was afraid of detonation running on cheap 87 octane fuel. But after driving this in the heat of summer in town with the air con on full it hasn't pinged (detonated) once I've heard.
I will say from a seat of the pants feeling that made a difference in off the line torque. This thing is really a dog but that helped. I haven't mapped the advance out over RPM as it's not a performance engine and not exactly a priority so I'm utilizing my instincts for the best settings. I also went up 4 primary side jet sizes as it was a bit lean. This 4100 carburetor is off of our old '66 galaxie 500 with a 352. Between the timing curve adjustment and the jet changing it really helped fine tune this.
I don't have a bung in the exhaust for my wide-band O2 gauge, but again seat of the pants and listening carefully to the engine measures seem to be ok for now. I have ordered another set of FPA headers and when they arrive I will make a proper exhaust for this with the bung for the O2's so I can see where it's actually at mixture wise.
It can't be that far off from ideal as I have 1000 miles on this oil so far and it's golden on the stick and smells like it just came out of the bottle. For a backyard refresh at home, this is one happy, smooth, quiet running engine so far with no perceivable oil consumption. Plus I'm averaging about 12-14 miles per gallon in a mix of town and rural road driving. So not too bad.
Building a Power Window Regulator
So I like power windows and locks on an old car. I am just one for creature features. A while ago I made a separate post about Nu Relics power windows as I had investigated them. Now I was impressed they actually called out the alloy of metals used but they never mentioned the temper on them. However a couple things kind of put me off. First they use they use the cheap disposable GM power window motor and secondly the regulators do not mount in the OEM power window regulator spot. It appears they mount in the manual winder spot. I do not know why that bugs me, but it does.
I had envisioned trying to make a power window regulator similar to the OEM power regulator from manual winder regulators and whatever newer ones I found. I saved a bunch of old Ford manual winder regulators; about 70 pounds worth of them for this purpose.
What sparked this sudden change to do the regulators was working on the power regulators for the '66 gal 500 XL. I recently became lucky and found 2 passenger side power regulators for the 65-68 2 door hardtop for 22 dollars each. I found a way to convert one passenger side to a drivers side so I had a complete front set. However since I had to take one apart to flip things around I realized I had the template to try and make a set for this 1968 XL. Well at least the front doors. So here we are.
With that I made one from one original manual winder regulator from a 2 door hardtop and one new regulator for a 80's Ford pick up that I found for 12 bucks. I did have to buy hardware to assemble them.
The first round was a prototype and I just kept going and didn't take any pictures as it was all an unknown if I could even pull it off. It worked and I took it back apart to paint and that's where this starts off. I still have to make the drivers side and can take detailed pictures of what to do.
I'll be honest this is loads of work to do. This is a good overview without getting too badly into the nitty gritty.
OK, on the left is the original 65-68 manual regulator for the 2 door hardtop. Next to it is the new cheap power window regulator for a 80's Ford pickup. Then to right are all the modified parts of both the original and the new pickup regulator ready for assembly. Now you do have to lengthen the arms of the manual regulator. It's quite a bit of cutting and TIG welding.

The key here is using the base plate off the Ford pick up power regulator. There are two problems with it that require modification. First the mounting holes are in the wrong position and it has no threaded portion in the base plate. This is easily fixed with weldable threaded bases (Mcmaster). The second problem is the base has no provision for a counterweight spring. With that the base has to be cut out of the old manual regulator and welded in the centre of this one to hold the reference standoff for the spring solidly.

Next was to install all new rollers on the 3 arms of the regulator.

I took a cheap Waldo World air chisel bit and ground a little splaying tip portion that helps spread the rivet.


I use a hammer to flatten but I'm also watching so it doesn't pinch the roller and stop it from spinning.
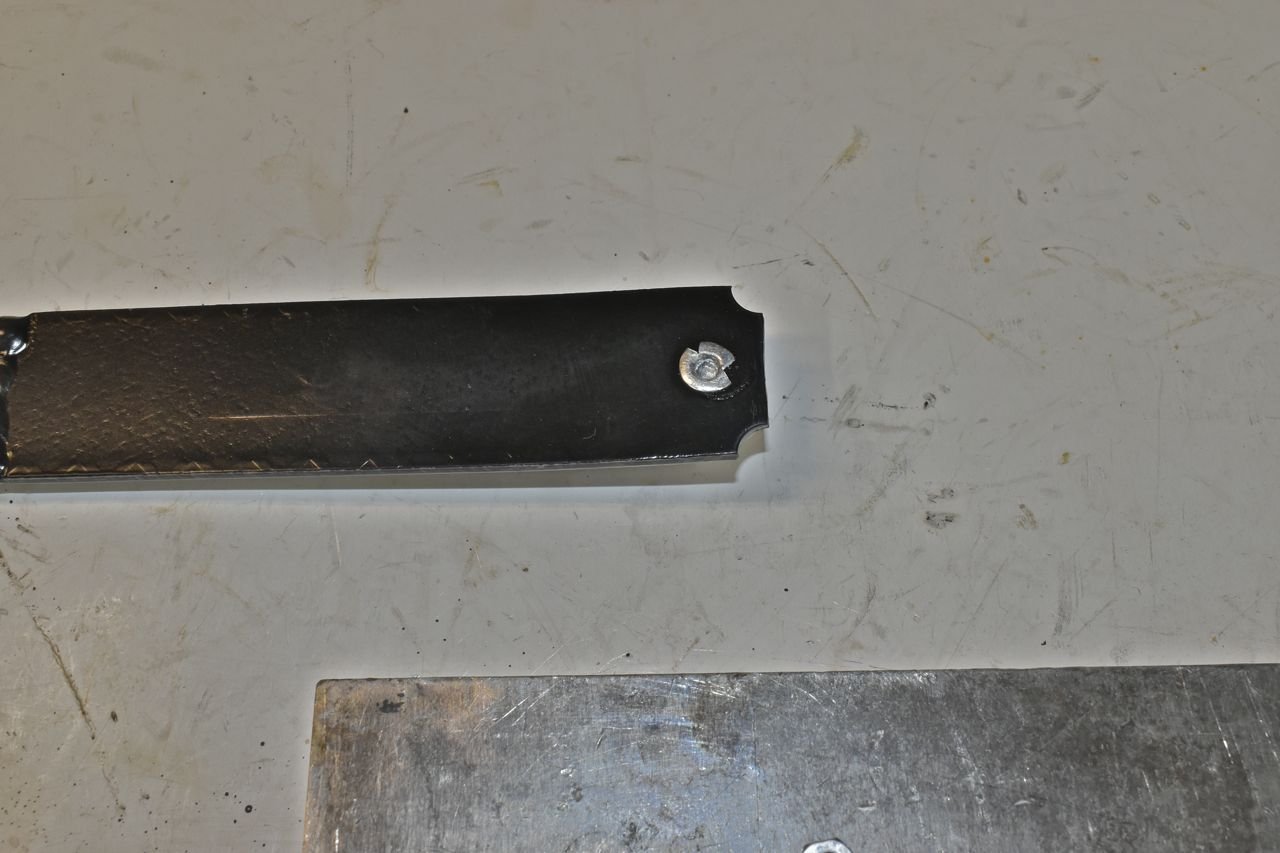
I lube up the rollers before installing them with a good waterproof grease.

Next I need to reattach the main arm to the sector gear. So the main arm is from the old manual regulator and the sector gear is from the newer Ford pick up regulator. As you can see I had to lengthen the main arm in a few places.
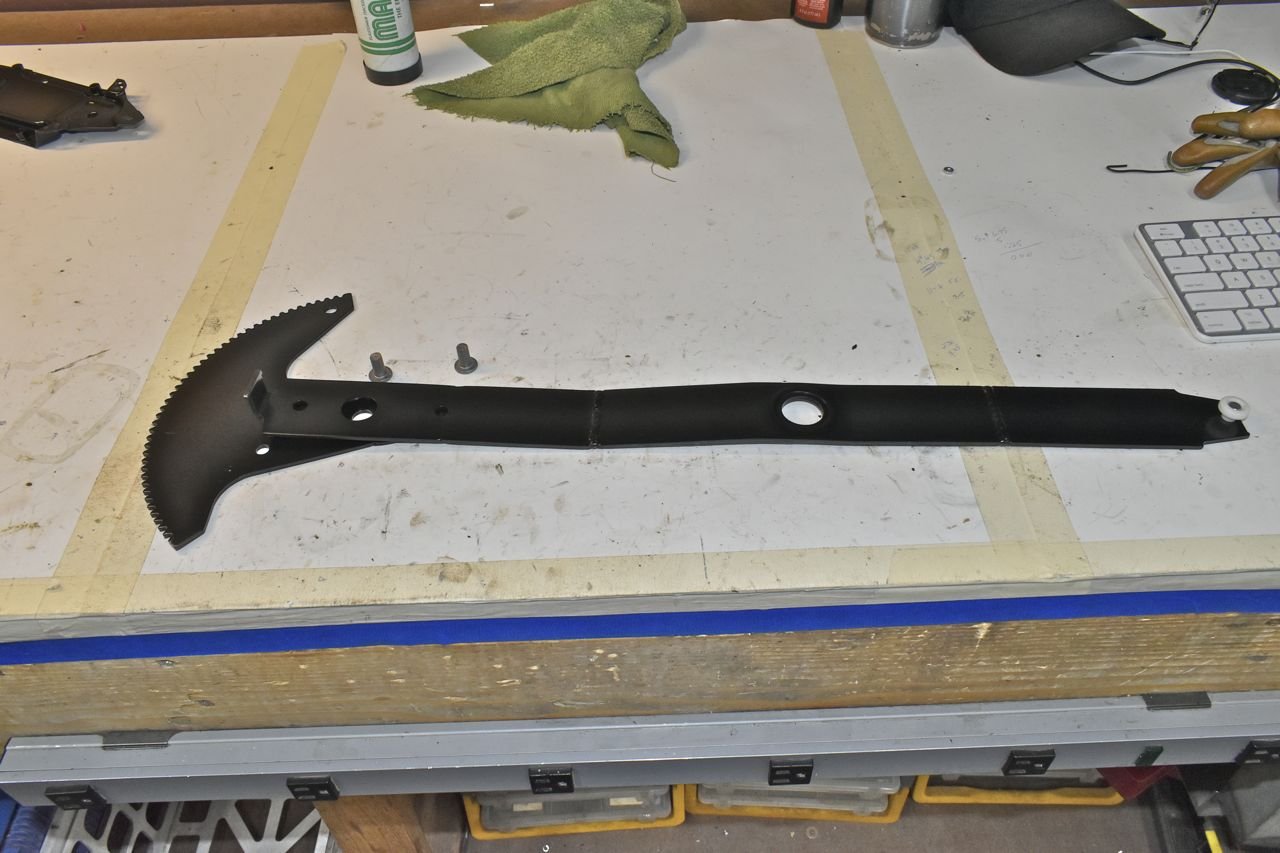
There's no room for nuts and bolts so this has to be riveted back together.

More parts from Mcmaster.

I used almost all of a 20 ton press to set those rivets.

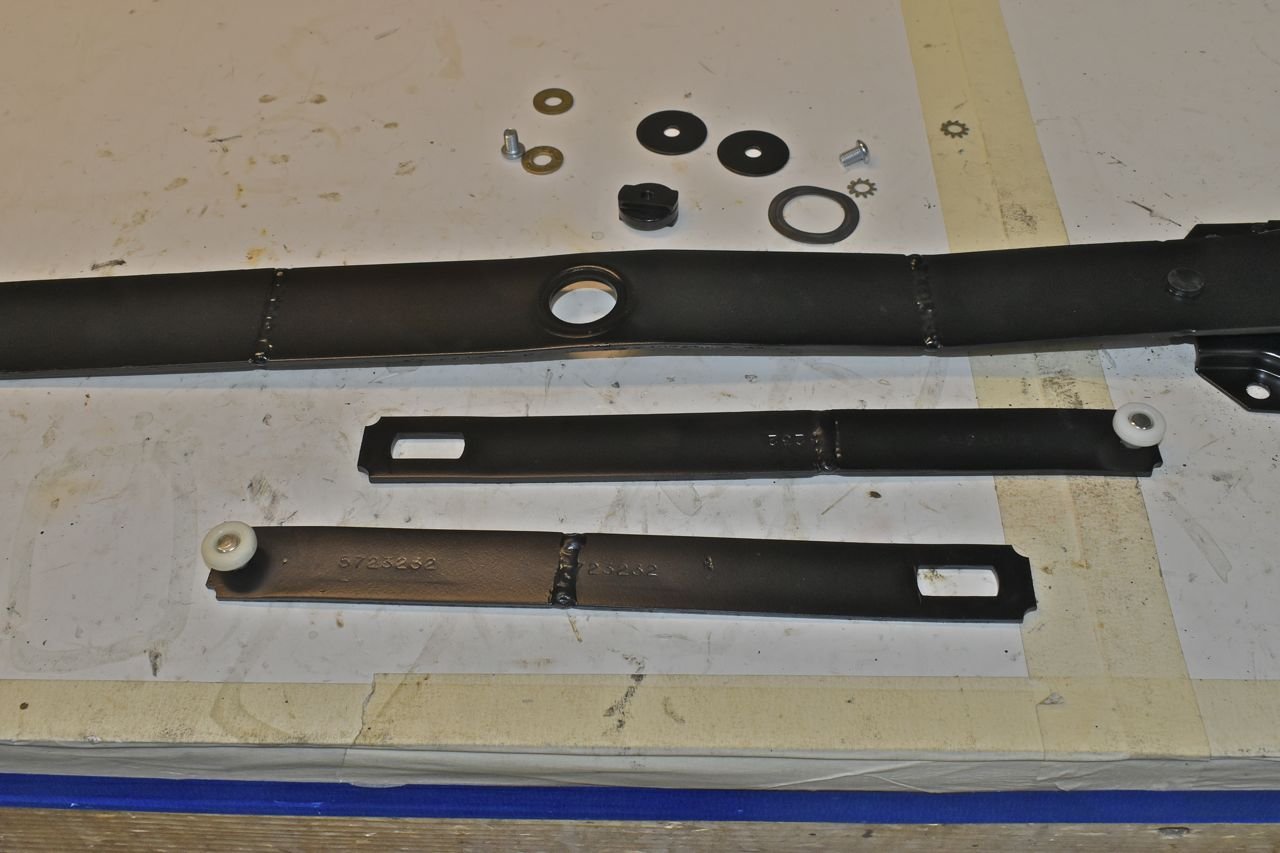
Next is to assemble the arm onto the base. Now originally this is all swaged together and I had to grind it all off to separate the pieces. Since the metal is ground off the plan is to bolt it back together by centre drilling the spring reference pin then tapping it.

The antirattle washer and fresh grease.


The nice part about this is you can take it apart to service it (clean and regrease) again if needed in the future.

The same was true with the swing arms. It was swaged originally, but now it bolts together with fresh grease.
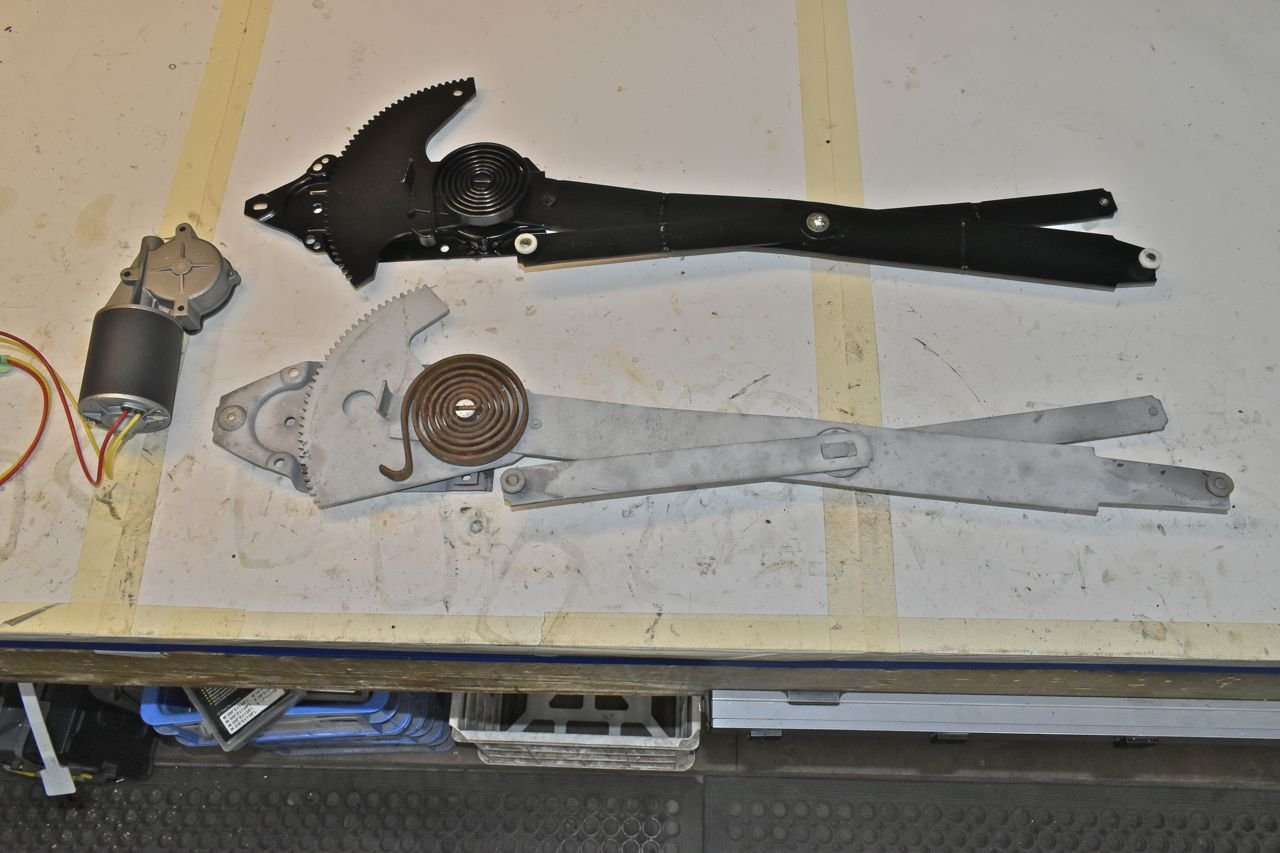
Here's an OEM 65-68 front door power regulator for a 2 door hardtop and the one I cobbled together.

They both mount in the same place and they both take the original style Ford motor.
But does it work?
Yes, yes it does and here's the proof. This is the 1965/6 door but it should work in the 1968 door.
Video : click here to watch.
Now to make the other front door power regulator and I have no idea about the rear quarter windows yet.
Note 1:
I didn't use the sector gear from the manual regulator. It's from the newer Ford truck regulator that uses the same motor. It's just "close enough" in radius and arc length to the original 60's Ford power regulator sector gear.
As for the speed of the window, a few things to mention here as well. First there are no belt lines installed and rubbing on the glass to slow it down a bit. Secondly it's a brand new motor and all the lube in the regulator is fresh. That's a big key note right there. When I took apart the old 60's Ford power regulator the grease was all dried up and had rust in places you couldn't see or normally get to and it was stiff to move the arms. The last key note is I'm using heavier gauge wiring than Ford ever did. I have less voltage drop across the switch and wiring than a factory setup. I am sure it was just as bad as Ford headlamps where there's almost a 2 Volt drop from the battery to the headlamp bulbs.
Note 2:
The gear teeth on both the sector gear and motor have the proper pitch and depth as the 80's Ford pick up regulator (using the base plate and sector gear) use the same motor as the 60's Fords, that's the key piece. Otherwise I'd have to make a new sector gear from scratch and whilst I have done that in tempered steel (1060) I don't think I would have bothered with this particular project as it's really tedious in a mill with a rotary table and all done manually.
Cheers
This is the current end of this thread unless more is posted. And yes, more will be posted.
‹ the end ›
Click here to continue to part 61