1966 Ford LTD Resto-Mod : 032 Custom Stainless Steel Transmission Cooler and Oil Cooler Lines
2023, November 14
1 - 2 - 3 - 4 - 5 - 6 - 7 - 8 - 9 - 10 - 11 - 12 - 13 - 14 - 15 - 16 - 17 - 18 - 19 - 20 - 21 - 22 - 23 - 24 - 25 - 26 - 27 - 28 - 29 - 30 - 31 - 32 - 33 - 34 - 35 - 36 - 37 - 38 - 39 - 40 - 41 - 42 - 43 - 44 - 45 - 46 - 47 - 48 - 49 - 50 - 51 - 52 - 53 - 54 - 55 - 56 - 57 - 58 - 59 - 60 - 61 - 62 - 63 - 64 - 65Hello again,
Thought I'd post a little more progress on this project car.
The body is bolted back down to the chassis, the steering is connected, the mechanical parking brake is connected, the hydraulic brakes are connected, and the carburetor is connected. It's slowly coming together. Of course all these rather simple check list items seemed to fight me in one way or another.
For the steering, what should have been a simple hookup, took 20 minutes because I took to the time to centre the body shell on the chassis and the mounts, this is not where Ford slapped it together. As a result in order to get the clearance right between the column flange and the steering gear the entire column had to be loosened and adjusted inward towards the instrument cluster.
The hydraulic brakes were a nightmare. Here I was so worried about all my hand made stainless inverted flares I made leaking, it turns out, I had one leak and that was because I never tightened the bloody thing to begin with. It was the rear line that goes from the chassis to the rubber brake line over the axle.
Here I am thinking as I'm filling the master cylinder up and seeing the rear brake level going down, I'm thinking wow those are self bleeding nicely.. Huh huh... If I has just looked under the car I would have caught that one sooner but I was fixated on the front brakes first.
So I'm vacuum bleeding the front brakes and slowly the pedal is building up, so I decided to start pumping it to help push air towards the wheel cylinders, so the pedal is building up and starting to feel good then pop, goes to the floor and I hear fluid dumping out. The front wheel cylinder blew.
Fearing oil soaking into the shoes like a mad person I rush to take the entire wheel down to the backing plate and was able to rescue the shoes in time. I took the wheel cylinder apart and couldn't find anything wrong with it. So I put it back together and it's fine.
I also had a copper washer leak on the other front wheel, just had to replace that one. Also as ford4V429 stated those cheap pink RPV's from Summit leaked like a sieve and that was the only part I had to animalize to stop it from leaking.
Ended up vacuum bleeding all four wheels until the pedal was rock hard even with a vacuum source (HVAC pump) on the booster. With the self adjusters adjusted manually to where the drum just barely touches the shoes the brake pedal with power assist only goes down 3/4" and the first 1/4" is mechanical free travel.
So I'm happy with that and all the leaks have been mended.
The gear shift is also connected and properly adjusted. I took the time to shim everything off properly and reduce the backlash (slop) in the linkages and it is way better than it was. It's still loose by todays standards, but probably this is how it came from the factory.
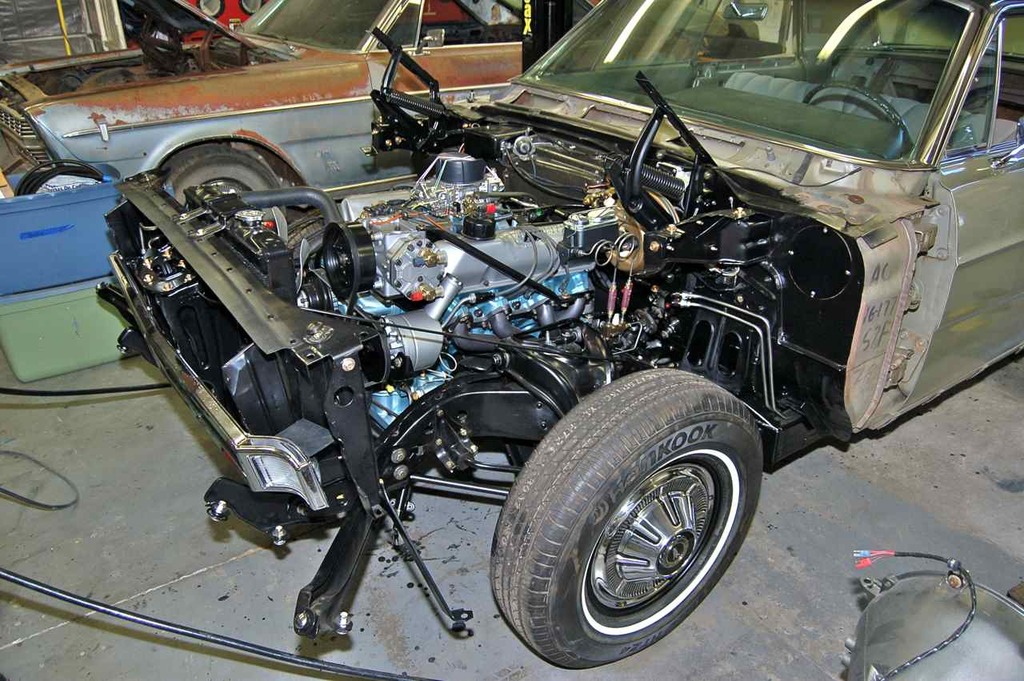
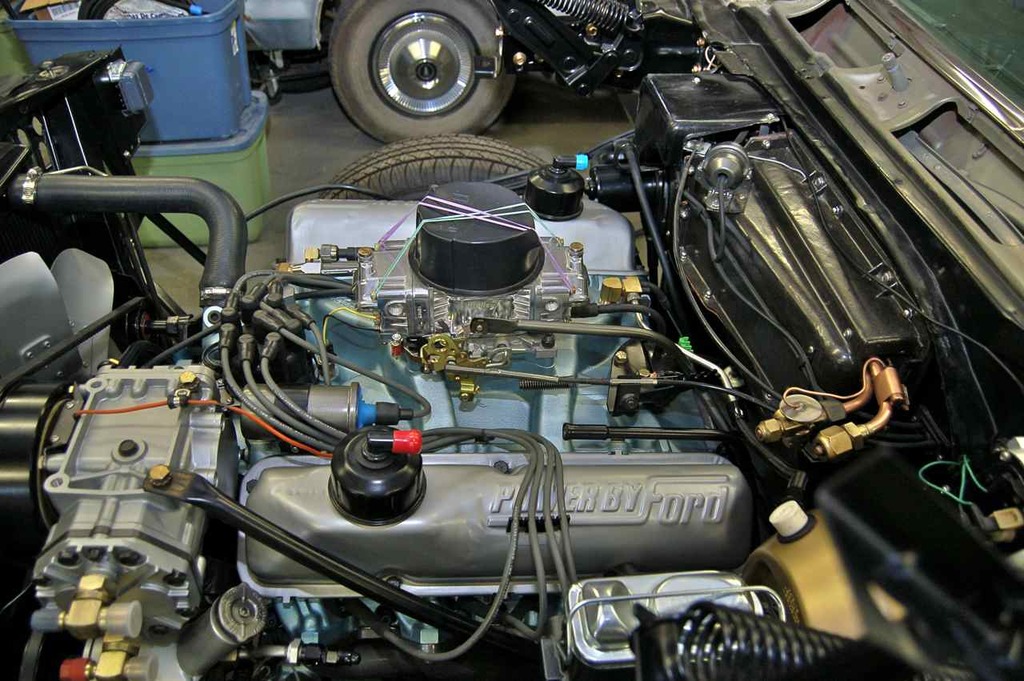

I finally fitted the transmission cooler in and it's connected. This was a nightmare.

Now I just have a similar nightmare to finish up (engine oil cooler) and fit the horns and the grill area is done.

Rant
About the 4100, I certainly will say it's a fantastic carb for regular driveability. However in my own experience with these things and a forum posting where three 4100 with different venturi sizes were tested to todays carb flow bench standards as new carbs are rated in, it was found that even the largest 4100 barely flowed over 500 CFM. If I can find that link I'll post it. It's fascinating to read. Here's the link: Autolite 4100 CFM Test Results
But in case someday that forum link is taken down, here's the good stuff:
I've gotten tried of all of the arguments about the CFM capacity of the Autolite 4100s. A couple of weeks ago I took five of them in a local speed shop and put them on Superflow 1020 flow bench. One 4200 had the small 1.08 primary venturi and the rest had the larger 1.12 primary venturi. The small one flowed 441 CFM, the larger ones flowed 503 to 528, averaging 520.
These results were very close to what I expected for the 1.08 but 50 CFM higher for the 1.12. Still the 1.12 does not flow 600 CFM as claimed by some vendors.
The testing was done at Charlie's Automotive in Apex, NC. They are an engine builder for the local NASCAR guys. The tests were done on a Superflow 1020 flow bench which is computerized and automatically corrects the output data to standard temperature and pressure. The flow testing was done at the SAE standard for 4 BBL carburetors - 1.5 inches of mercury, which is the same standard used by Holley, Edelbrock and Carter.
| Type or No. | Primary Venturi | Primary Bore | Secondary Venturi | Secondary Bore | CFM Test Results | |||||
| C6AF-E. | 1.08 | 1.437 | 1.18 | 1.437 | 441 | |||||
| EDT 84D | 1.12 | 1.562 | 1.18 | 1.562 | 503 | |||||
| EDT-17BR | 1.12 | 1.562 | 1.18 | 1.562 | 523 | |||||
| C4SF-B | 1.12 | 1.562 | 1.18 | 1.562 | 526 | |||||
| C4AF-DG | 1.12 | 1.562 | 1.18 | 1.562 | 528 |
Even with that aside, replacing a well tuned 4100 with a bog standard Holley 1850 600 CFM and the engine has more top end and off the line grunt on the same engine. I'd be very inclined to believe those findings.
If this was more or less a factory rebuild with those restrictive OEM exhaust manifolds I'd use it. And whilst I have a 750 CFM on this now, which is a tad too big, (650-80 would be optimal) the 4100 would be the limiting factor on this engine if I used it.
But I have considered it when I was in the thick of heavy research on parts to use for this engine build. The std 330 dollar Holley vac sec 750CFM won out on the best carb to use at the end of the tally sheet.
End of Rant
A little more progress.
Installed the new rear drains.


Onto the dreaded engine oil cooler mounting and plumbing...
For a while I really didn't think the cooler or the lines would fit in the small space. I spent 5 hours just bending these two lines. These are 1/2" stainless and a complete &#^#$&^%#()........ to bend. Not to mention being so short they have to be bang on as not to put undo stress on the cooler.

And the reason for the crazy snake in the one line is for the horn to rest into.
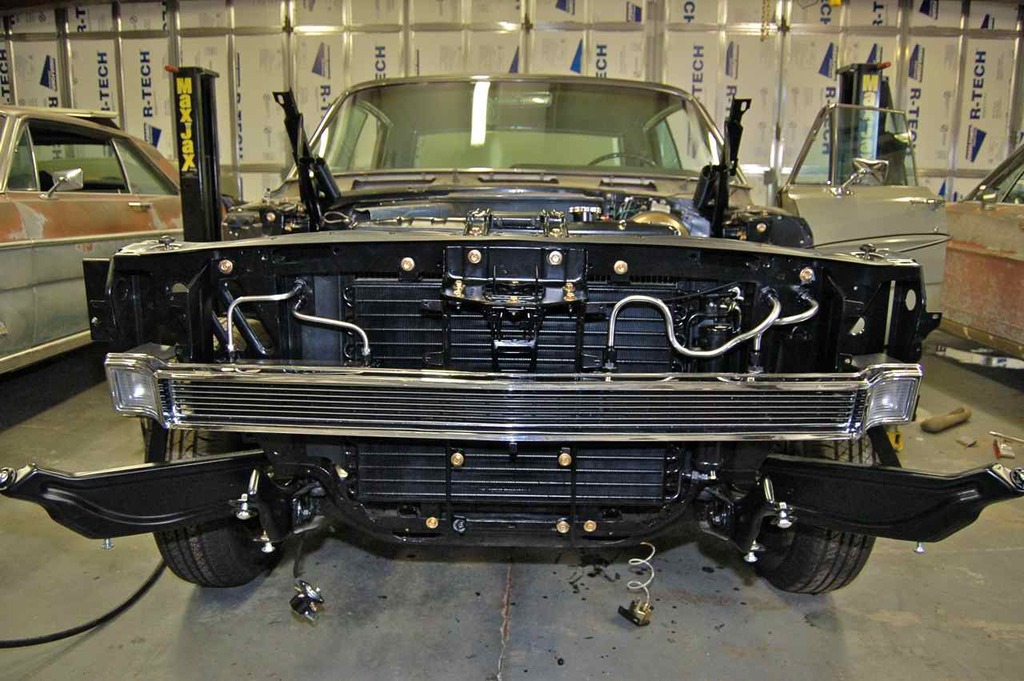

I had to move the horns about 1-1/2" inches over to clear.
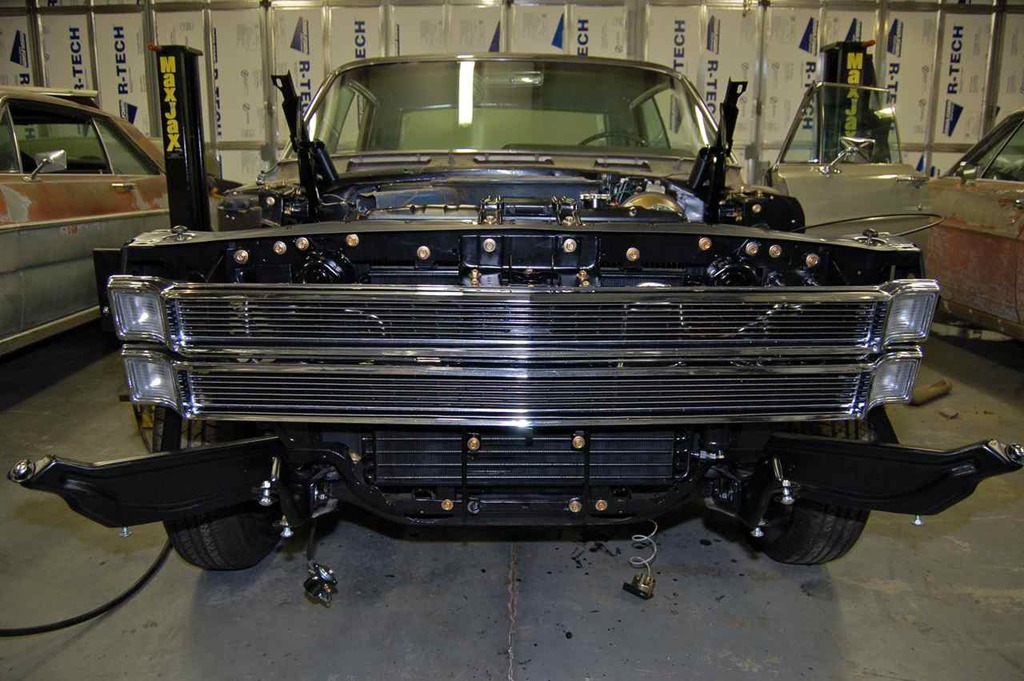
There is very little room behind this grill now...
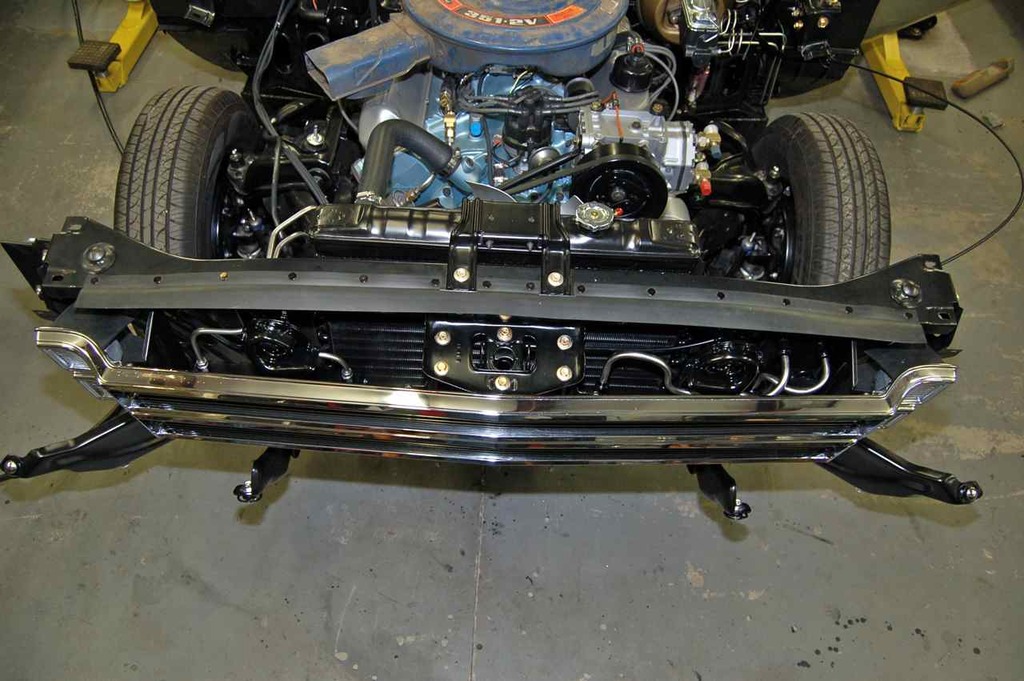
Plumbing the rest should be easy peasy compared to this. Plus I am using AN flex line for the engine bay area for the engine oil, P.S. lines and fuel. Actually looking forward to that doddle next.

New horn ring, again, as it helps not to be a ding dong and neglect to notice that retainer for the LTD/XL/Country Squire is different than the standard galaxie or Custom. The centre emblem area is slightly different on these models and uses a horn ring retainer that needs the 3 ear extensions. Otherwise the standard galaxie/Custom uses the 3 inner holes in this one with the ears lopped off.
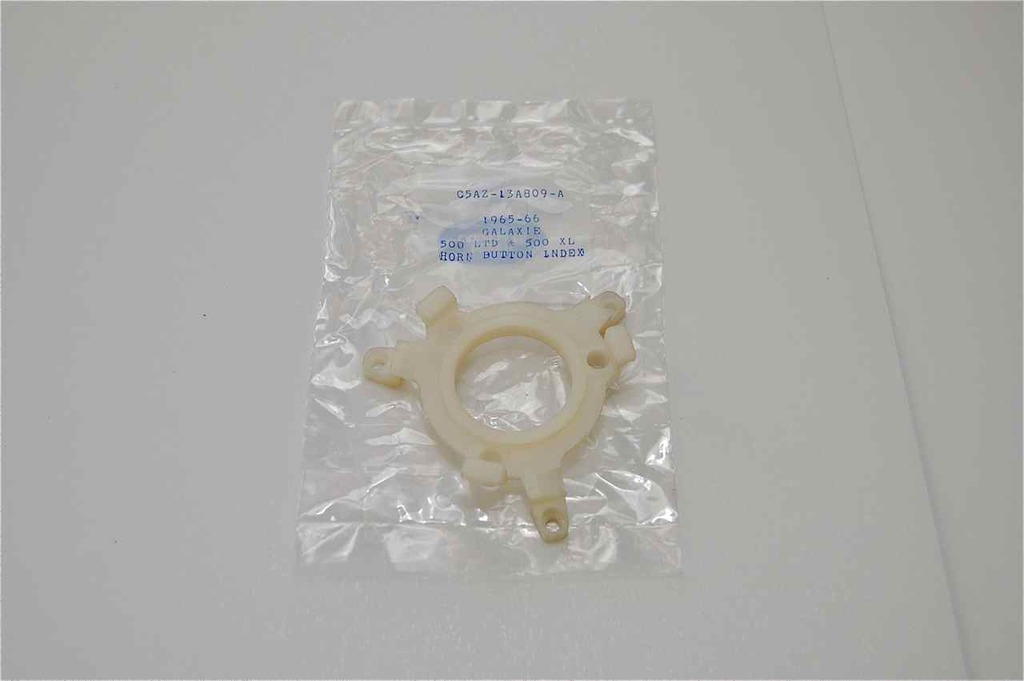

Even something so simple as repairing the horn ring can throw you for a loop.

Aside from one more small bracket I need to make in the engine bay for the dual stainless fuel lines dangling about in the corner it's ready to have some inner wings blasted and dry hung on the car to see what new holes I need to add and what original holes need to be plug welded closed.
Cheers...
Click here to continue to part 33