1966 Ford Galaxie 500 XL Refurbishment : 007 Suspension Assembly
2023, November 14
1 - 2 - 3 - 4 - 5 - 6 - 7 - 8 - 9 - 10 - 11 - 12 - 13 - 14 - 15 - 16 - 17 - 18 - 19 - 20 - 21 - 22 - 23 - 24 - 25 - 26 - 27 - 28 - 29 - 30 - 31 - 32 - 33 - 34 - 35 - 36 - 37 - 38 - 39 - 40 - 41 - 42 - 43 - 44 - 45 - 46 - 47 - 48 - 49 - 50 - 51 - 52 - 53 - 54 - 55 - 56 - 57 - 58 - 59 - 60 - 61 - 62 - 63 - 64 - 65 - 66 - 67 - 68 - 69 - 70 - 71 - 72 - 73 - 74 - 75 - 76 - 77 - 78 - 79 - 80 - 81 - 82 - 83 - 84 - 85 - 86 - 87 - 88 - 89 - 90 - 91 - 92 - 93 - 94 - 95 - 96 - 97 - 98Now onto some of the steering parts.
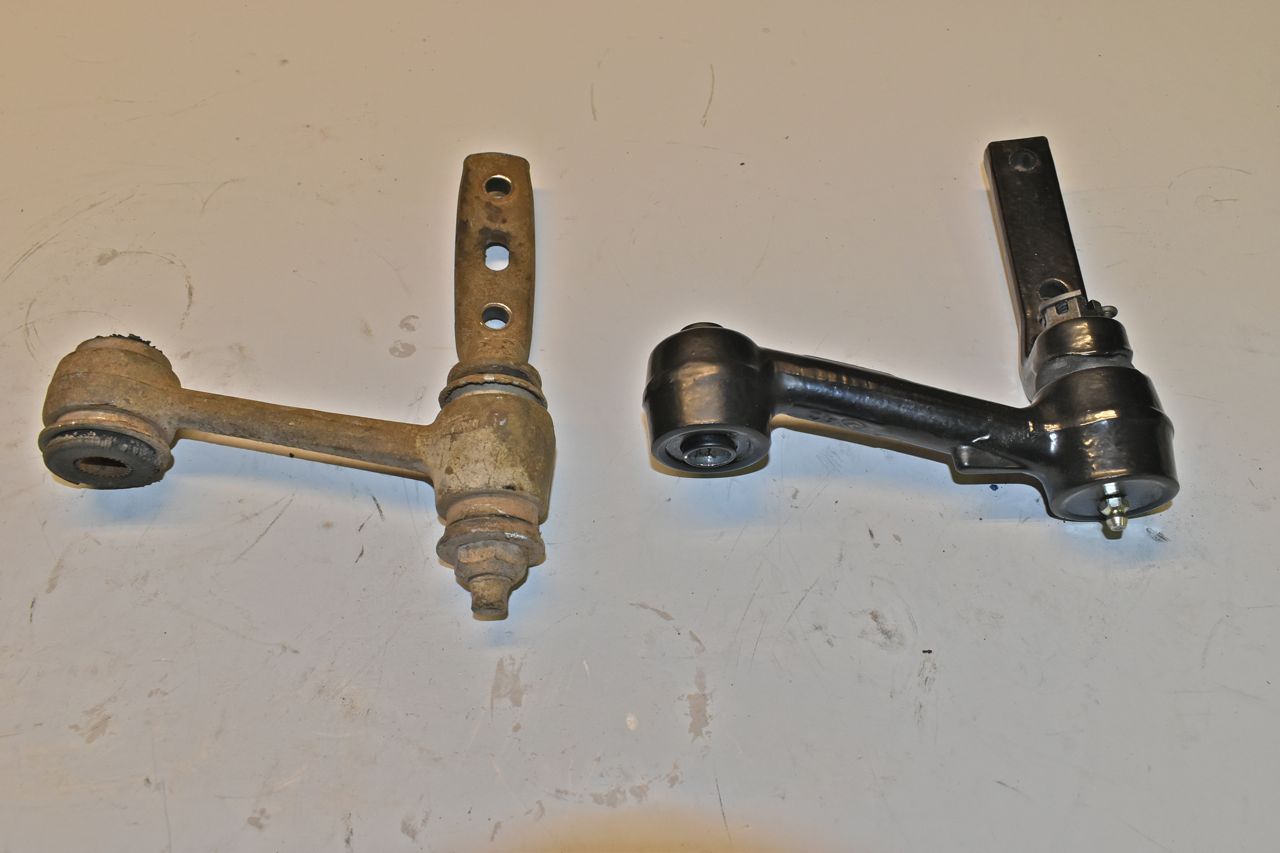
There are two different kinds of idler arms you can use. The original one (crusty one on the left) using rubber bushings, you can still buy these or buy the greaseable bearing joint kind. I like the ability to grease moving parts so I opted for that kind.
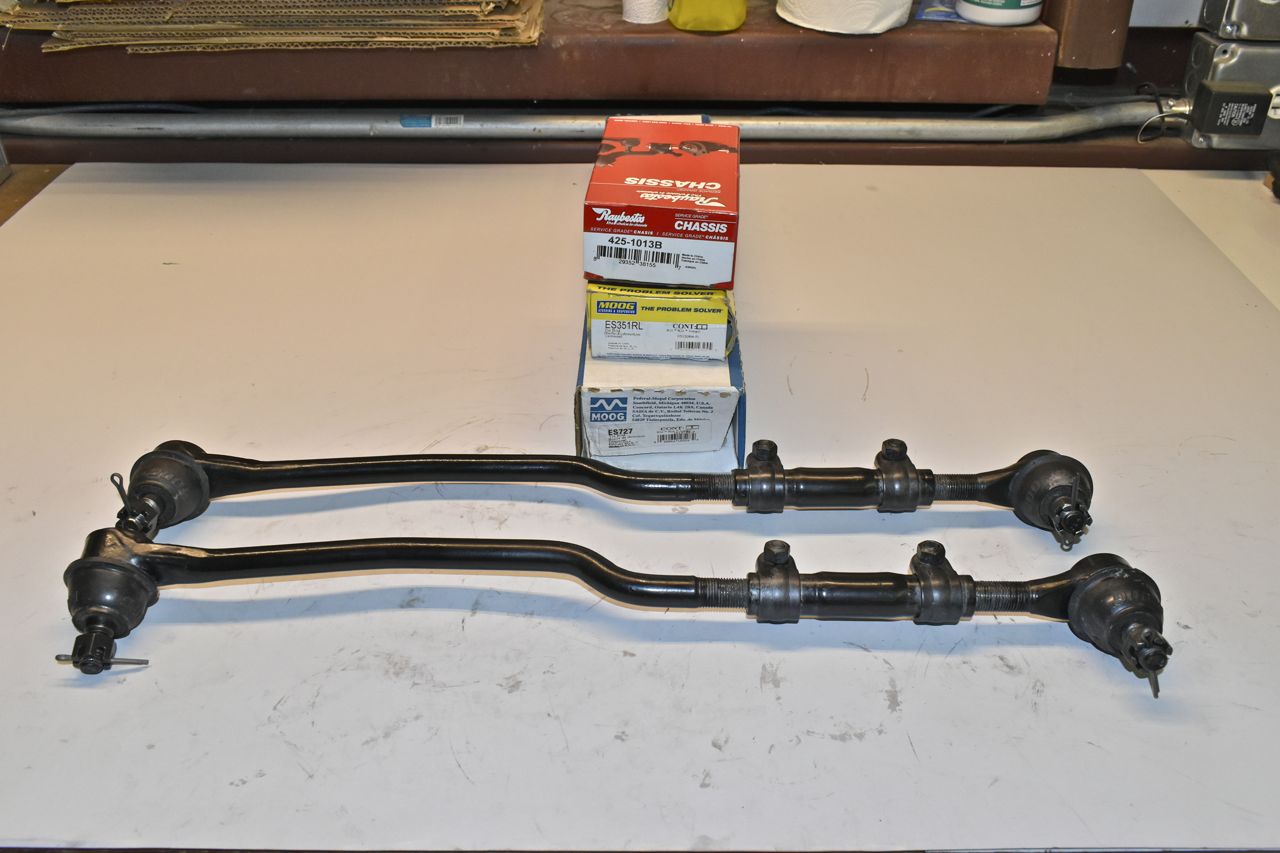
The tie rods were all new, even the coupler.
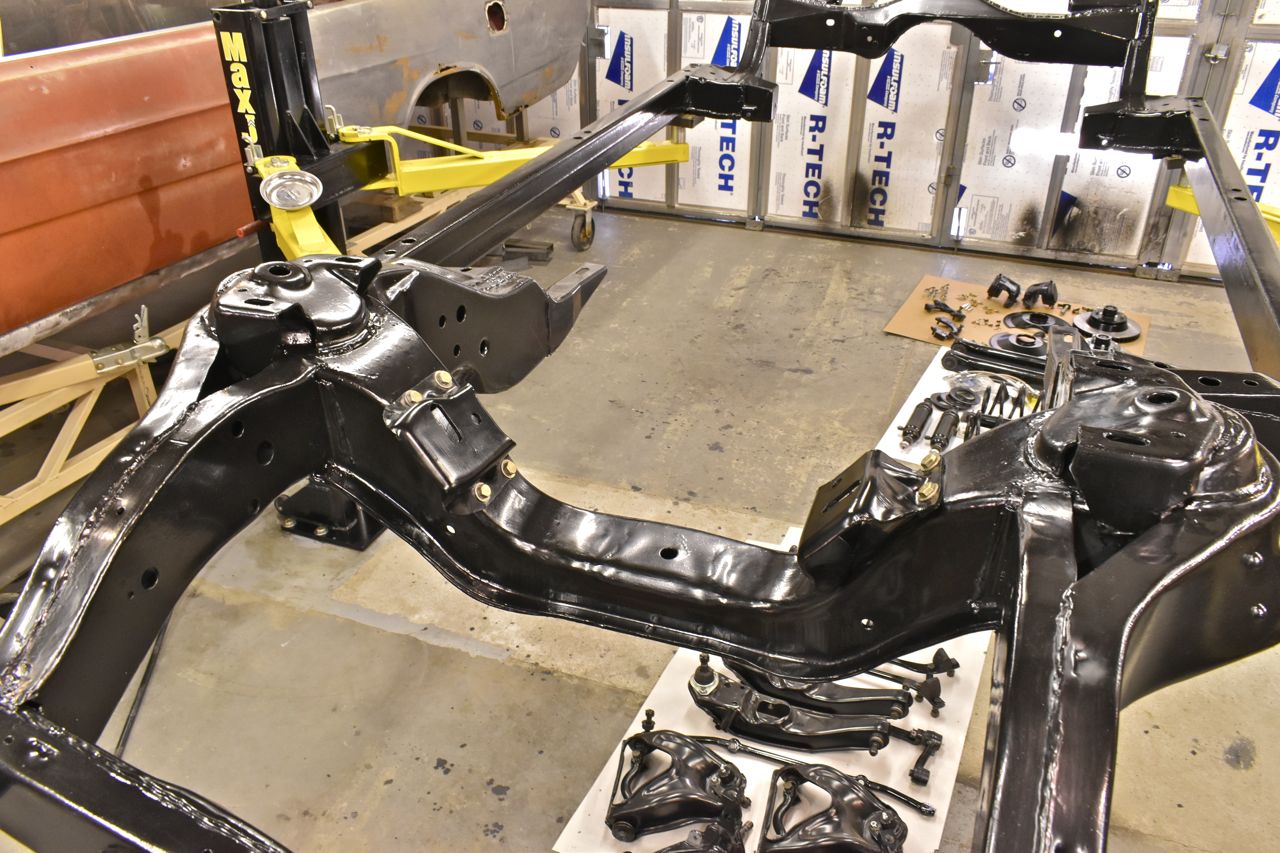
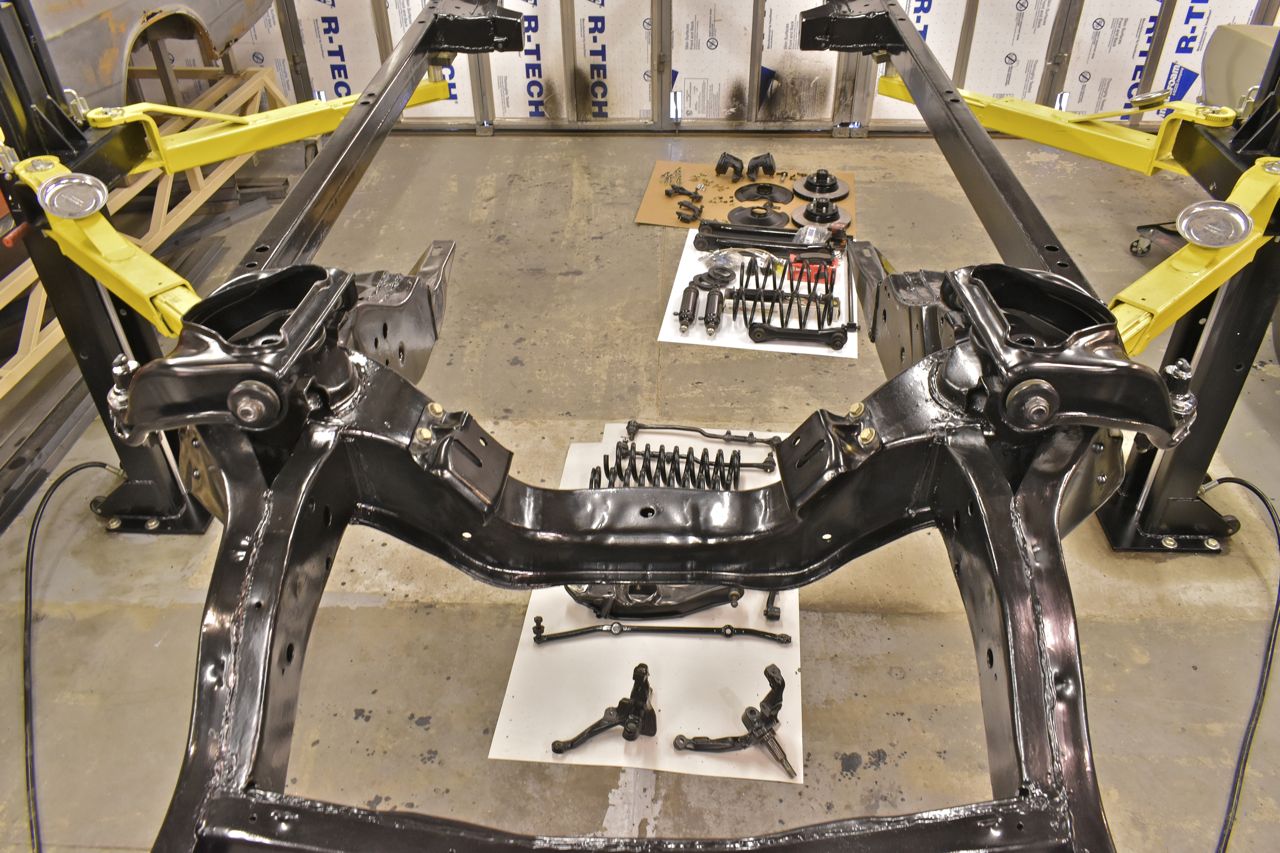
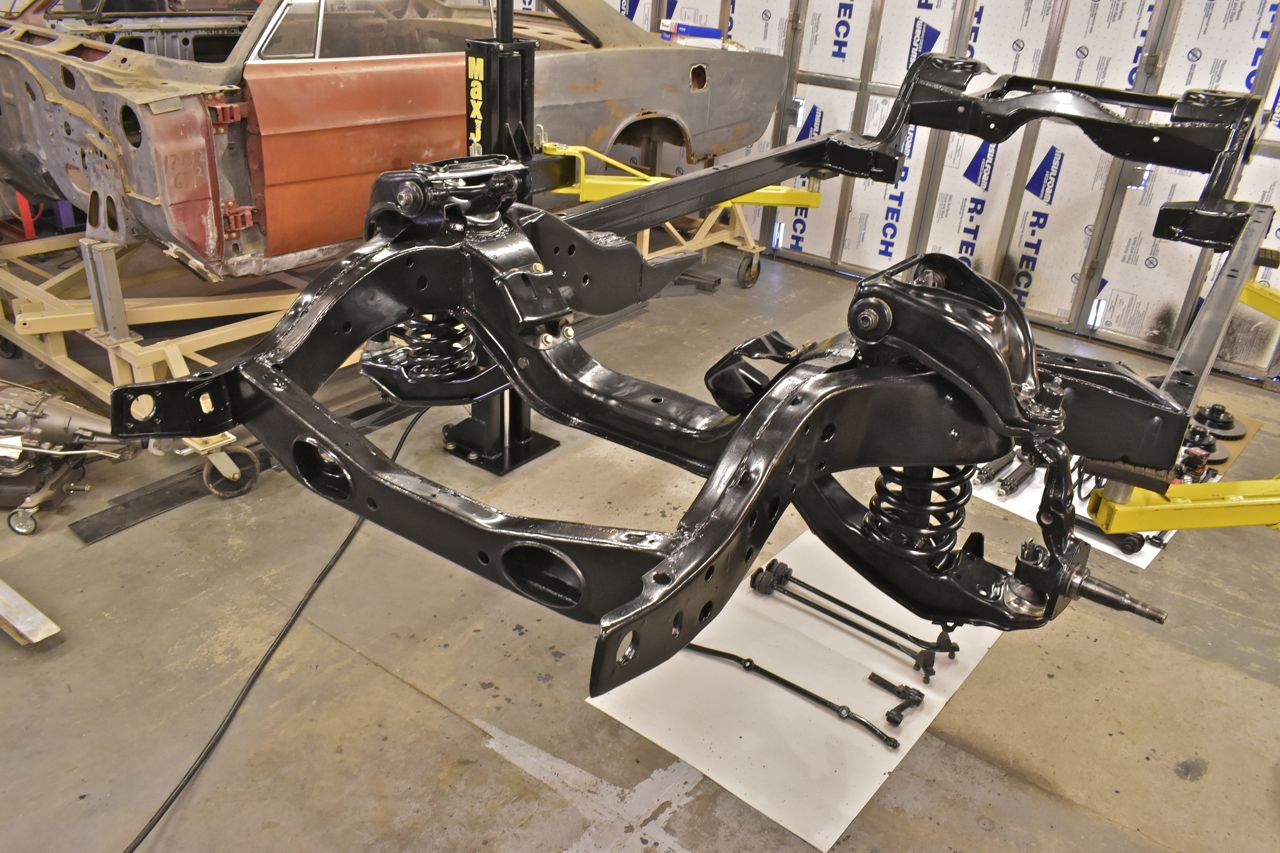
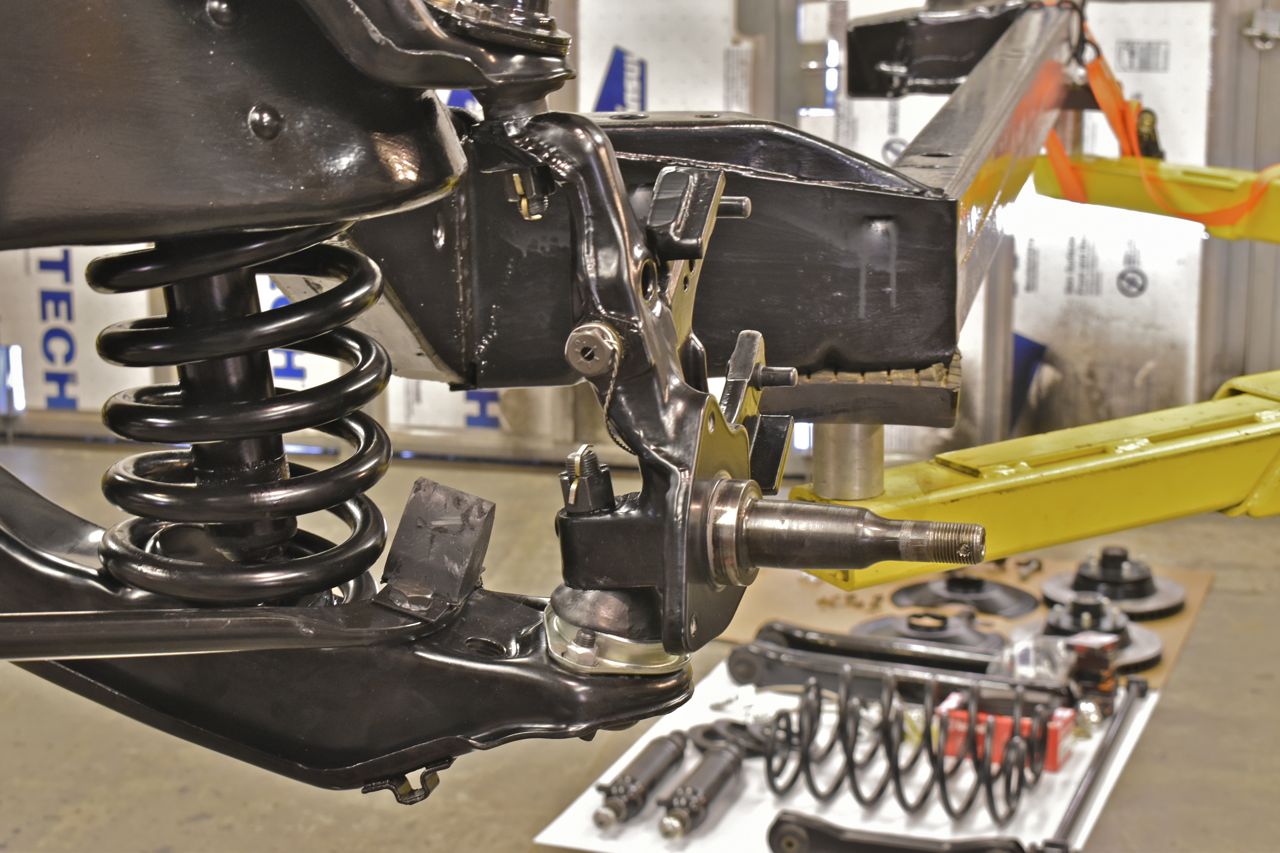
Now there's enough finished parts to start assembling.
Finally some actual progress, or so it seems to me.
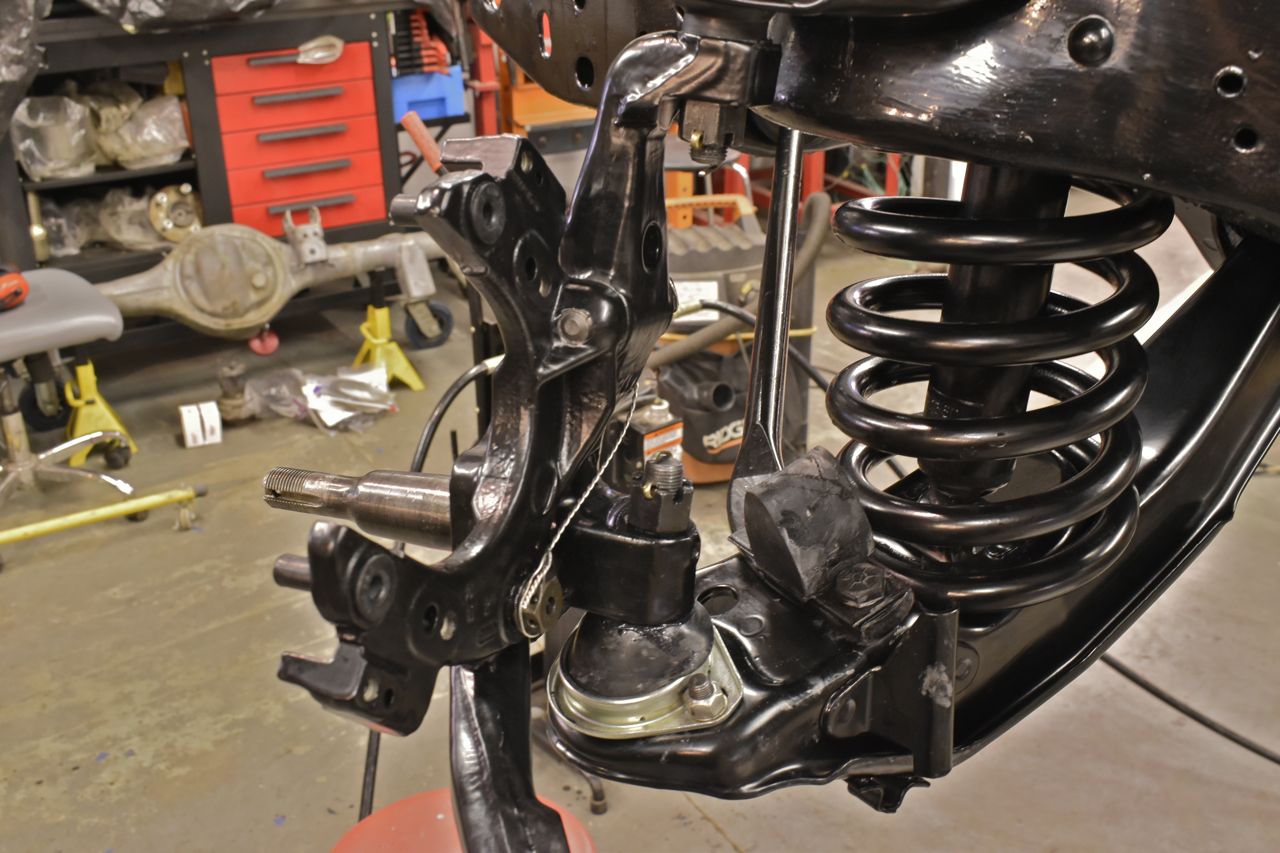
Engine perches go in first before lower control arms.
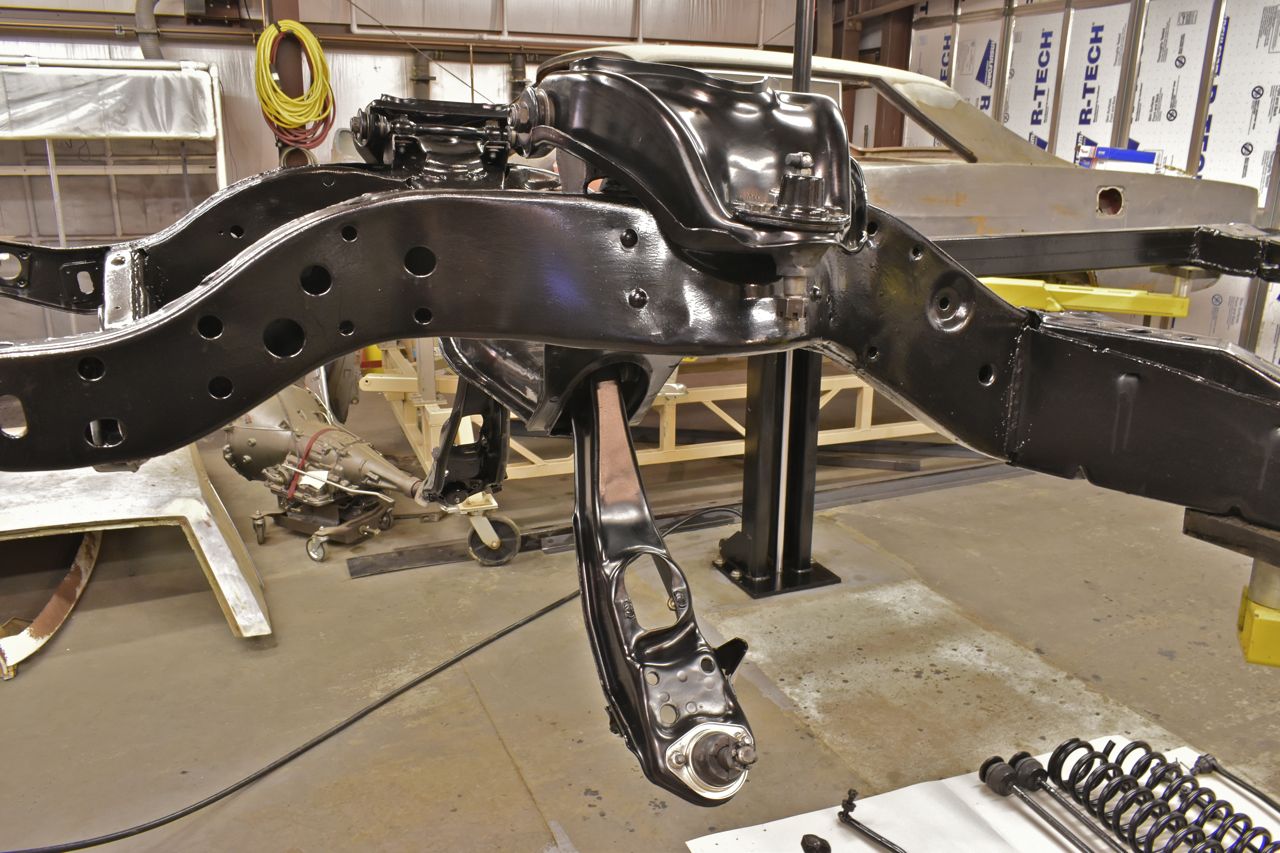
Next I set the upper control arms into place. I tightened them down half way on the adjustment travel.
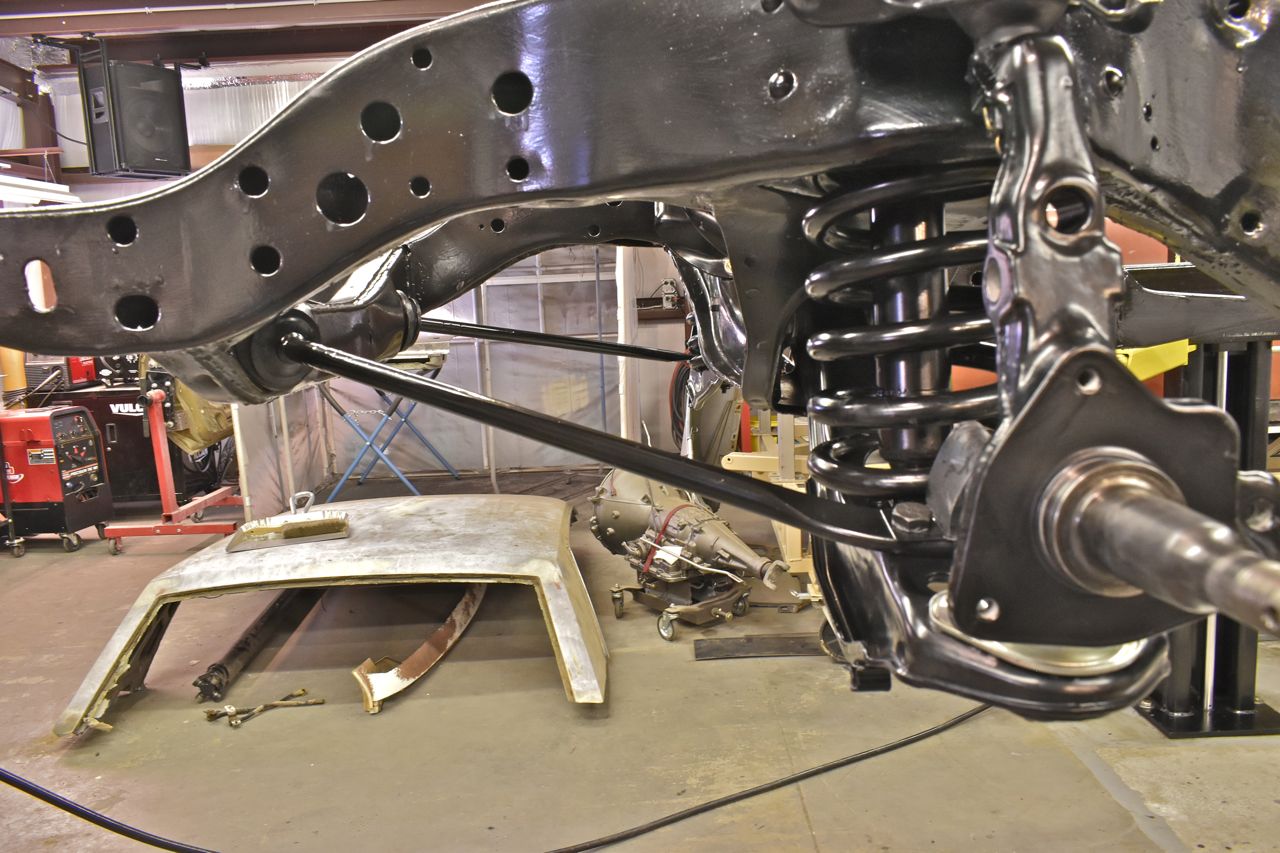
The lower control arms were then installed.

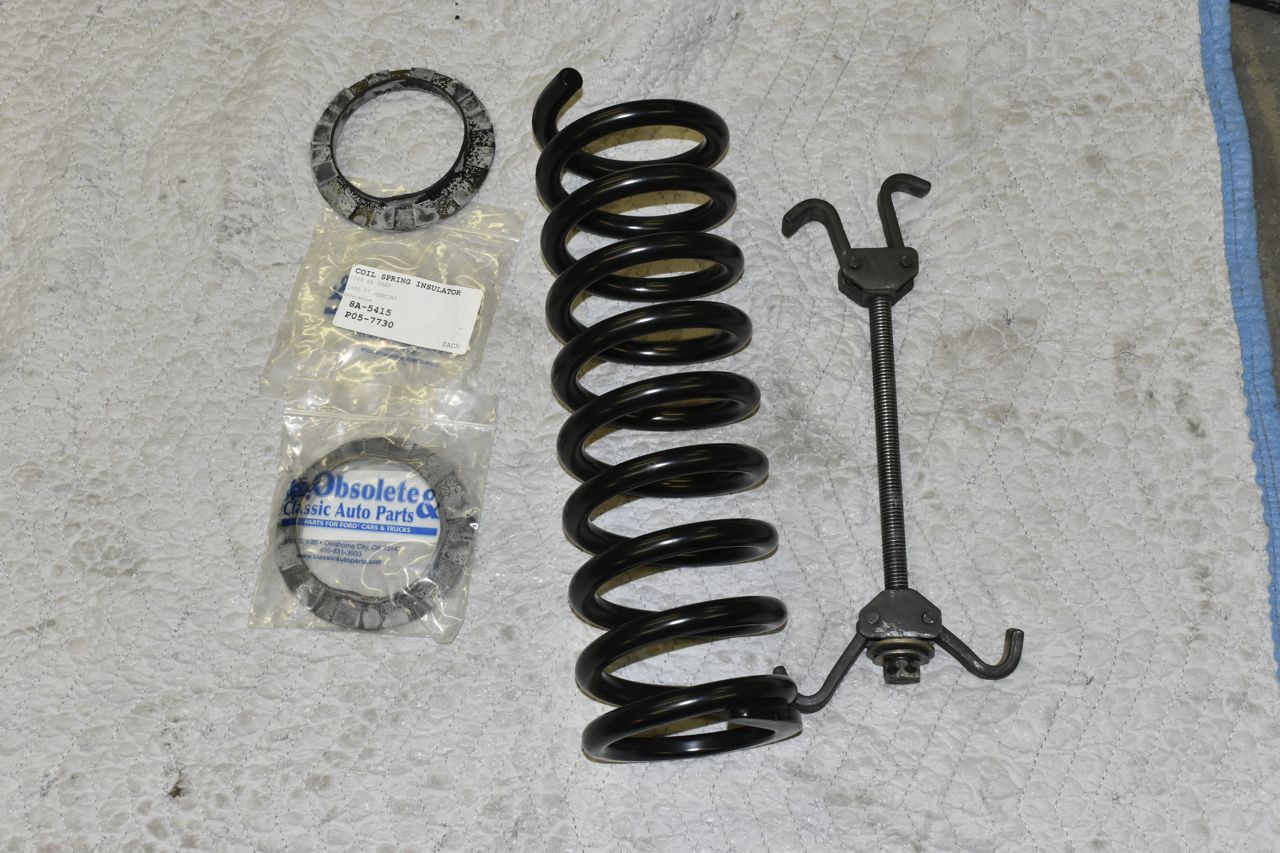
And now for the unpleasant part of the programme. Compressing these always makes me nervous. Well this time my trusty ol spring compressor failed. I was almost to the point where I could install it as it was very compressed, I just needed about an inch more. I had this on the moving blanket with my left hand holding the coil spring from turning and my right hand was operating the ratchet to tighten when the threads in the block gave out. Now the potential energy of this compressed is immense. The threads failed but in about 2-3 inches of skidding down the threaded rod welded them to the rod and stopped. 2-3 inches of sudden expansion doesn't sound so bad, but because I was holding on really hard with my left hand to keep it from turning the shock wave and sudden movement of the spring pulled my shoulder out for a moment and it popped back in. In about the time I thought, hymm that's novel, the intense pain quickly ensued. Yes I did scream my head off for about 7 seconds as it was frightfully painful. Darn near passed out. My shoulder still is very sore.
I ended up renting another spring compressor to finish this. As a side note the coil springs are powder coated as well along with new isolators for the top.
How I loathe thee, let me count the ways.... But they are in.
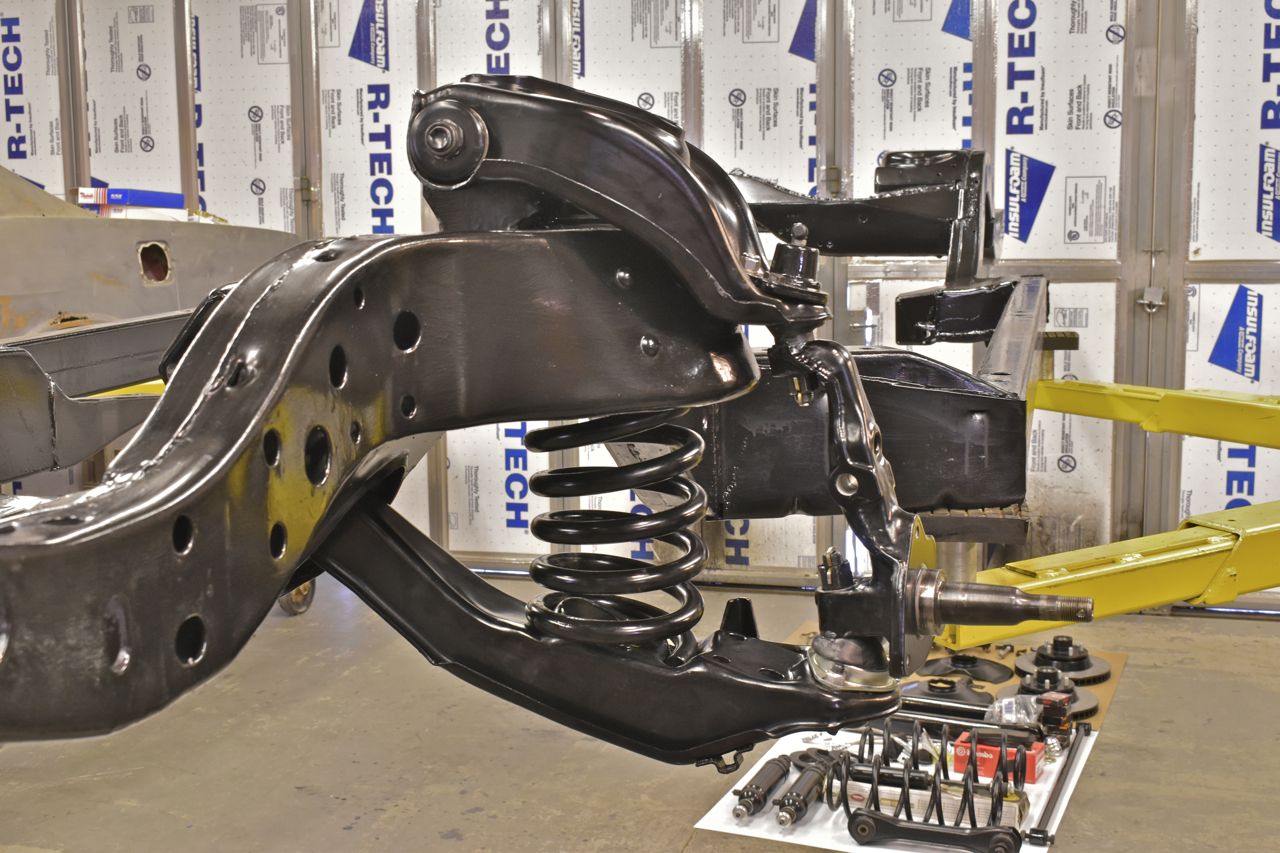
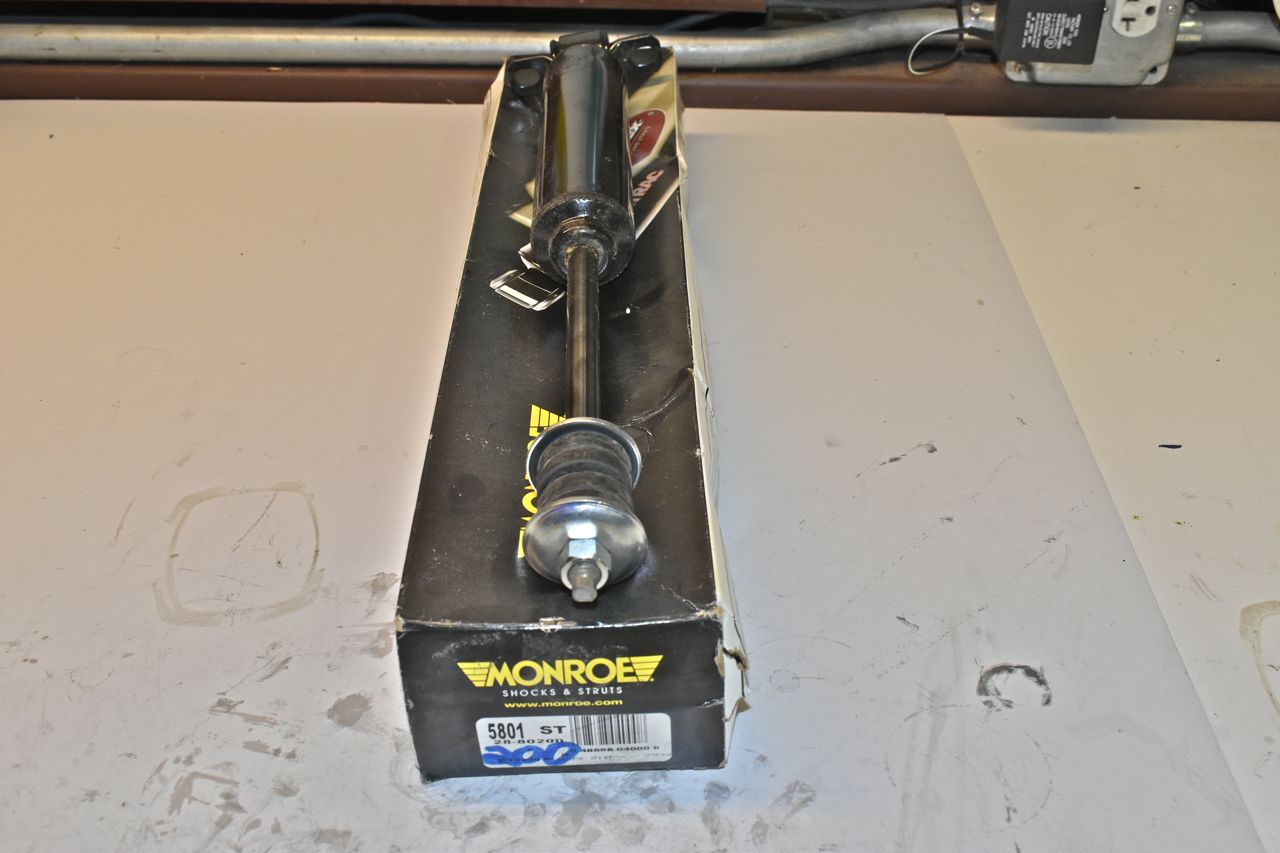
New shocks.
At this point I felt more comfortable having those loaded coil springs in there.
Radius arm rods (strut rods). A couple notes on some things. In already having done this on the 1966 LTD, I've learned that reproduction parts aren't always the best. If the original rubber bump stops clean up ok, I'll reuse those instead. On the bushing side, I've had nothing but problems with Raybestos and AC Delco bushings. They crack and split in two when tightening them. They are absolute rubbish. Through a good car chum pal of mine I was able to procure NOS Moog bushings for the 1966 LTD and this car. They do not split upon assembly.
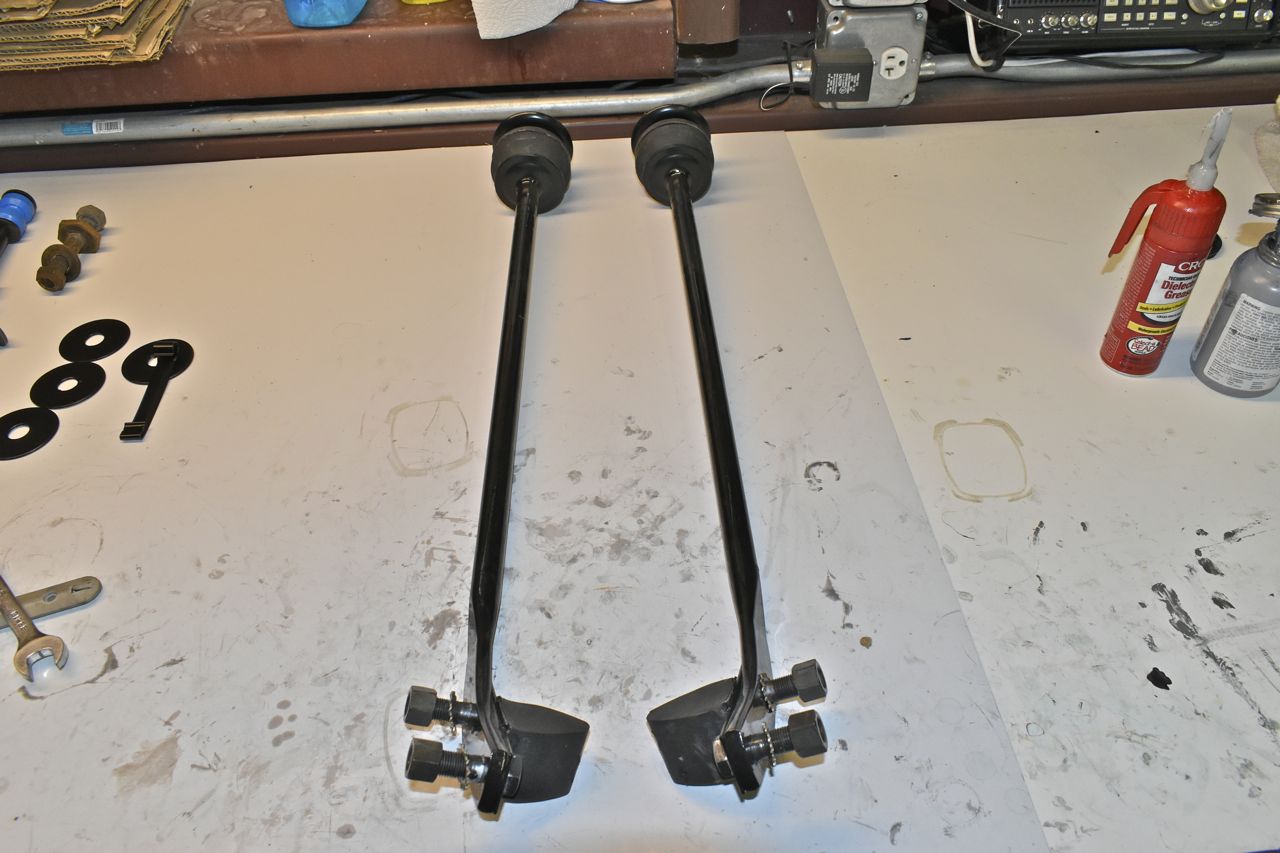
These take some wrestling to get in. The trick I learned is to use a ratchet strap on the lower control to pull back slightly to line the bolt holes up, then release the strap and tighten everything up.

These are the caliper brackets. These to were powder coated.

Well I never thought I'd use aircraft safety wire again and I certainly never thought I'd be using it on an Automobile. I find it amusing.