1966 Ford Galaxie 500 XL Refurbishment : 019 Custom Bracket Fabrication Tutorial
2023, November 14
1 - 2 - 3 - 4 - 5 - 6 - 7 - 8 - 9 - 10 - 11 - 12 - 13 - 14 - 15 - 16 - 17 - 18 - 19 - 20 - 21 - 22 - 23 - 24 - 25 - 26 - 27 - 28 - 29 - 30 - 31 - 32 - 33 - 34 - 35 - 36 - 37 - 38 - 39 - 40 - 41 - 42 - 43 - 44 - 45 - 46 - 47 - 48 - 49 - 50 - 51 - 52 - 53 - 54 - 55 - 56 - 57 - 58 - 59 - 60 - 61 - 62 - 63 - 64 - 65 - 66 - 67 - 68 - 69 - 70 - 71 - 72 - 73 - 74 - 75 - 76 - 77 - 78 - 79 - 80 - 81 - 82 - 83 - 84 - 85 - 86 - 87 - 88 - 89 - 90 - 91 - 92 - 93 - 94 - 95 - 96 - 97 - 98Rear Disc Brakes Continued
I thought I would do something a little different in presentation. I thought maybe someone would want to see how I make a bracket from conception to finish. I realize I jump a lot of steps and you only see a small fraction of the pictures that are taken. So for the rear hose brackets I will show the entire process how I came up with them for anyone new to this who is wondering how you do this at home.
So from a couple posts up you can see I need some sort of bracket to hold the flexible brake hose above and secure an adapter to the bracket so I can attach a solid line to the other side.
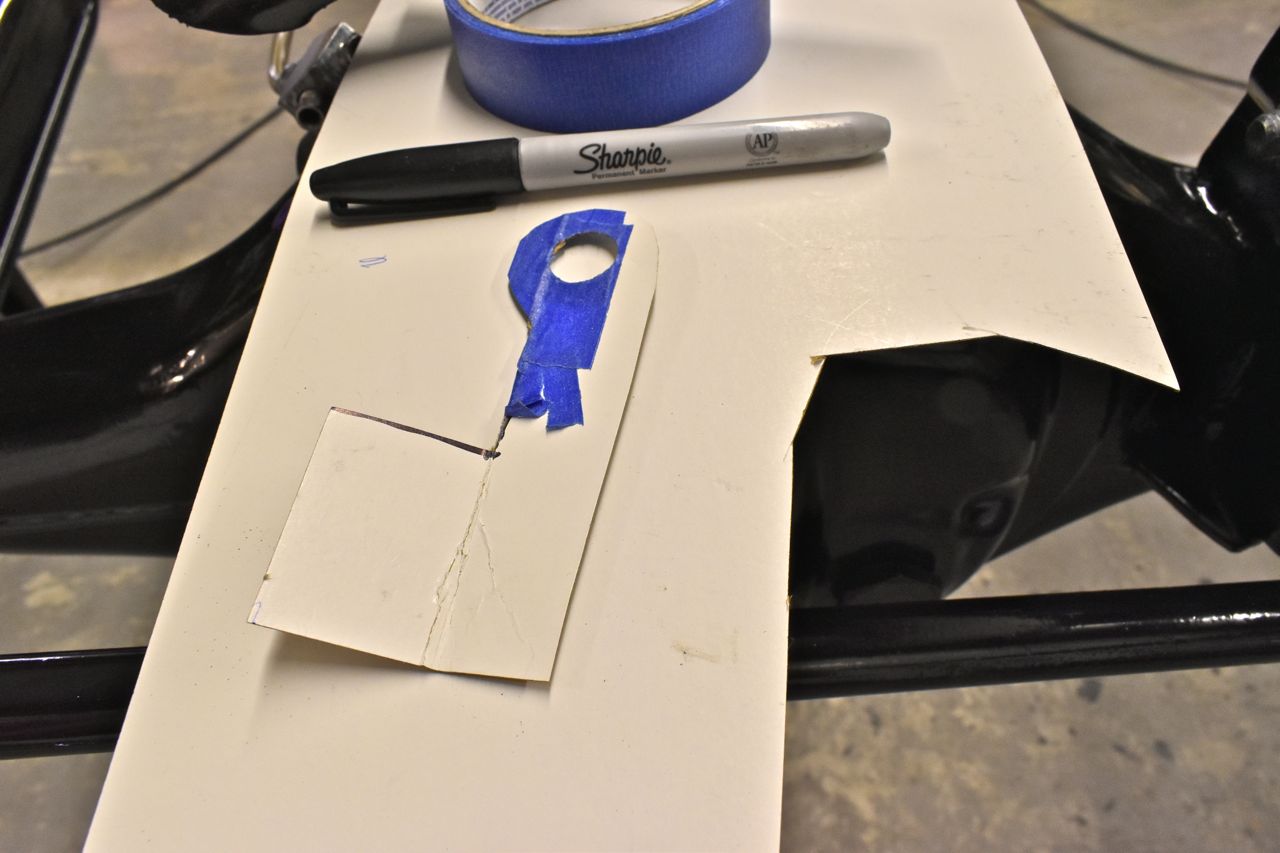
I am not very good at conceptualizing detailed imagery in my minds eye. Darn thing is practically blind. So I start off with simple card paper, tape, scissors, and a pen/marker.
I start off with simple orthogonal shapes; squares and rectangles. If I need more I use tape, if I need less it's scissors time.

I continue till I have something I like. Now when I trim I'm not cutting to have straight lines, close enough will do on something like this because I have some wiggle room around the bracket.

So my first template is crude but critical dimensions are accurate.

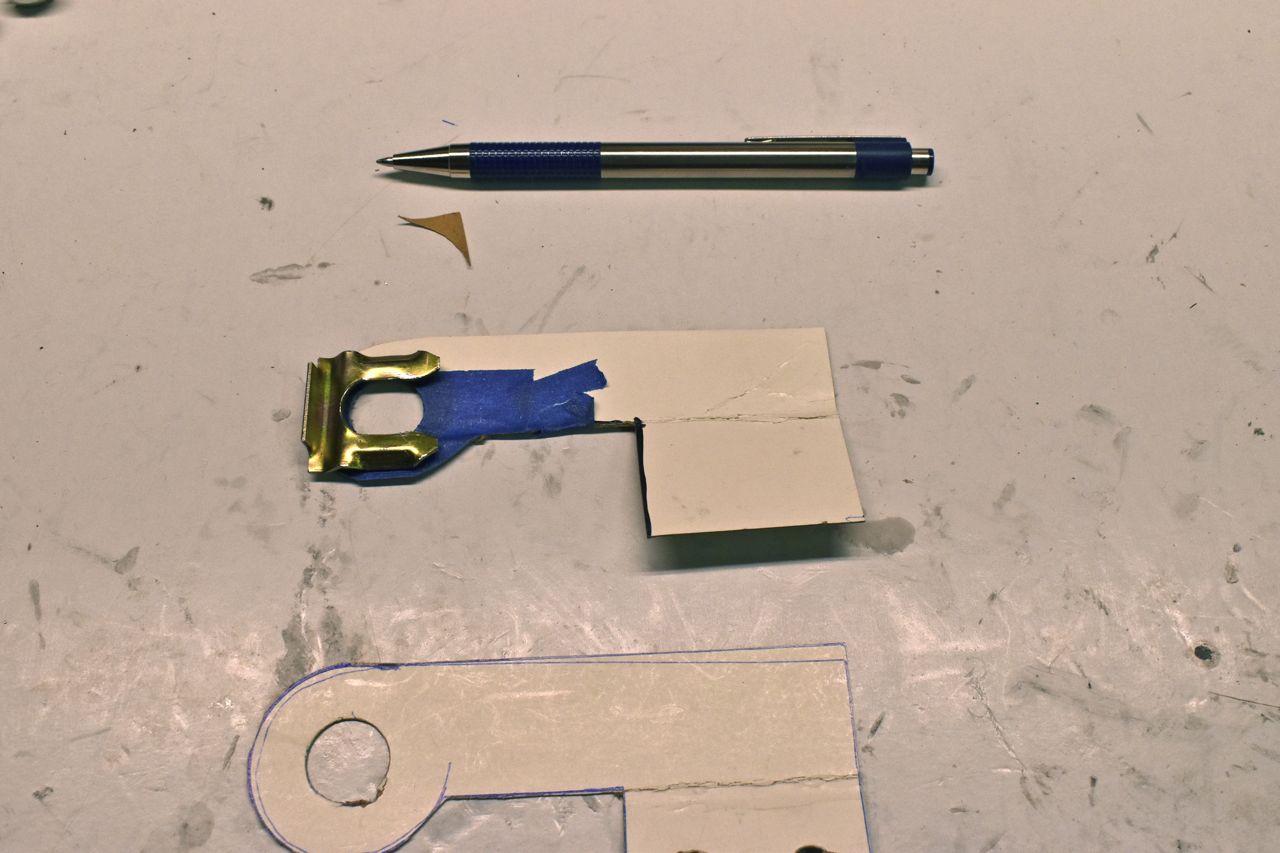
Now I can go to the table and true up the sides (make them parallel and perpendicular) on another template.

Next I added the bolt holes.

and I checked to see if the original circle I cut out would be big enough to hold the clip. It wasn't. So the template under it has a bigger circle.

That'll work.

You certainly do not need any special stencils for something like this.

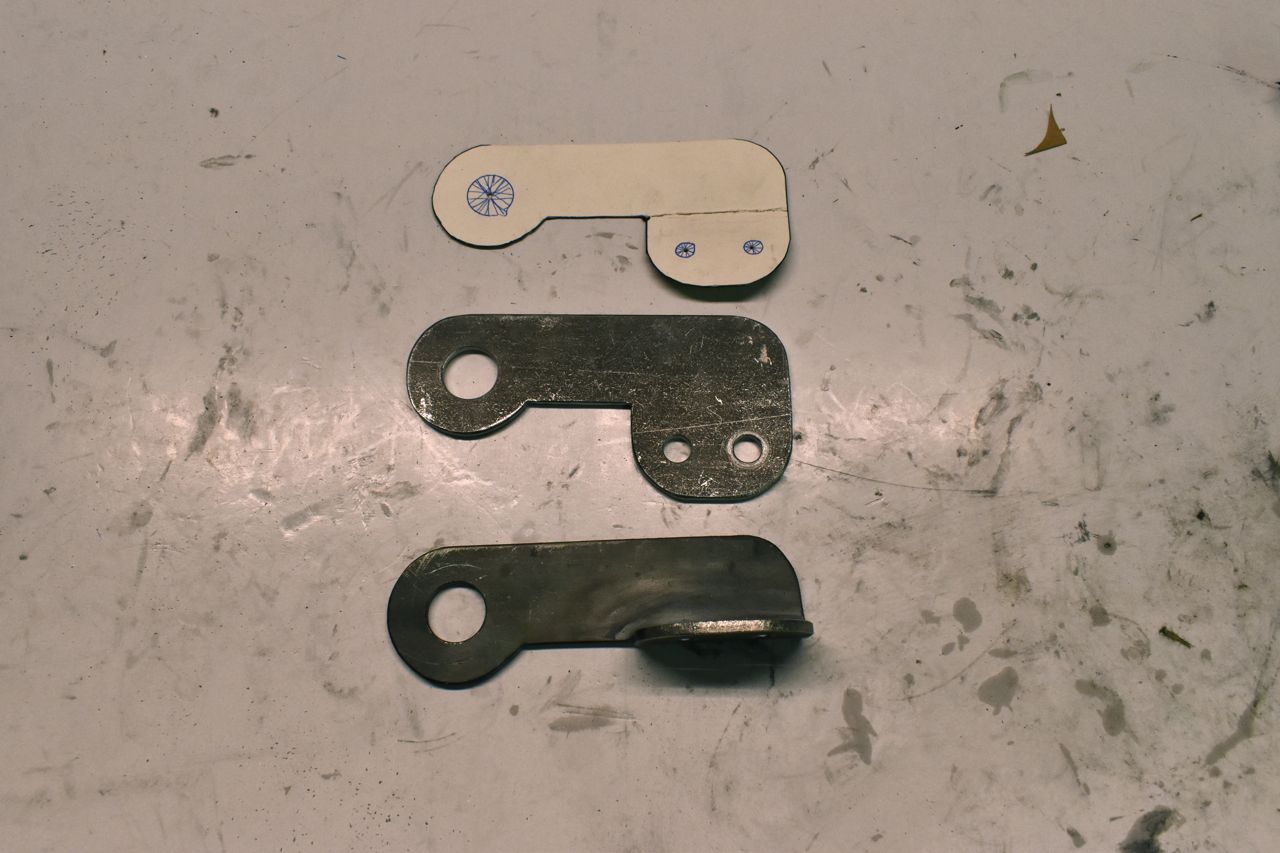
Next I picked out the hardware I'm going to use and made sure the holes were adequately spaced.

Rounded corners look better so grabbed a socket and applied a radius to them. This was unintentional, but I did start to giggle as it ended up looking a bit phallic.

Traced it out on a piece of leftover 4130 Chromoly.

Roughly cut it out on my cheesy bandsaw. It's a really old Harbor Freight special. It was made in Taiwan and not China. Maybe that's why it still works.

I used a bastard file to smooth out all the edges. Now you can use some other means, however, since this is Chromoly, if you use a tool that will create fine enough particles to get airborne you need a respirator as this contains chromium. You need to be cognizant of the materials you are working with and the dangers associated with them.

100 calories later.

Centre punch for the holes.

Now I realize this may seem straight forward, but I thought I'd share with you how I handle drill bits and drilling. How many times have you went for a drill bit and it was dull? Probably too many to count. Here's my system for evaluation. I buy 1/8" jobber drill bits in decent quantities. Every hole larger than 1/8" I use the 1/8" drill bit to start each hole. As they wear I toss them for a new one. You would not believe how much it saves on the other drill bits in your set. I also buy other drill bits in 1/4, 5/16, 3/8, 1/2" for the same reason.

Another tip these cheap drill bits from Harbor Freight work really well.


Now I did oversize the holes by 1/32" to allow for powder coating.

Since I need mirrored brackets all I need to do is bend the tab the other way.

To do a simple fold, I use two whopping pieces of angle iron.

It just has two bolts that hold them more or less in place, but the bolts are loose.
Since this is 3/4 hard (tempered) Chromoly, in no way are you going to easily bend that by using a hammer. You'd probably break the vise. So it must be heated to bend easier.

This is a small oxy-acetylene kit you can buy at chain stores. I don't use it much at all, except for times like this. All I can say is if you are unfamiliar with using these gases you MUST read the handling and setup instructions. Unless you want your last fleeting thought to be, so that's what the red arc on the acetylene gauge means. :eek:

Heat it orange hot with a neutral flame and hammer down. You want to be sure it's a 90˚ bend before you put out the torch as even this method which alters the temper on the Chromoly still produces one tough bend you won't be able to alter once it starts cooling down.

It's twins, well, sort of.

Next up is drilling the holes in the axle bracket to mount these brackets to test fit.

Because the upper hole is really close to the axle tube a taper tap will not be able to make it all the way through. But you can start it with the taper tap and then switch to the plug tap (squared off one) and finish cutting the threads.

You can better see.

Next up powder coating at home.
Continued in next thread.
Click here to continue to part 20