1966 Ford Galaxie 500 XL Refurbishment : 042 Engine - Head, Porting & Multiport Manifolds
2023, November 14
1 - 2 - 3 - 4 - 5 - 6 - 7 - 8 - 9 - 10 - 11 - 12 - 13 - 14 - 15 - 16 - 17 - 18 - 19 - 20 - 21 - 22 - 23 - 24 - 25 - 26 - 27 - 28 - 29 - 30 - 31 - 32 - 33 - 34 - 35 - 36 - 37 - 38 - 39 - 40 - 41 - 42 - 43 - 44 - 45 - 46 - 47 - 48 - 49 - 50 - 51 - 52 - 53 - 54 - 55 - 56 - 57 - 58 - 59 - 60 - 61 - 62 - 63 - 64 - 65 - 66 - 67 - 68 - 69 - 70 - 71 - 72 - 73 - 74 - 75 - 76 - 77 - 78 - 79 - 80 - 81 - 82 - 83 - 84 - 85 - 86 - 87 - 88 - 89 - 90 - 91 - 92 - 93 - 94 - 95 - 96 - 97 - 98Hello,
A little more progress on this car. More engine fun. Well not really, it's porting and polishing time and this is also a miserable experience, but it really needs to be done to realize the full benefit of all the goodies installed.
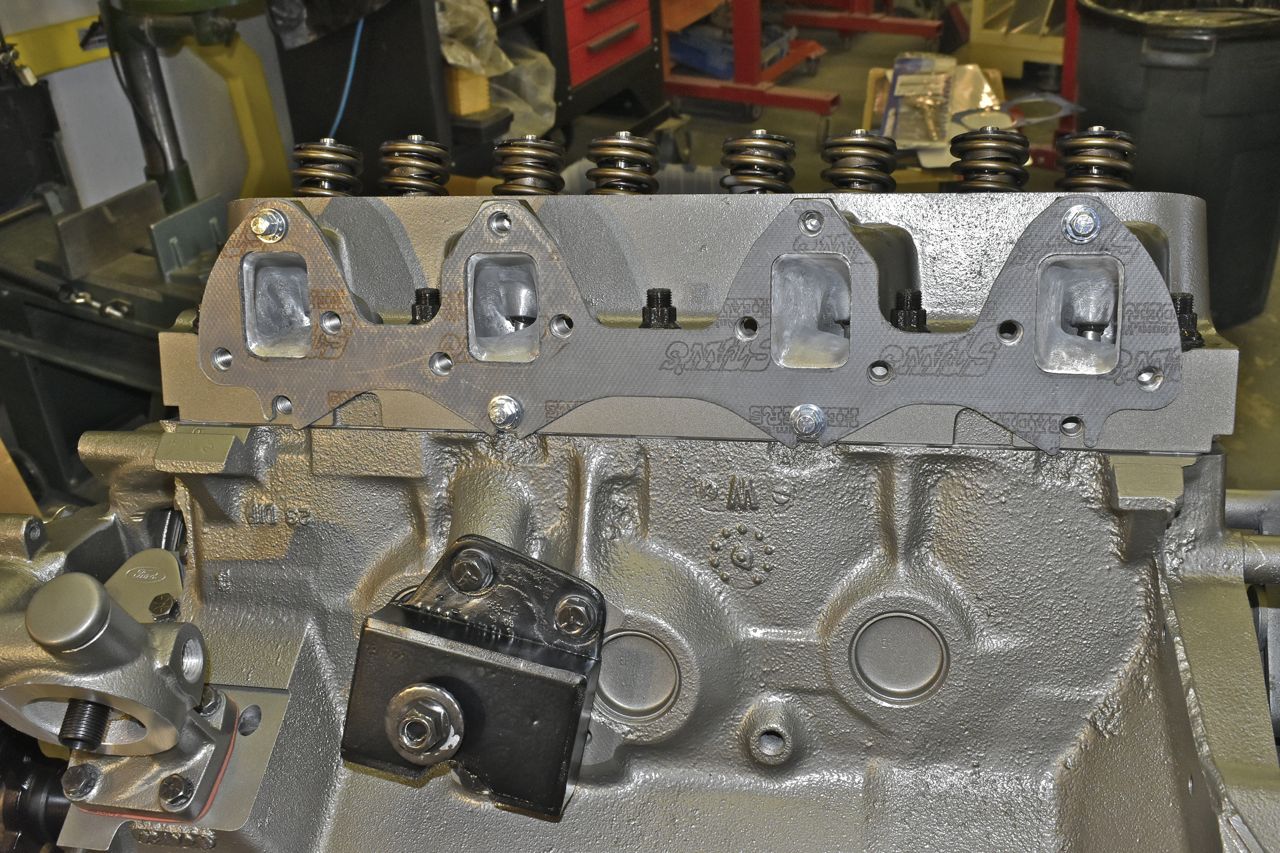
Now on the Edelbrock head the intake ports surprisingly match the gaskets. I am shocked. Usually Edelbrock products have problems. As a reminder these "ready to run out of the box" heads had loads of metal shavings on these. You would be a complete ignoramus to just bolt these on "out of the box".
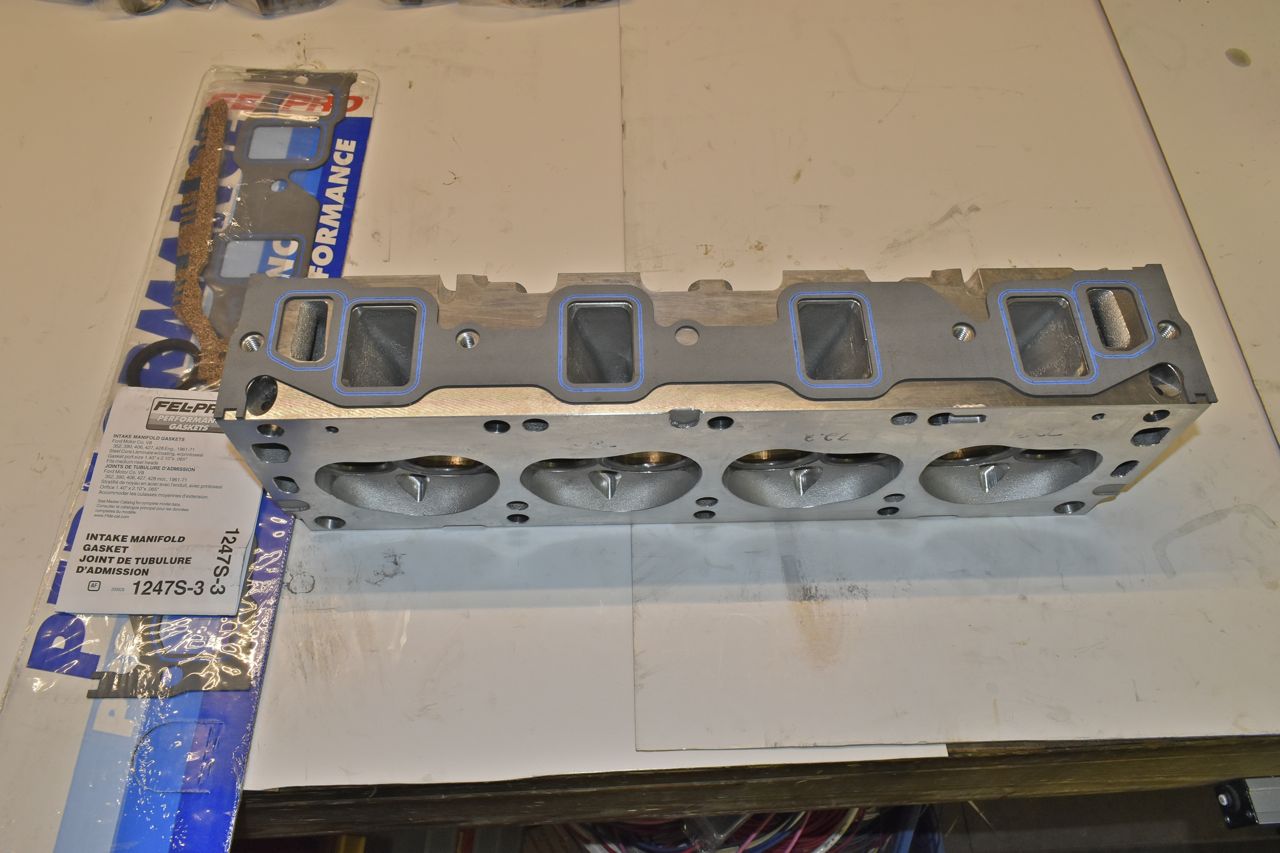
But the intake port is very rough and could use a little smoothing to help keep the fuel from condensing on the rough gritty bits.
So I smoothed out the runner and bowl area and blended it a bit better.

Here's a before picture.

This is more of what I expect from Edelbrock. Yup. Going to need to really remove and blend this. (sigh)
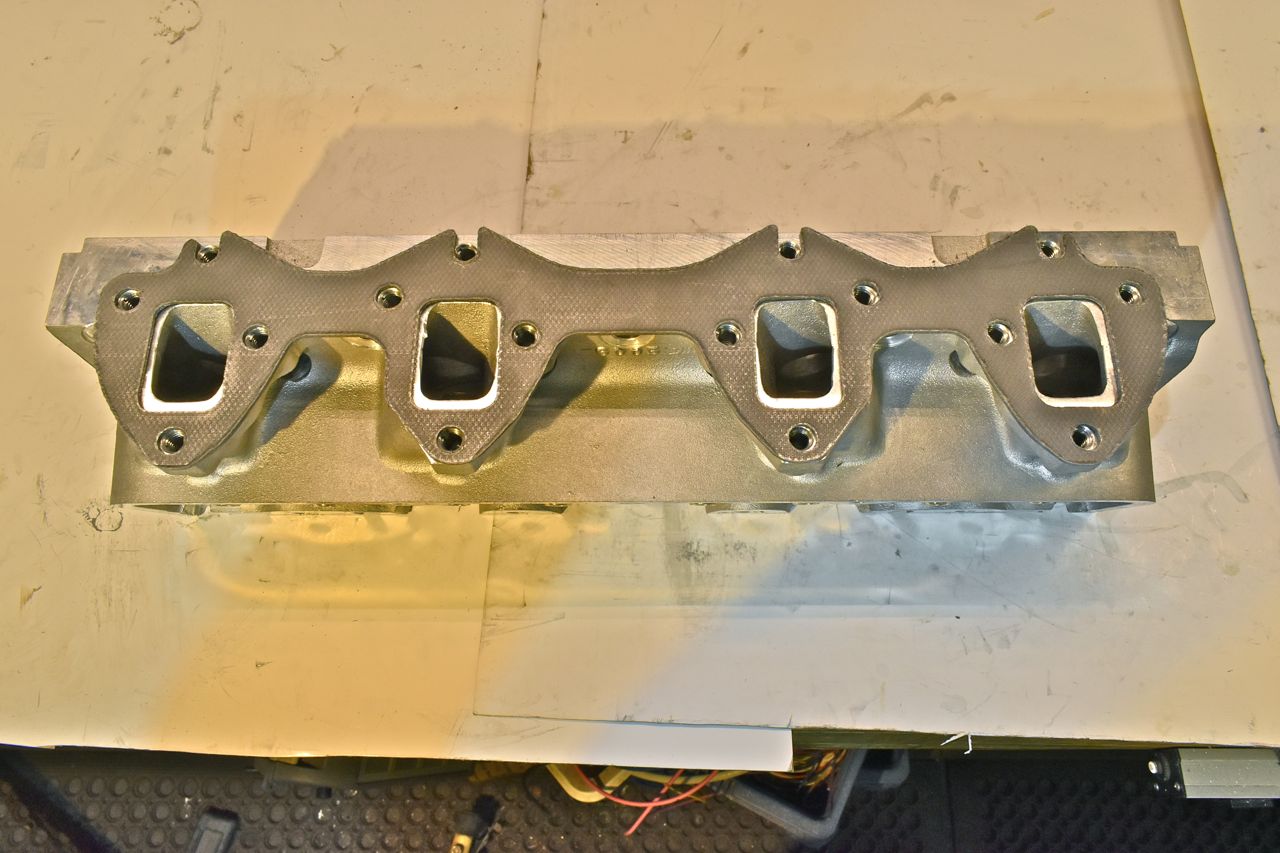
I spent about 4 hours on this one head. It's much smoother on the exhaust and intake ports.
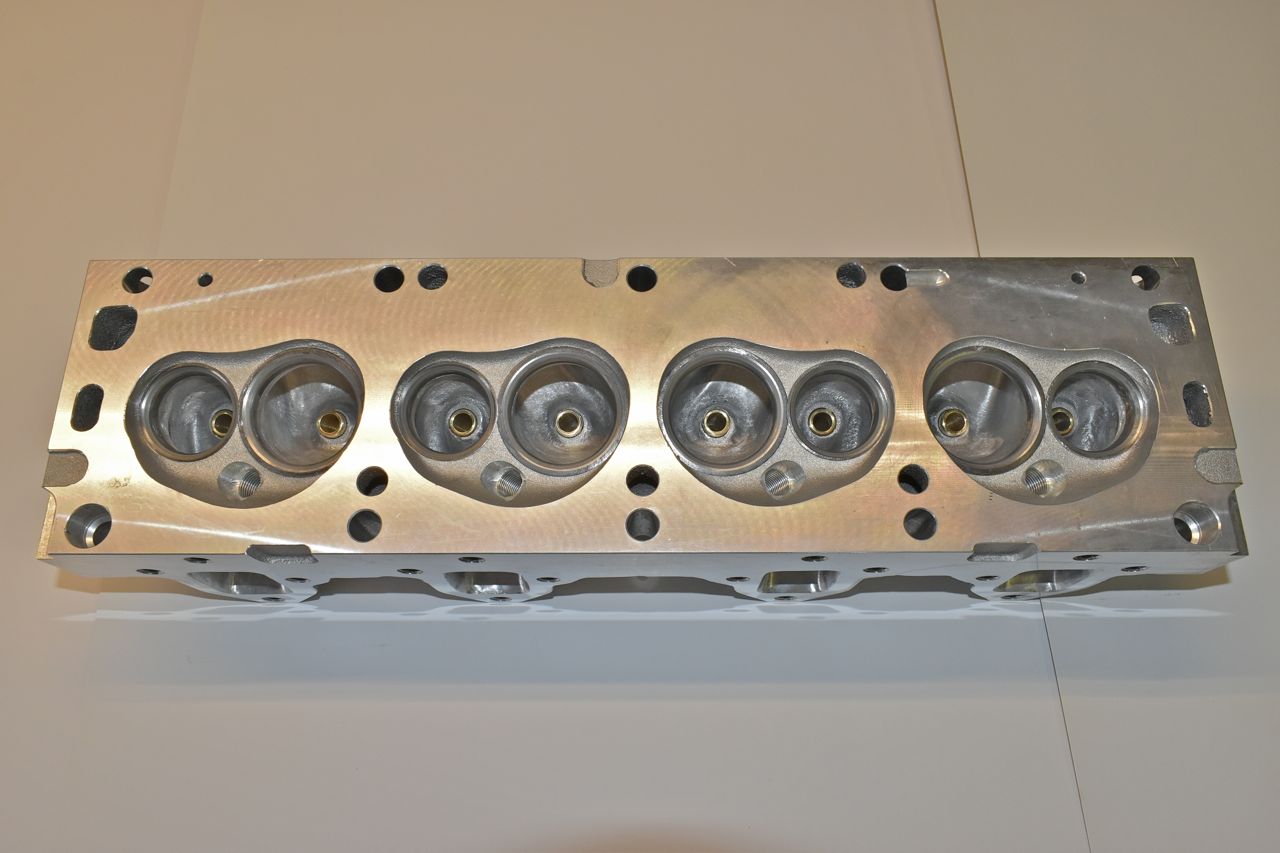

Is it really worth it? At best it's probably worth a few ponies mid to upper RPM range. The sheer amount of mess made with aluminum shavings is mind boggling.

These are FPA headers and they are nicely built and use the full area of the gasket. These are ~1200 dollars and in my opinion worth every penny.

The head was cleaned reassembled and painted. All the goodies ready for install.
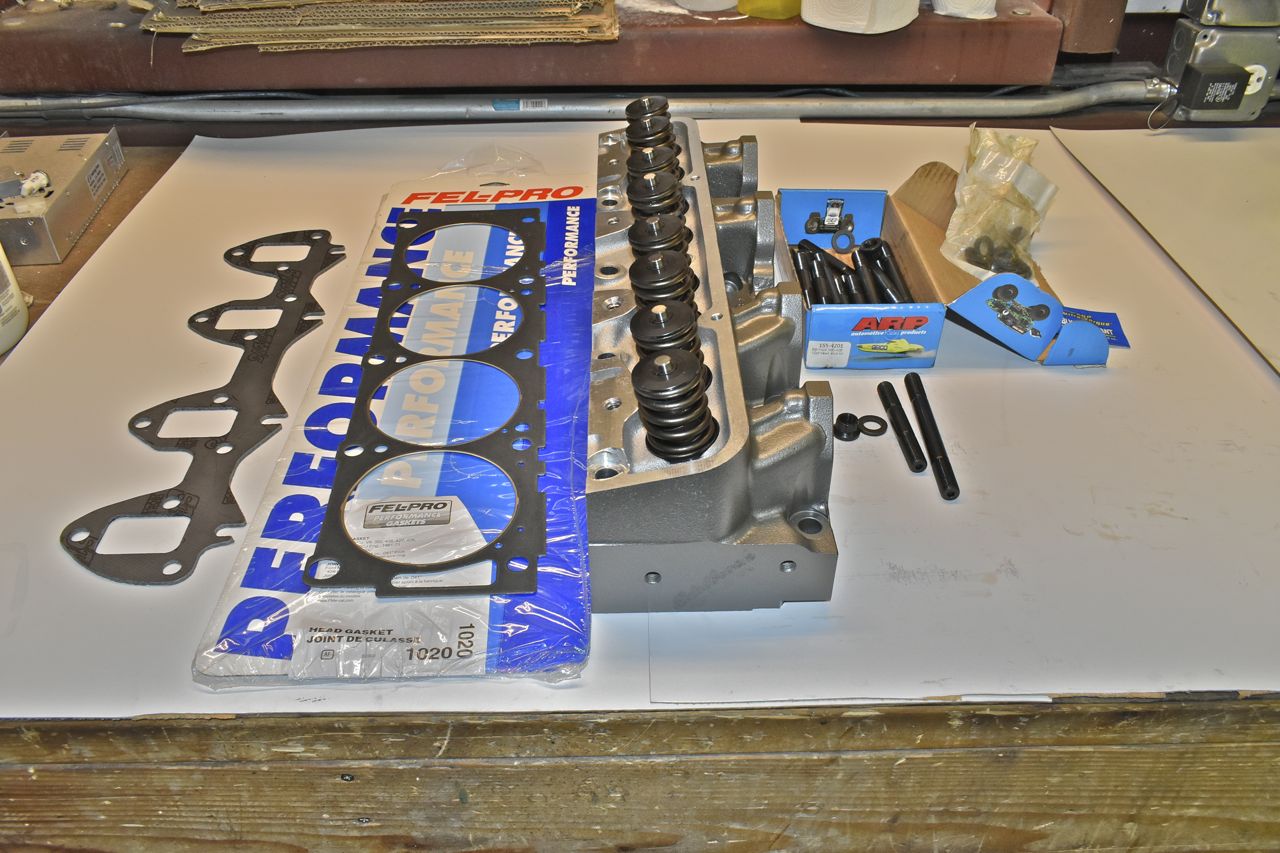
This is the part I like. Putting it together and seeing the results.
The head studs get screwed in hand tight and the deck and head surface were wiped with IPA one last time before the head gasket went on. Not less forgetting the locating inserts, were well, inserted.
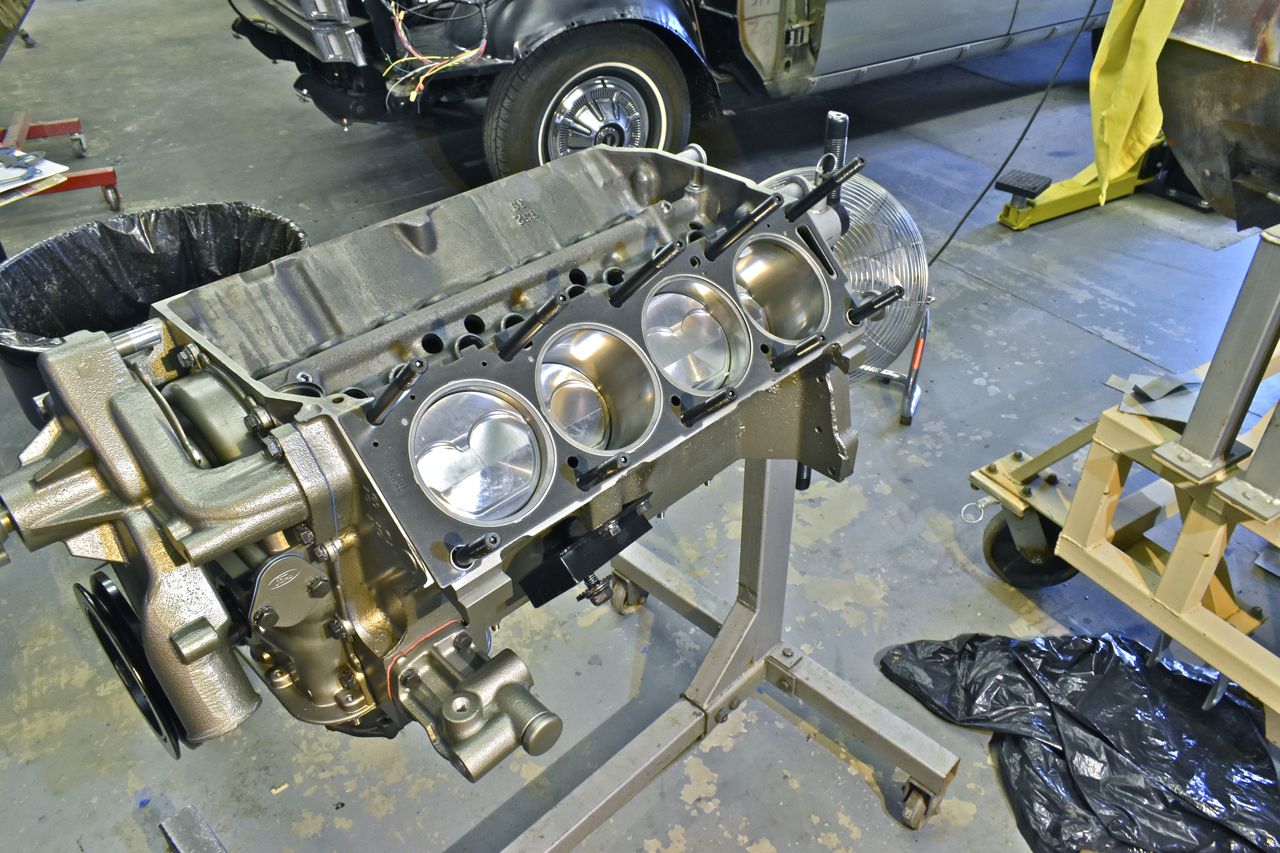
I followed Edelbrocks torque specs on the bolts instead of ARP. ARP instructs to use 110 ft/lbs on all bolts, but Edelbrock says 110 on the top row and 100 on the bottom row in 3 equal increments. Slowly looking more and more like an engine.
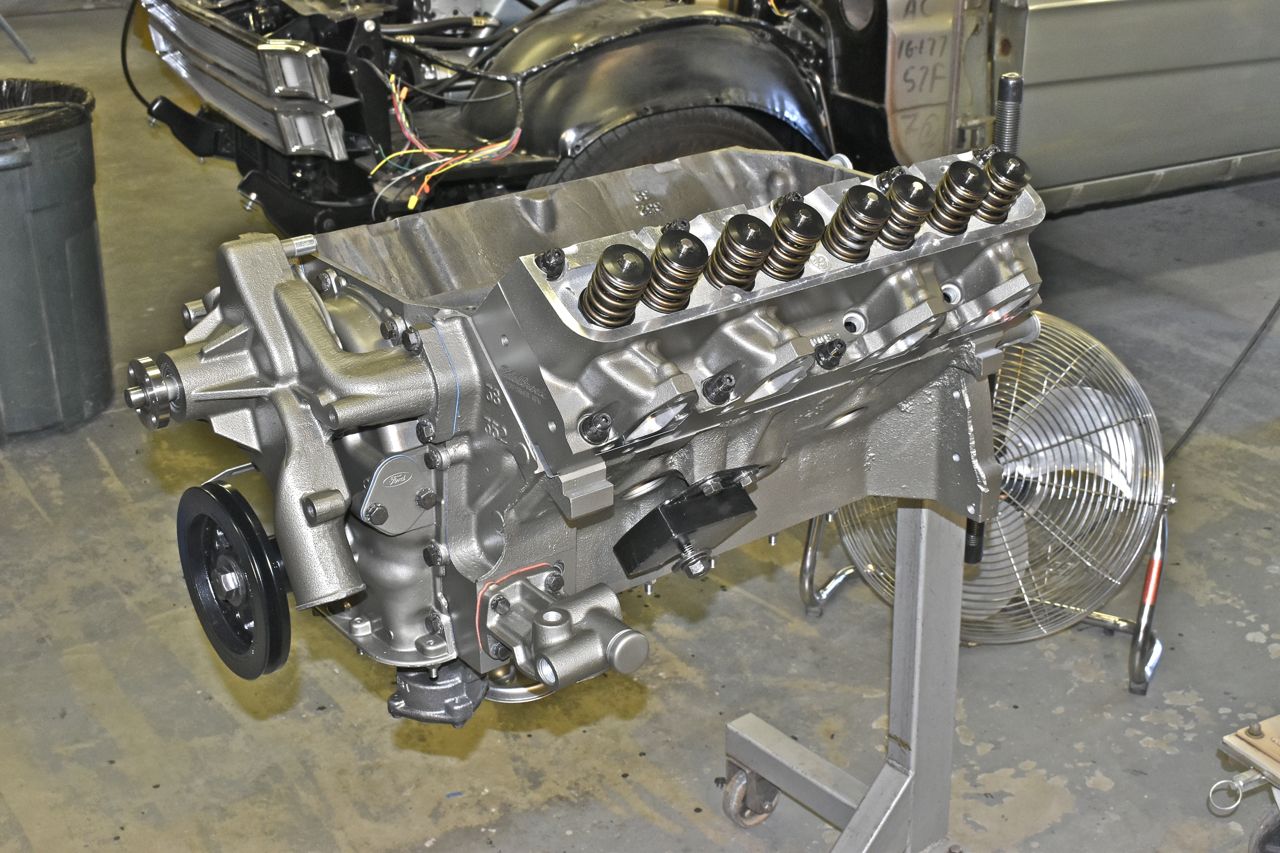

Now for the more funner (funner isn't a word but it should be) part.
The multiport manifold arrived.
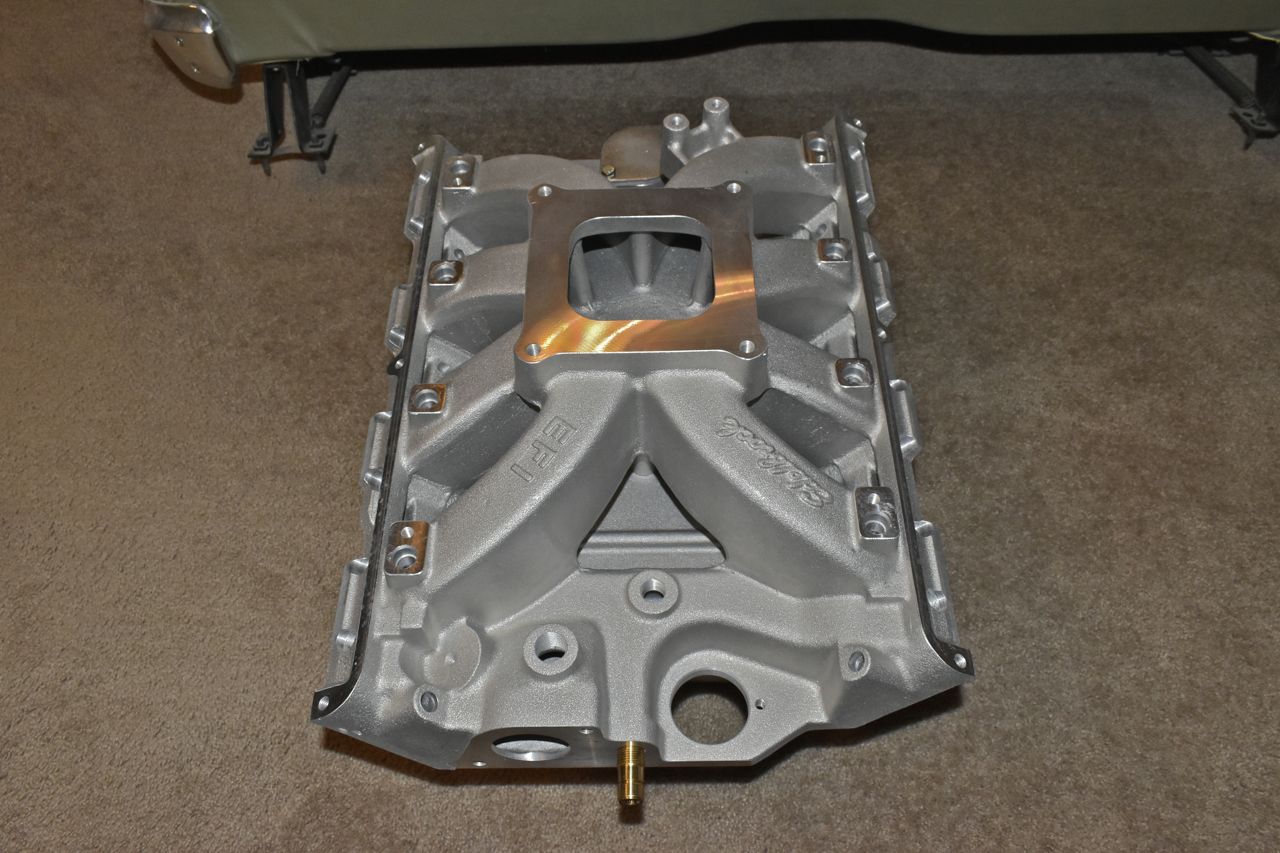
This is one serious chunk of aluminum. It weighs just about the same as the all cast iron LS5 intake on my 454.

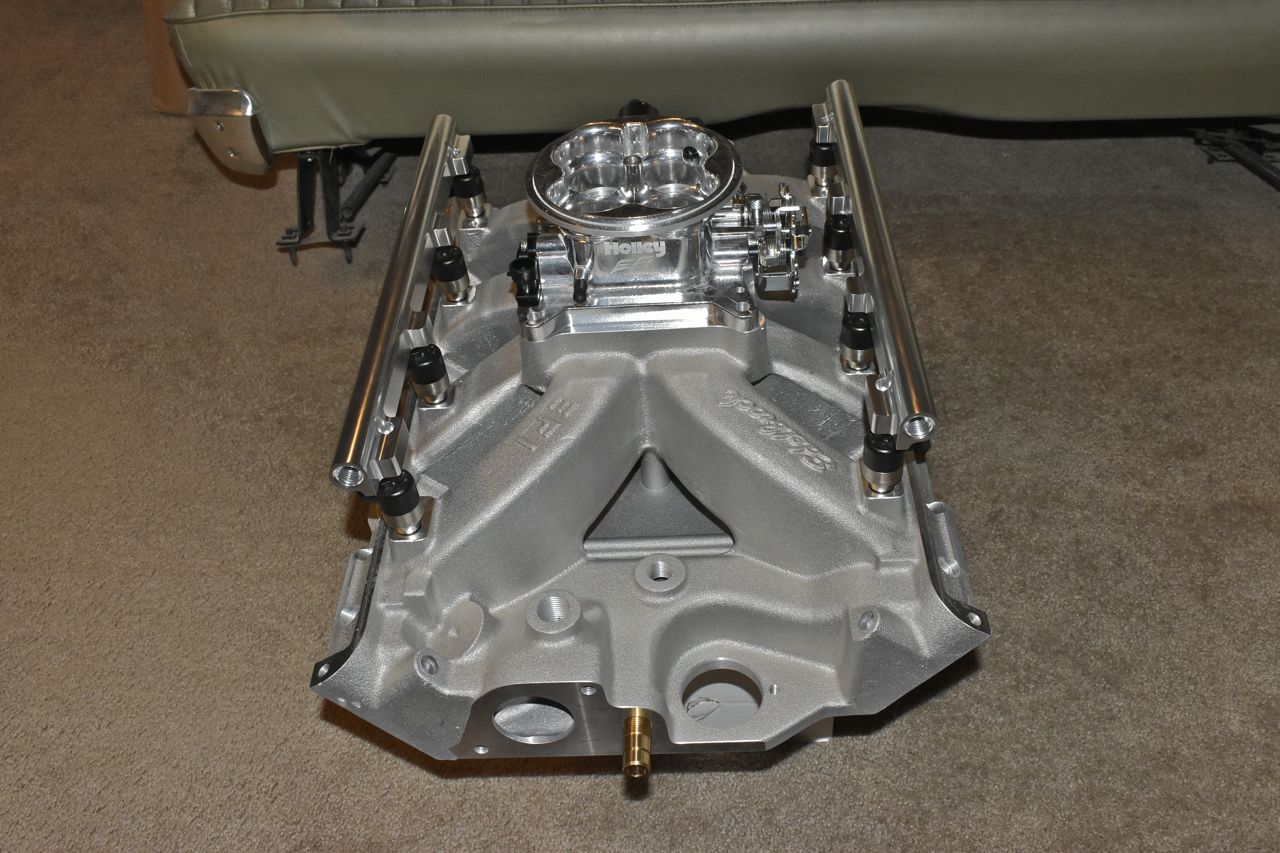
So here's what I've chosen for parts. It's obviously the Edelbrock intake and Edelbrock fuel rails and believe me I'll get back to those in a bit. The throttle body is a Holley generic multiport throttle body. The injectors are Holley made based on the lapped disc Bosch style injectors. These are 42 lb @ 43 PSI fuel pressure.
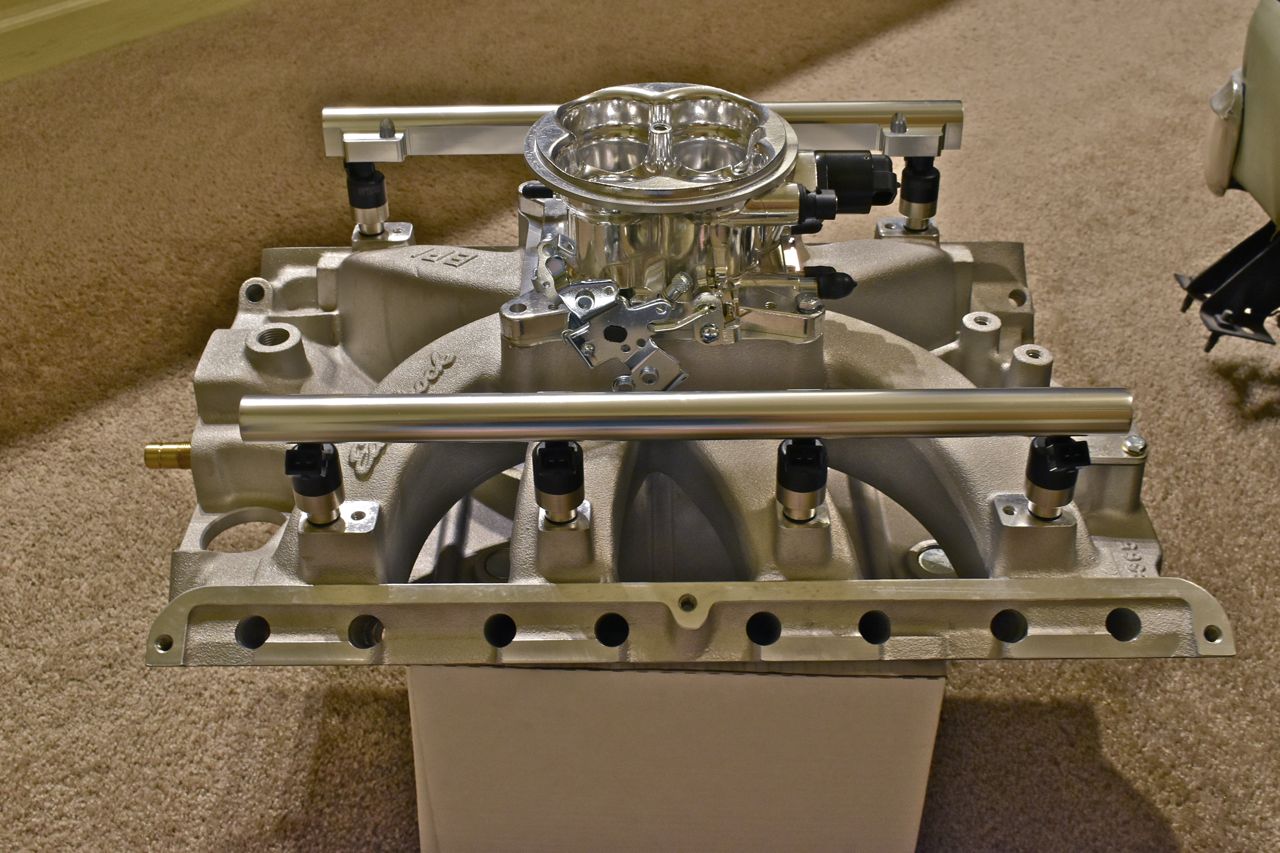
When I picked these out I used a BSFC of 0.5 and 500 peak horsepower, then rounded up to the nearest size injector. I chose Holley injectors because they supply the voltage compensation chart for fuel delivery. This is crucial when manually programming your own system. The rest of the system is more or less standard EFI parts. I'll need to mount a MAP sensor as there is no provision on the throttle body but that's already sorted out.
Now back to railing on Edelbrock quality. On the right is a Blue Thunder intake and that was 750 dollars. The Edelbrock is 815 dollars. The Blue Thunder is fully machined nicely and ready for install. The Edelbrock intake is not. I don't have specific pictures yet, but I need to machine a flat spot around each intake mounting bolt so it can actually seal. Plus the intake ports are so small and off compared to the intake gaskets much porting and polishing will be needed to match the heads.
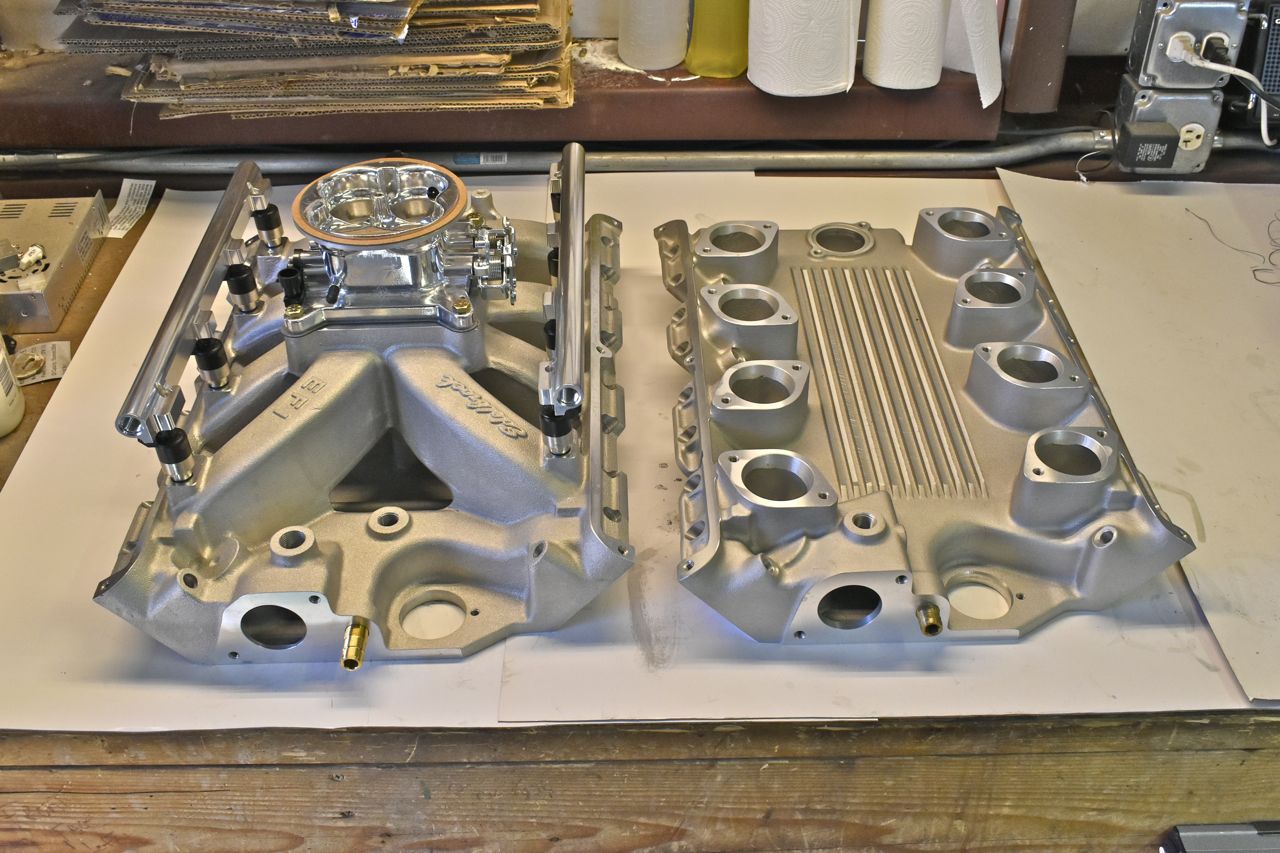
But it doesn't end there. So the Edelbrock fuel rails I ordered had shown a different style of rail. Now these in my opinion are much nicer looking, but Edelbrock put the hardware for the old style of which is completely useless and I'll have to machine standoffs out of round stock and order some stainless hardware.
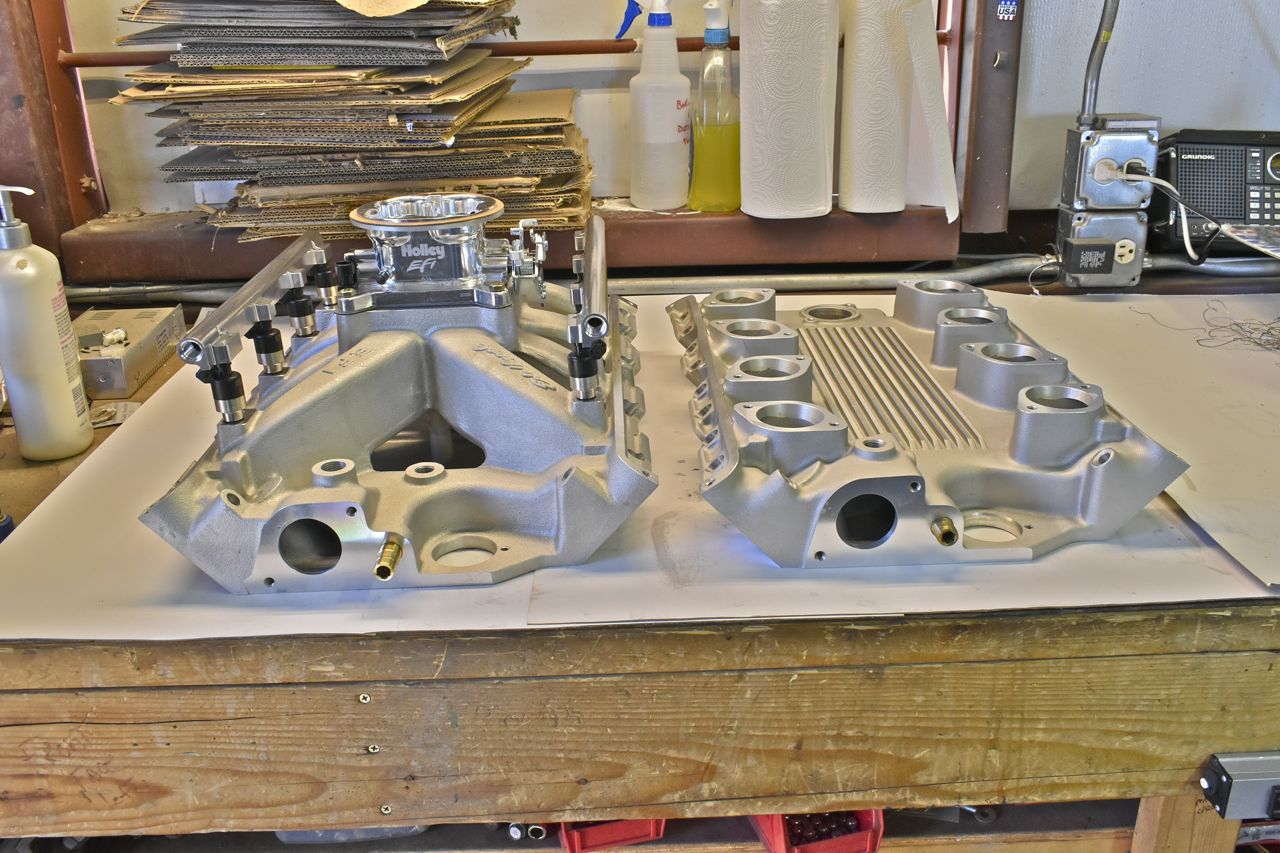
Just typical Edelbrock shenanigans.
The two intakes were for a comparison on what to expect from the aftermarket as far as ready to install. The right hand side Blue Thunder is for a project way down the road.
The intake port cross section area seems to be more or less close to the port size, but that size is much smaller than the head port size. I will have to open all that up and blend as best as I can in the intake. You really do not want any sharp transitions anywhere in the intake or exhaust for that matter but since the pressure differentials are much less in the intake stream it's more crucial there.
The reason why you do not want any sharp transitions is vortices created spoiling and slowing down any laminar air flow present in the runner. Think of an airplane wing tip. Right where the wing ends (wing tip) large vortices are created from the pressure differential and air flowing over the top and bottom of the wing. Those vortices spoil any laminar air flow outside the wing span. It doesn't affect the plane creating them, but can be a rough ride for a smaller plane immediately following it as crates large turbulent wakes.
A similar thing can happen on sharp transitions in the intake runner. The rolling swirls off the port mismatch will slow down the laminar flow trying to flow through.
On a stock full size car FE does this really matter.......... no not really and I wouldn't waste my time with something like this as most mid 60's and later FE's were pretty anemic from the factory, even the Q code 428 (non CJ) was nothing to write home about.
For the topic of the valve seating on Edelbrock heads, I had to lap these. The previous set I bought they needed a complete valve job they were so bad. Plus of the previous heads had a binding valve guide and it needed to be reamed.
I had to CC these heads to calculate the dome needed on the piston for the static compression ratio I wanted and for gigglesnorts I poured some of the coloured alcohol I use for the volume test on a couple of the cylinders and nearly every intake valve leaked it. Fortunately the guides were good in these heads and after lapping they held their drink.
Until next time,
Cheers.
Click here to continue to part 43